Continuing on from
Part 1 of my look at AmigaOS4.1 Final Edition where we prepared the hard disks for the new version, in this part we look at the installation of AmigaOS4.1 Final Edition onto my X1000!
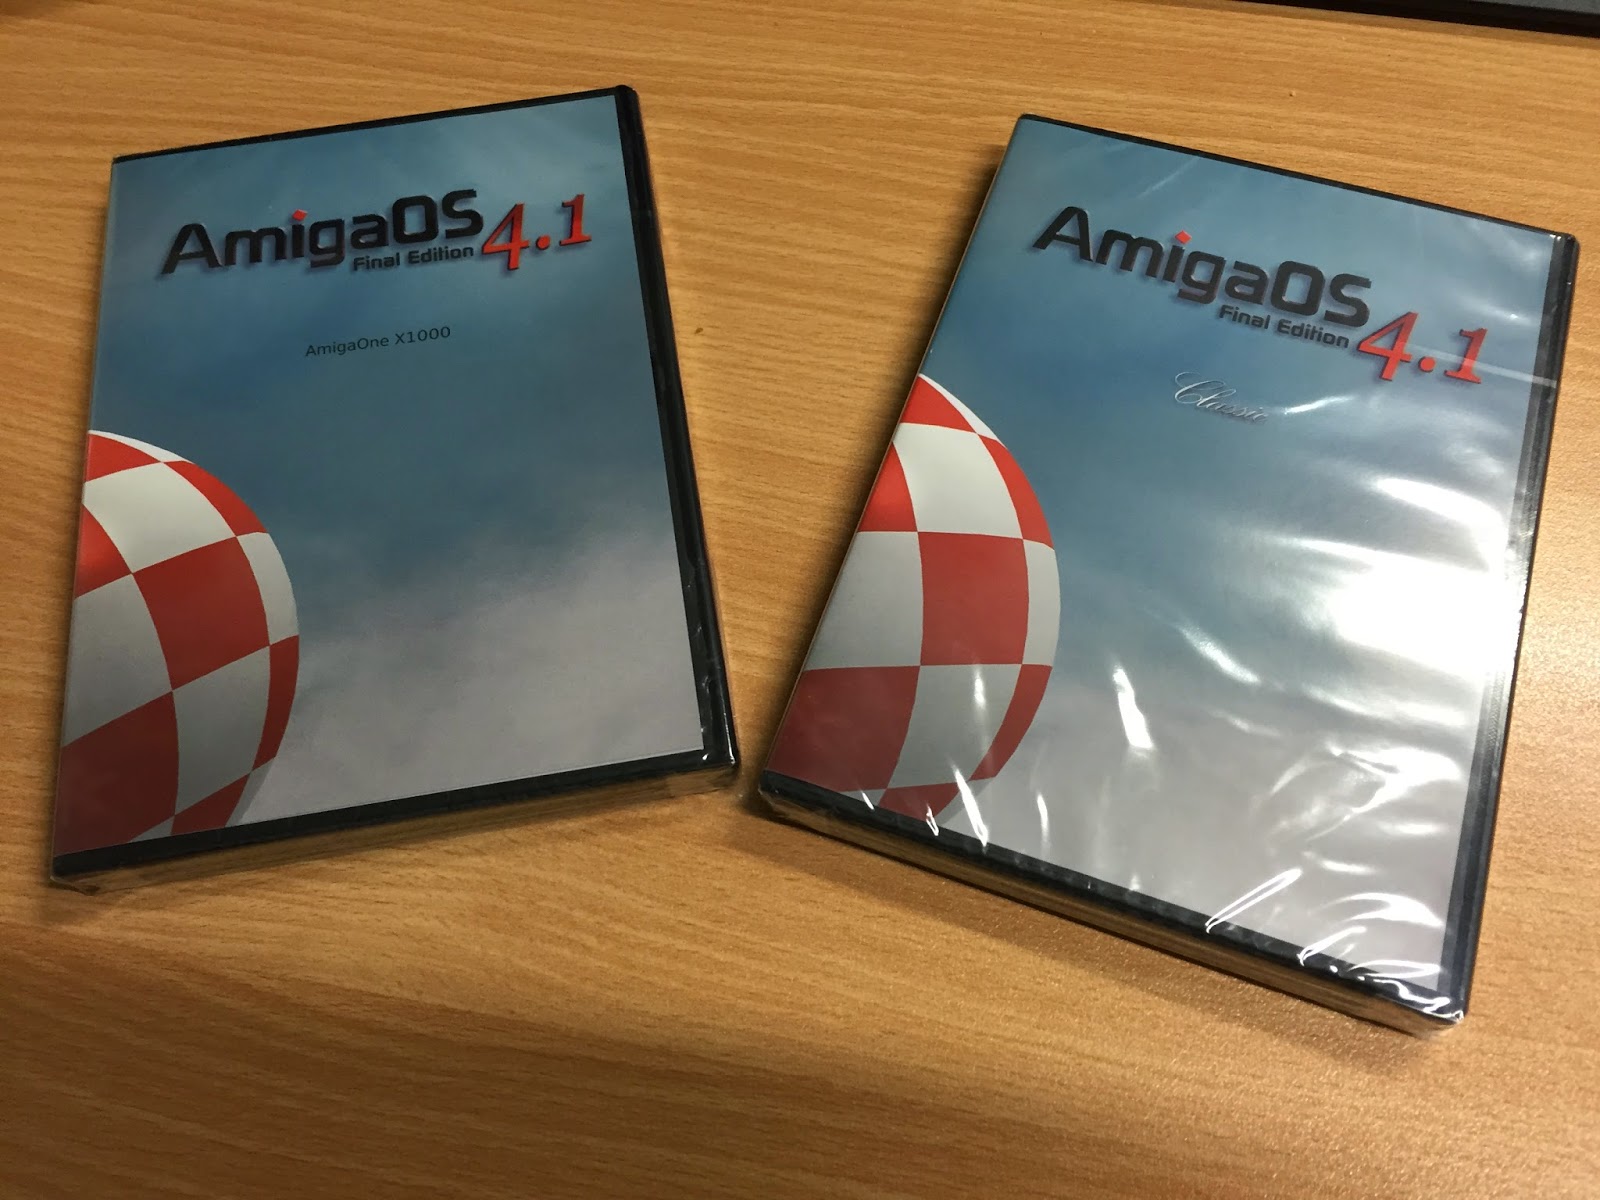
I received my AmigaOS4.1 Final Edition and Classic CD's in a nice professional package:
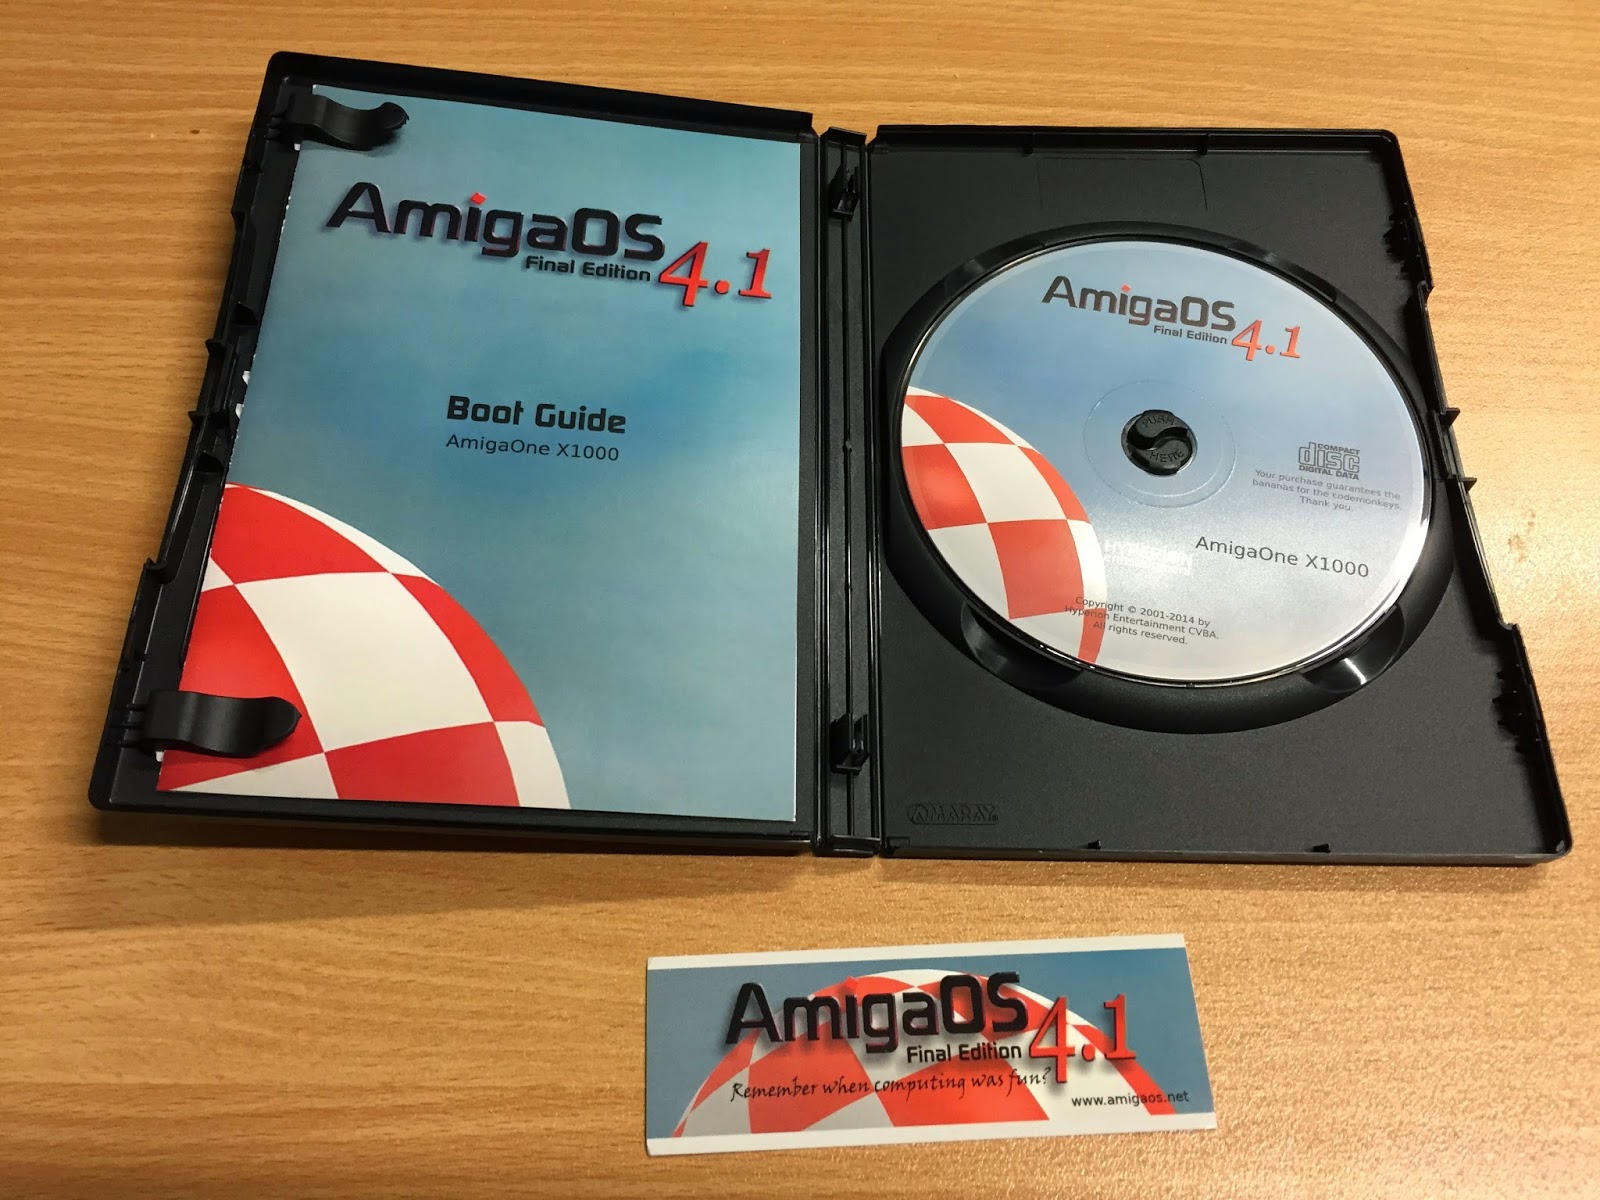
Opening up the X1000 version for the installation, you get a nice Boot Guide (Serial number on the back for registering for updates from Hyperion via AmiUpdate and their website), an AmigaOS4.1 sticker and the CD itself of course):
A close up of the CD label reveals that my purchase guarantees the bananas for the codemonkeys!
I am very happy to support the efforts of AmigaOS4.1 developers! So let's get into the installation!
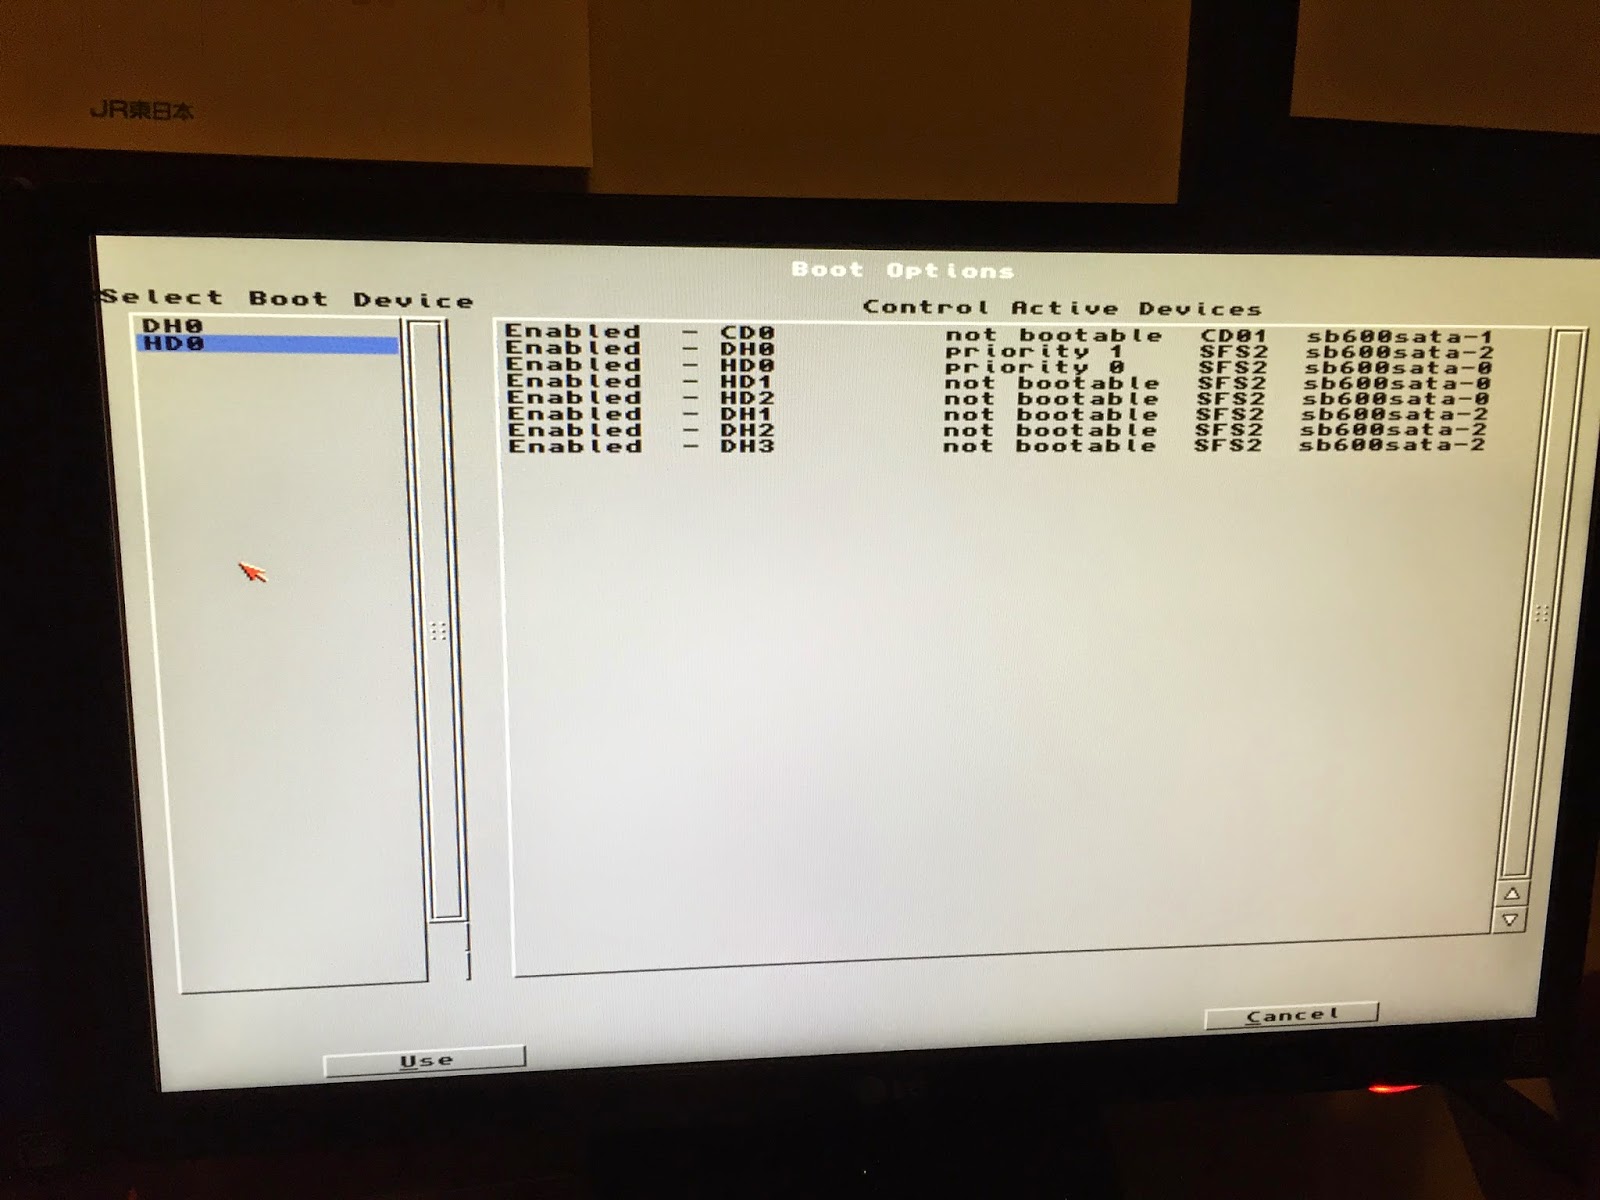
First, I put the AmigaOS4.1 Final Edition CD into the X1000 and booted from it, using the CFE AmigaOS 4.1 CD boot menu option.
As a side note, this is not the Final Edition of AmigaOS4 to be released! It is just the Final Edition of AmigaOS4.1 to be released. There will be an AmigaOS4.2 in the future, which is under development right now.
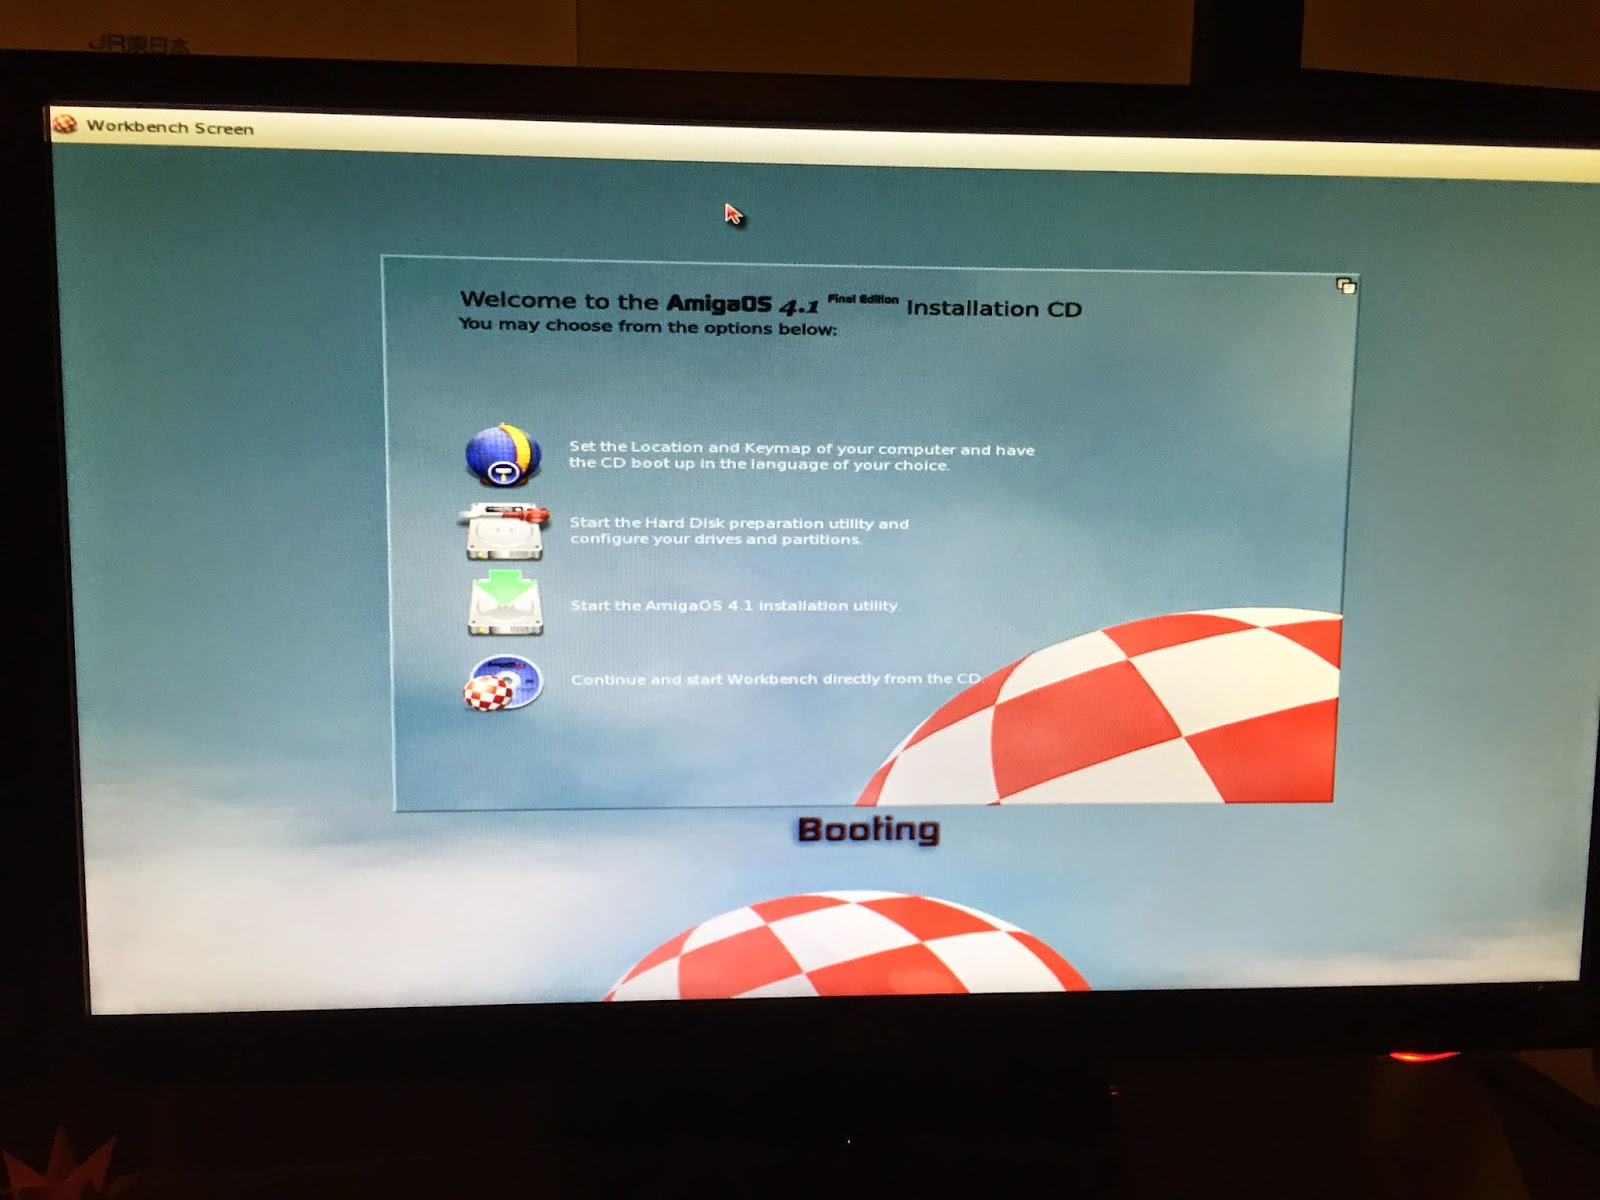
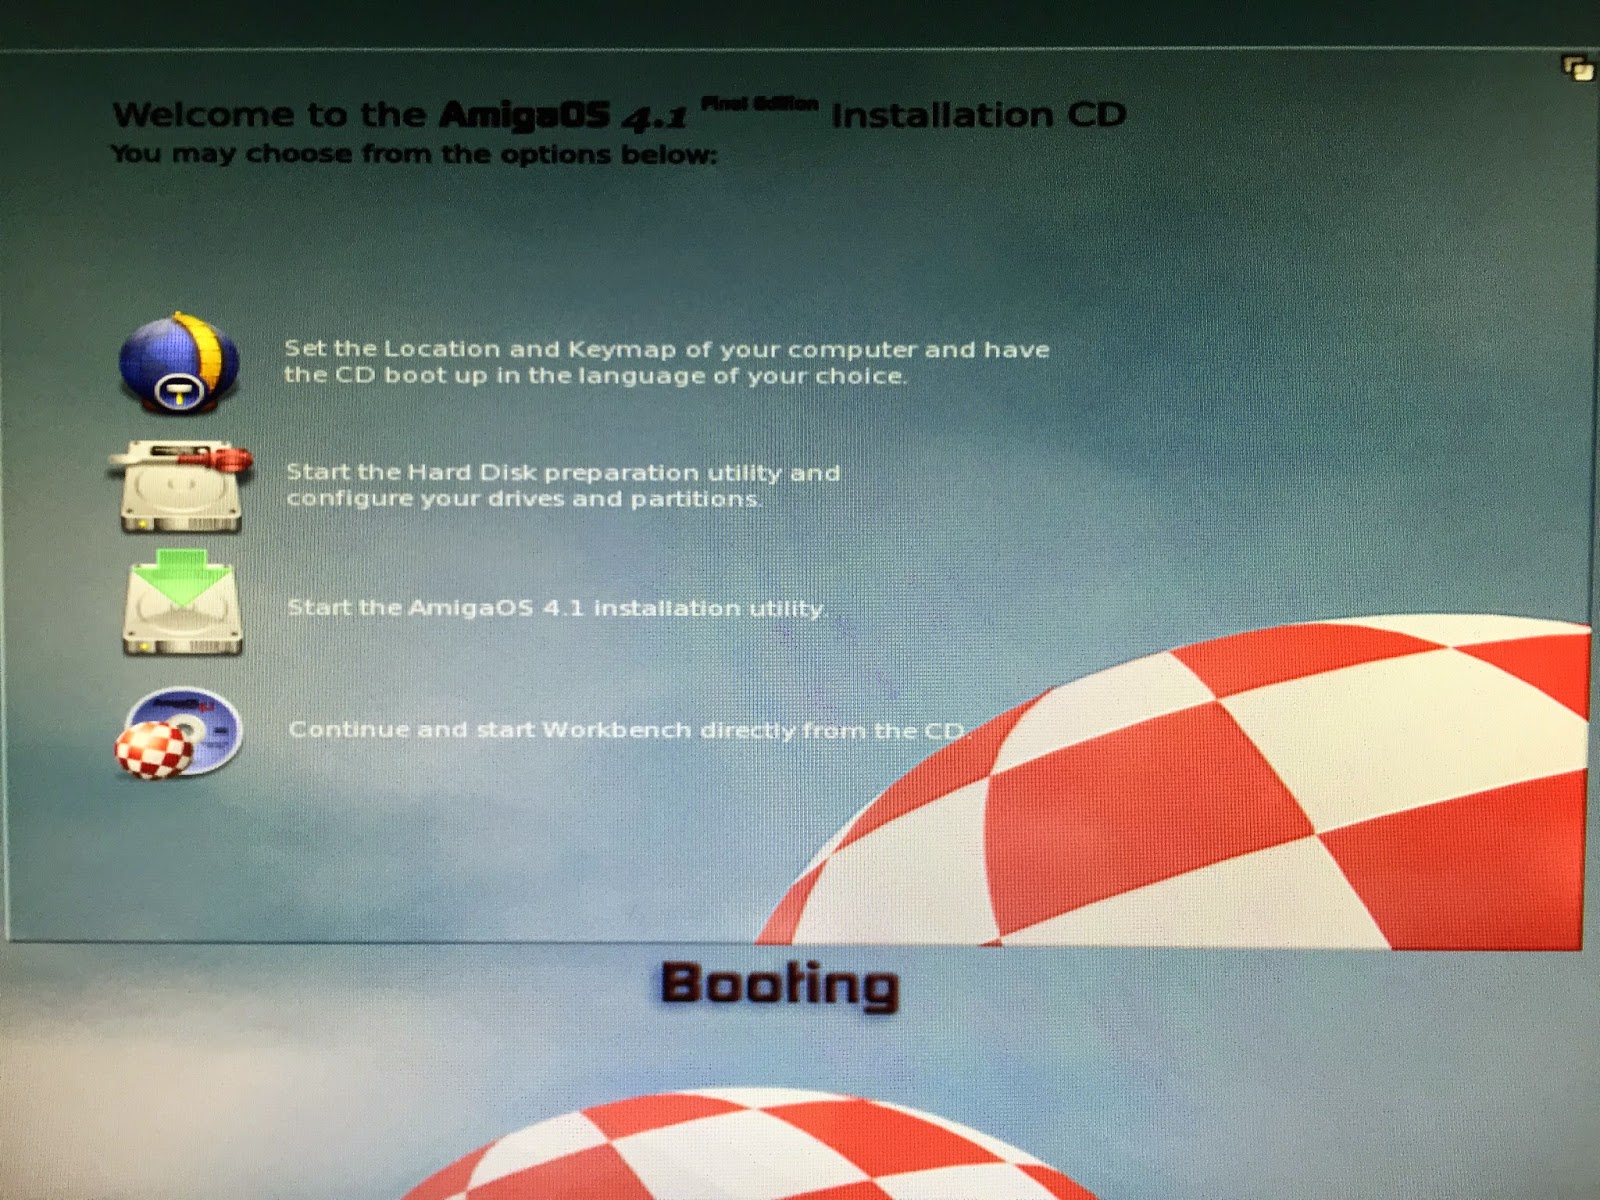
Back on topic - Once the CD has booted, it presents the welcome screen below:
On closer inspection, we have the option to set the locale and keyboard to be used for the installation, to prepare our hard disk for the installation (already done in Part 1 separately), Start the installation, or run the Live CD Workbench directly from the CD:
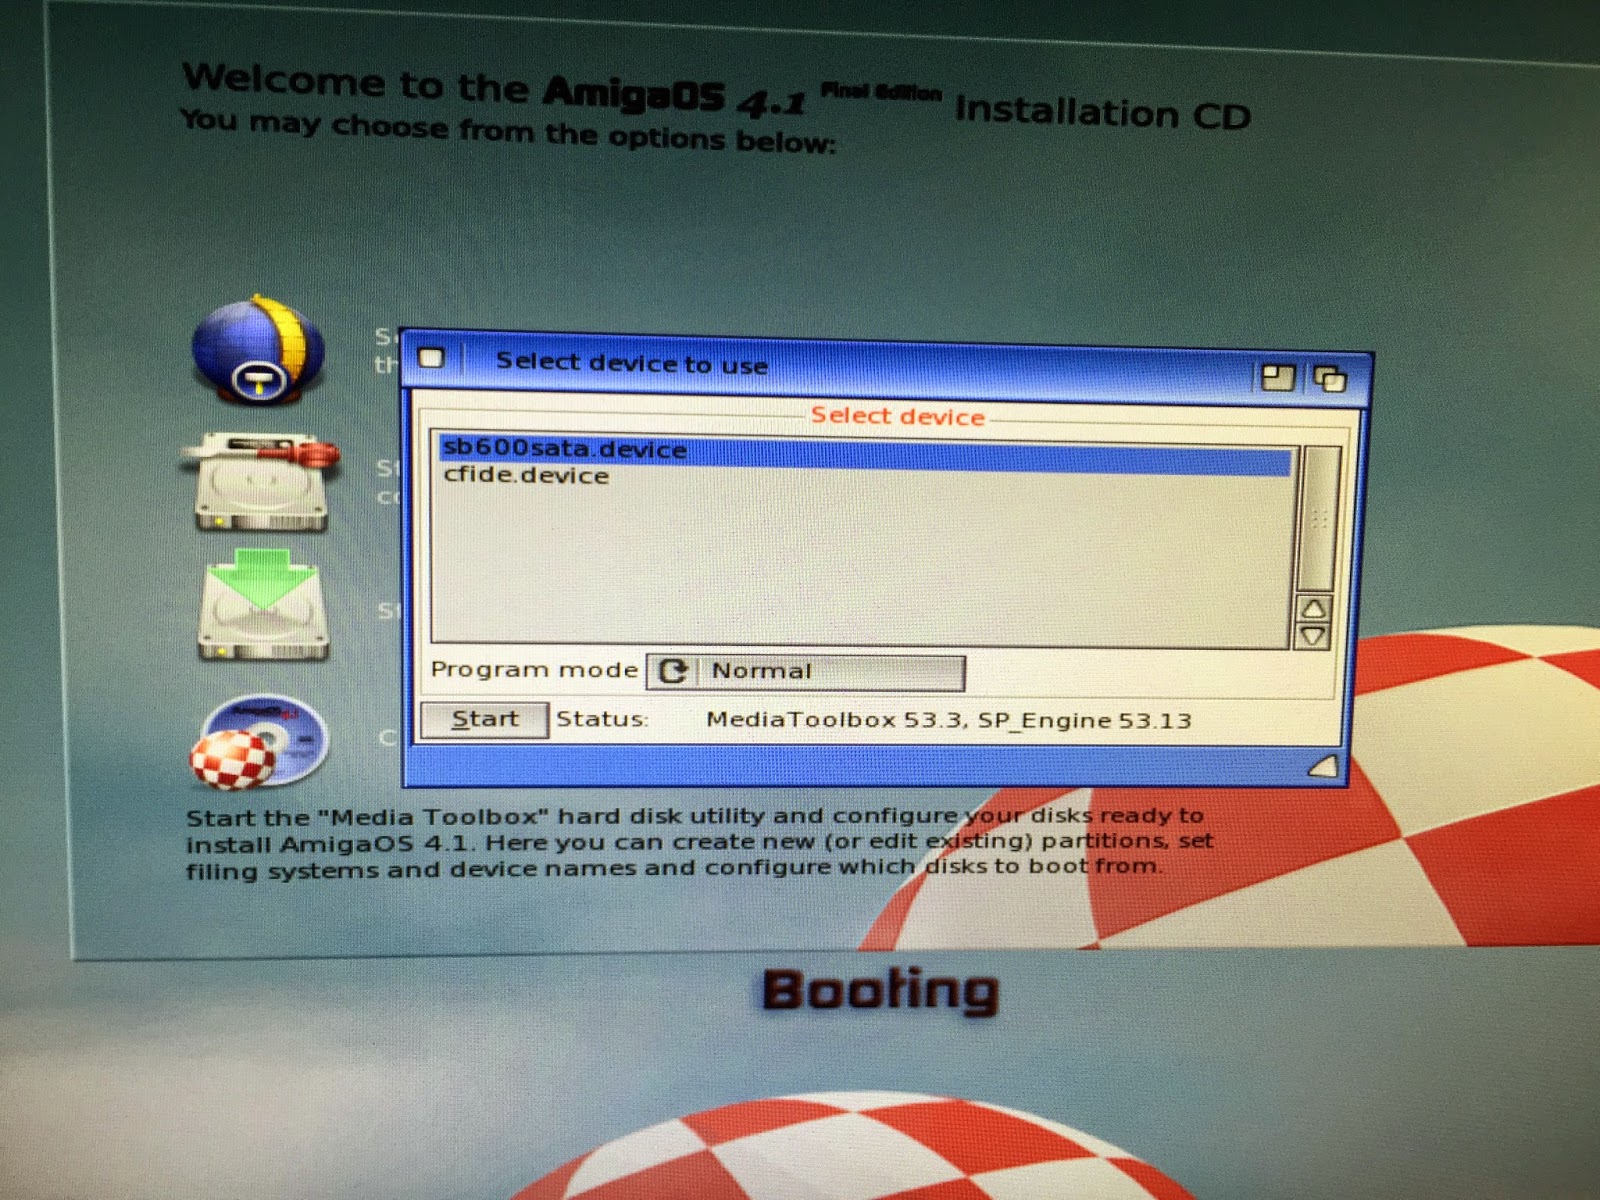
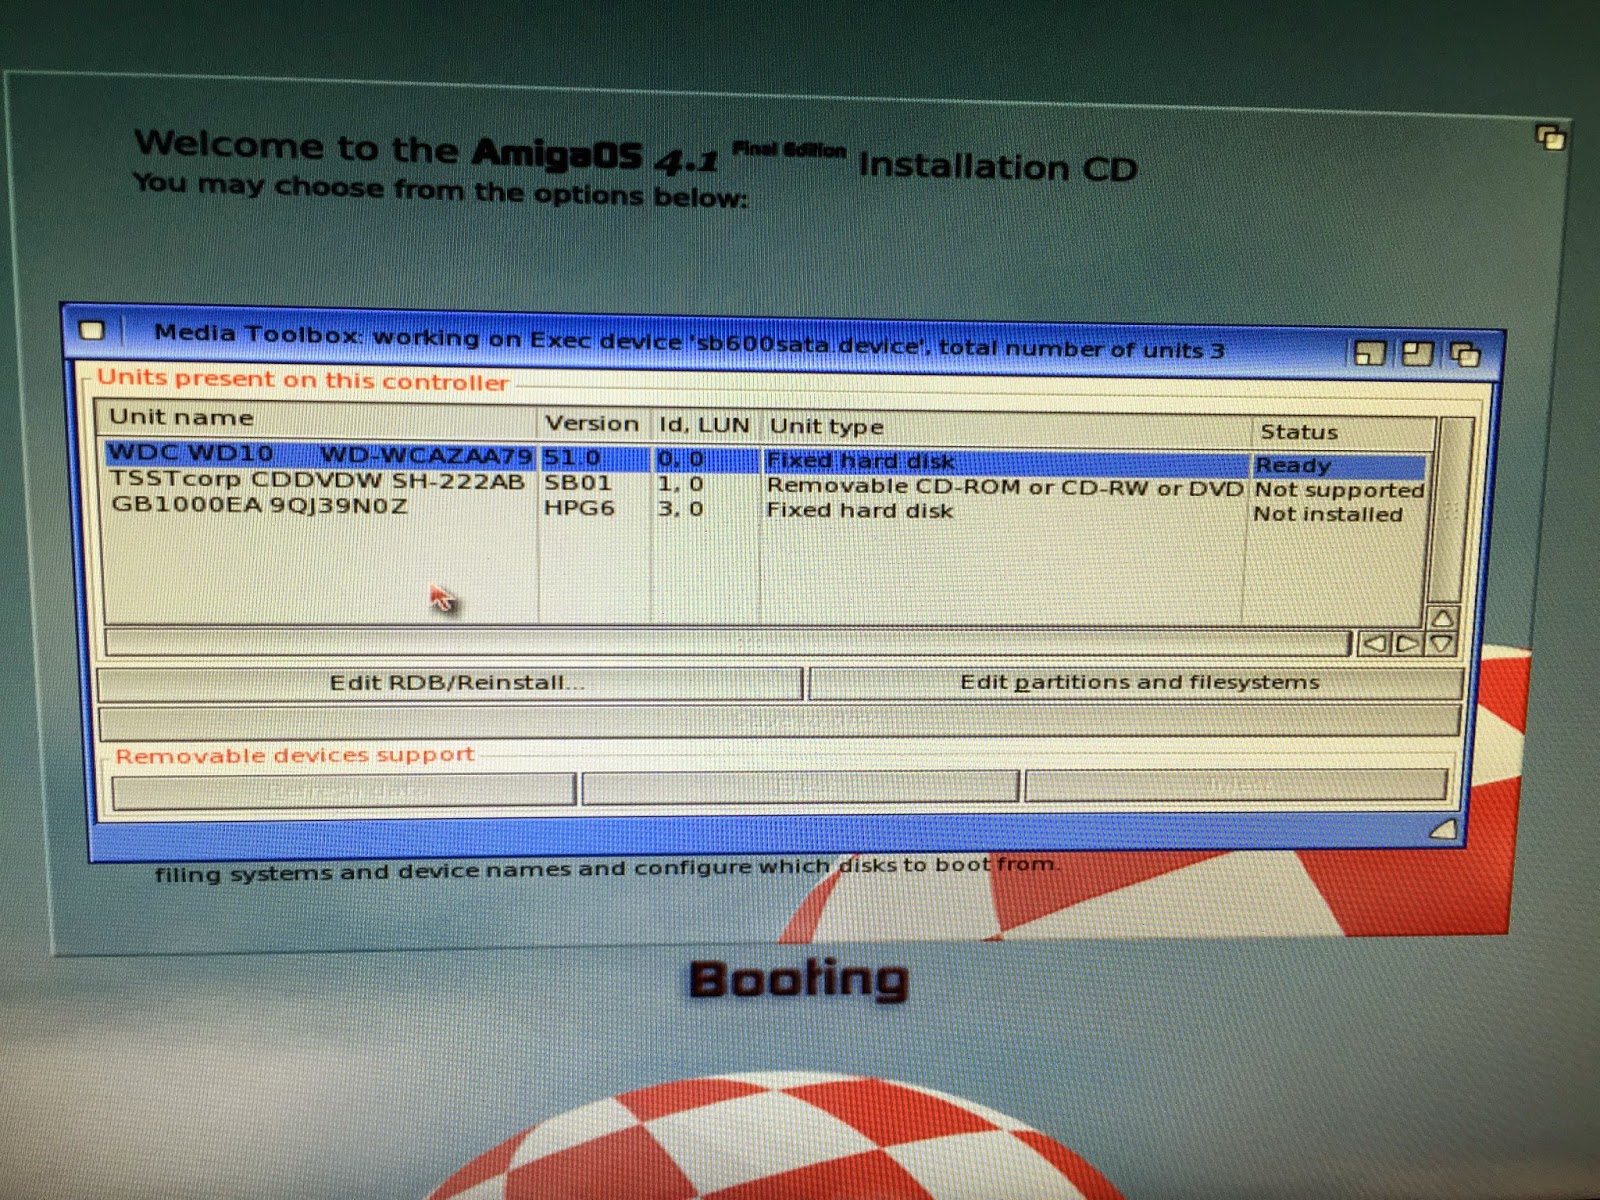
I will show my hard disk setup that I did in Part 1 via the "Start the Hard Disk preparation utility" option above, now that the other AmigaOS4.1.6 disk is removed:
You can see the hard disk highlighted below:
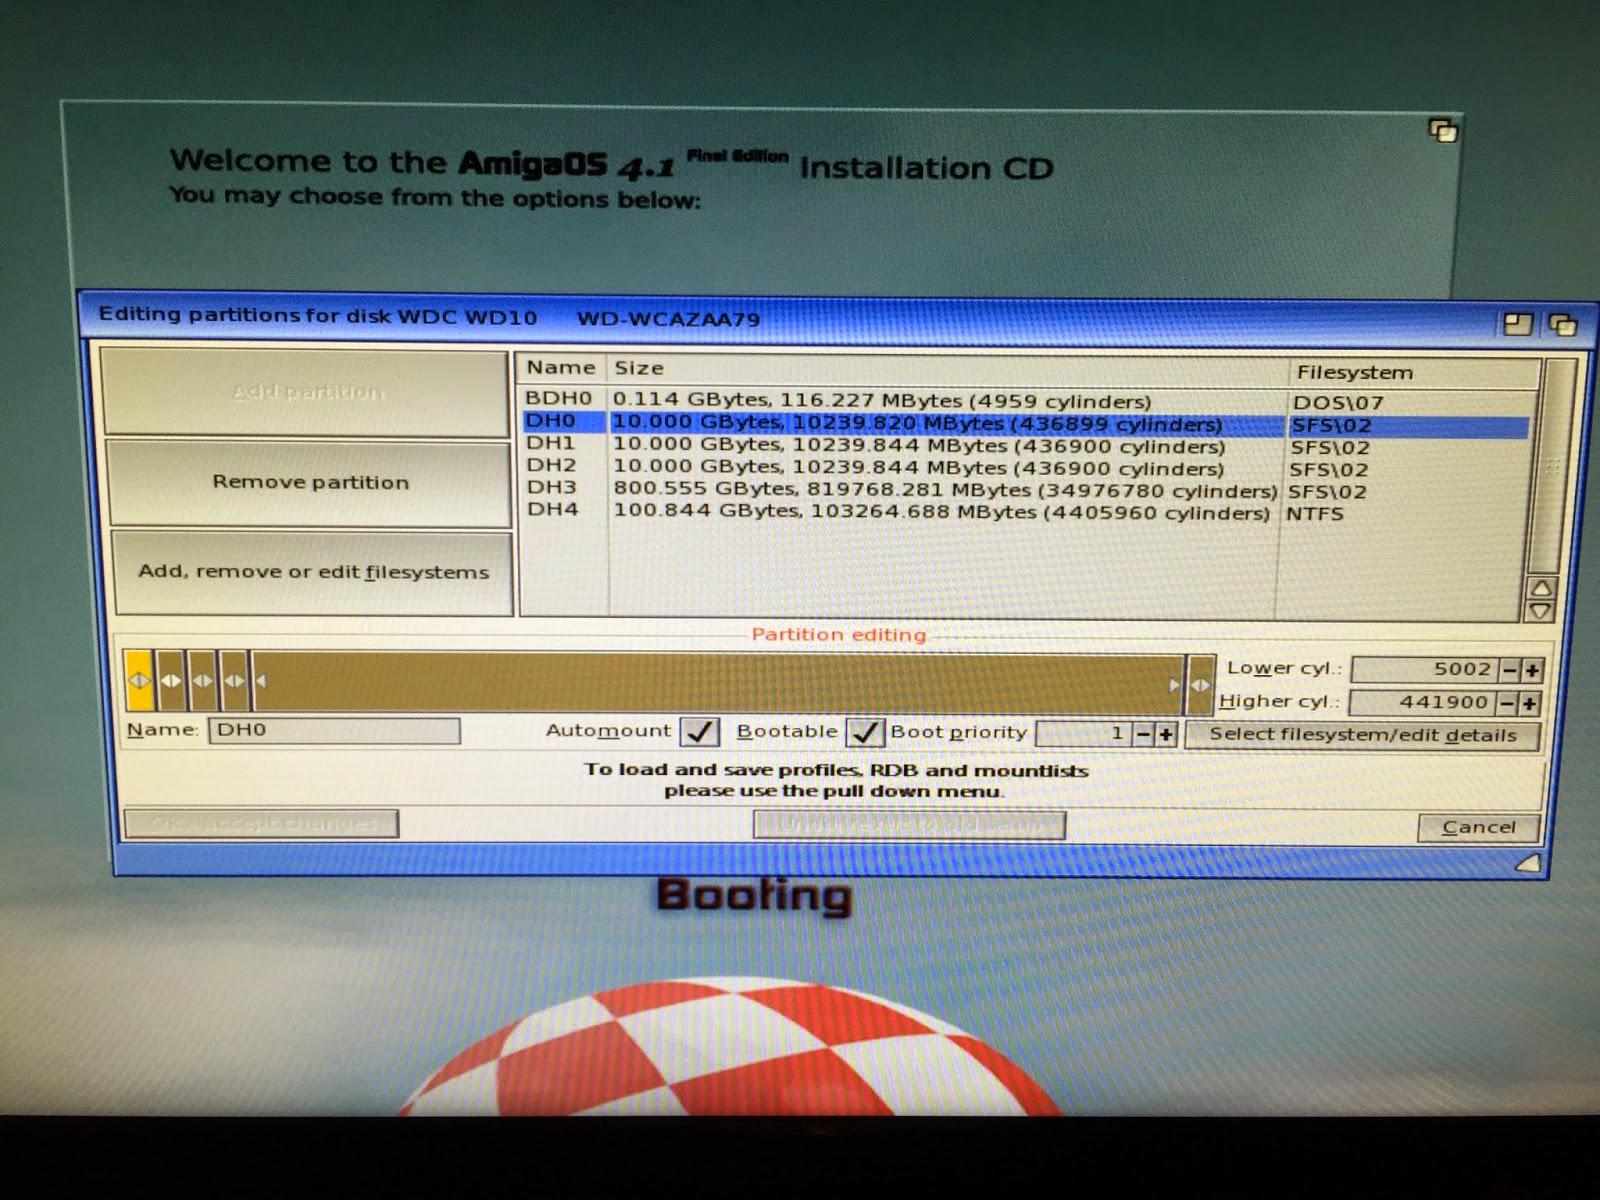
When I select
Edit Partitions and filesystems, you can see the partitions all setup, and ready to go. I will be installing to DH0:
I don't need to make any changes, so I click
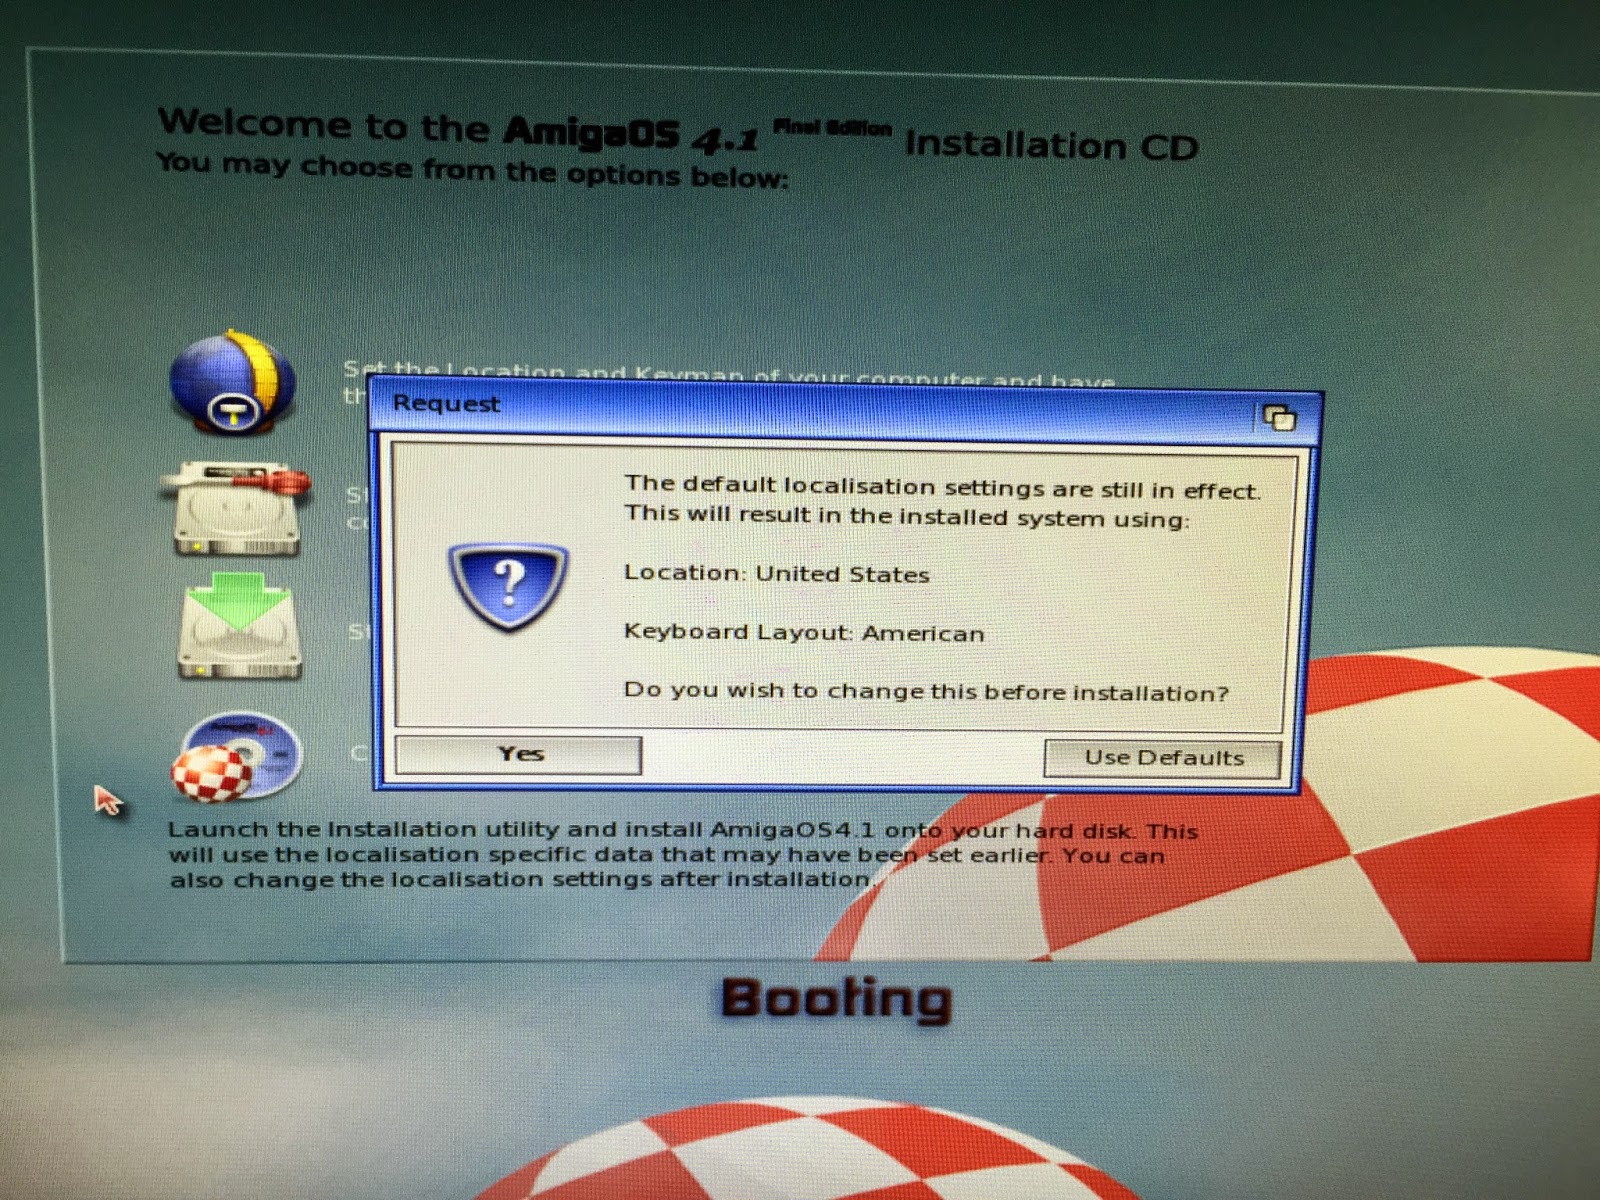
cancel to close the Media Toolbox utility, and then choose the start the installation option - it reminds me that the default localisation settings are still running (I didn't change them) - it gives me the option to change them now:
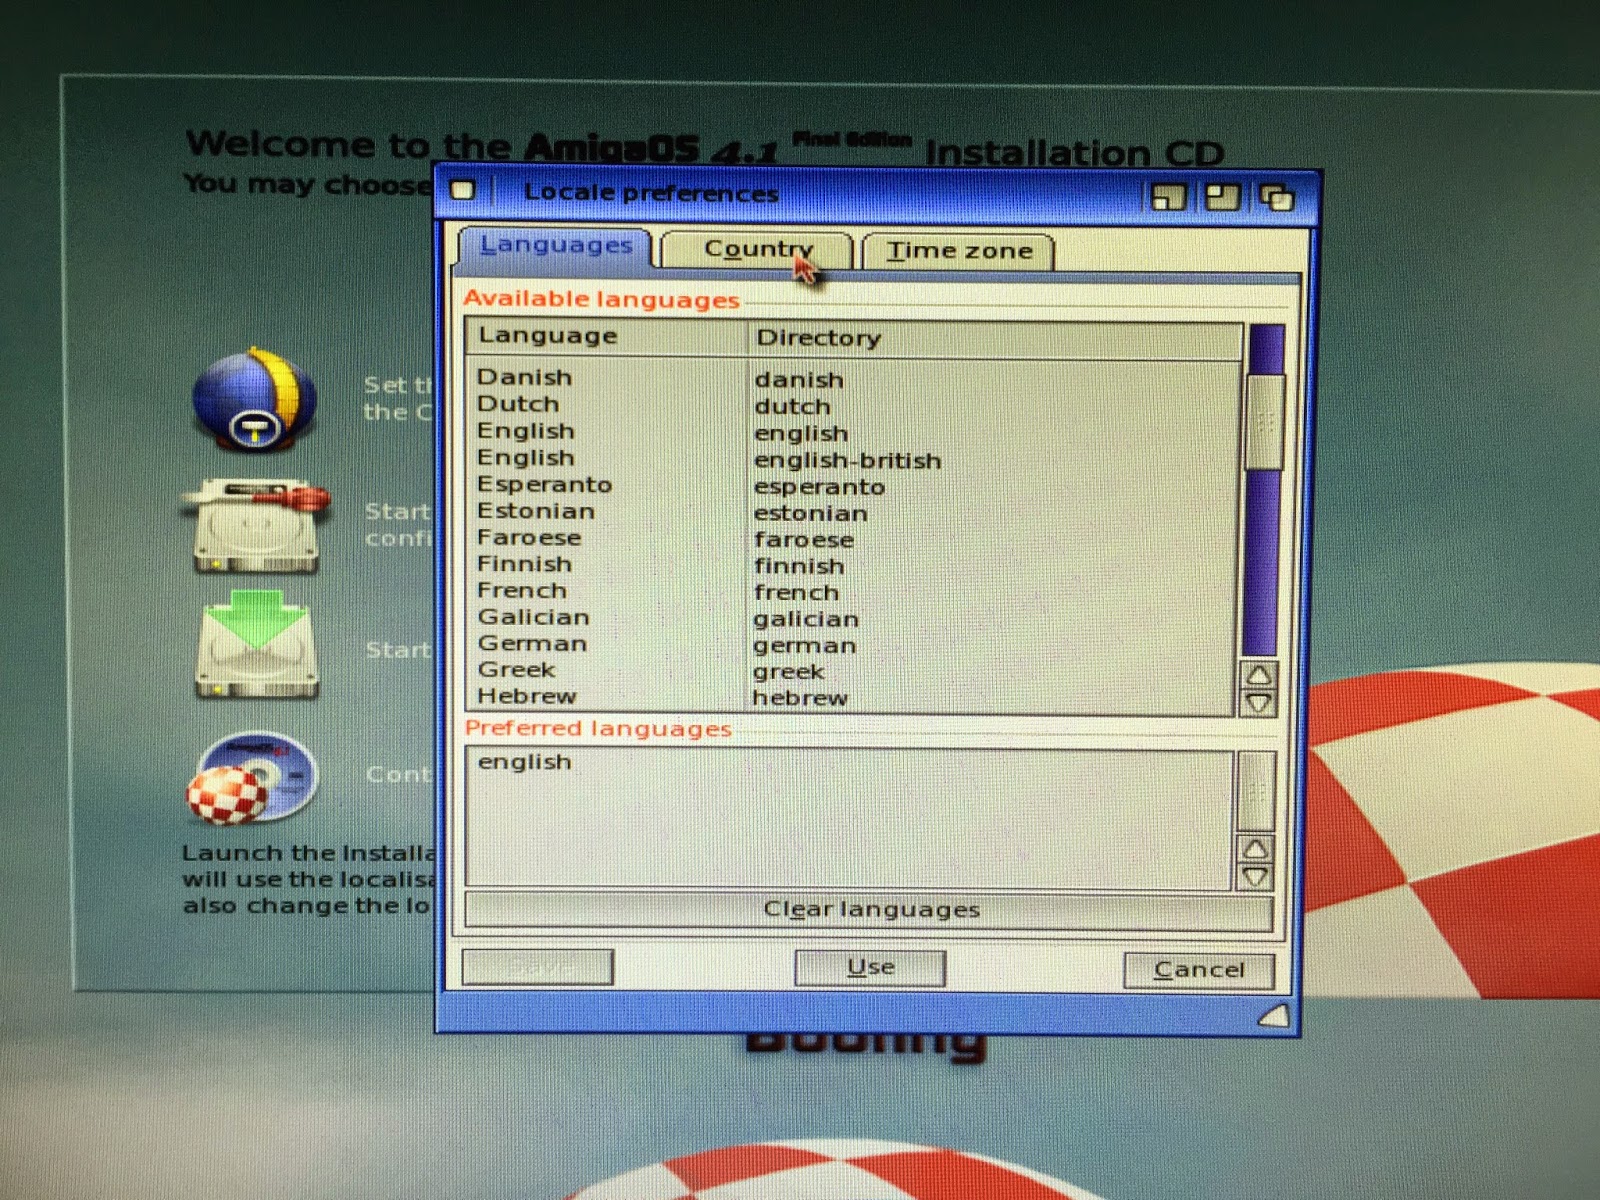
So in the setting window that comes up I add in
English-british and
English in Languages tab:
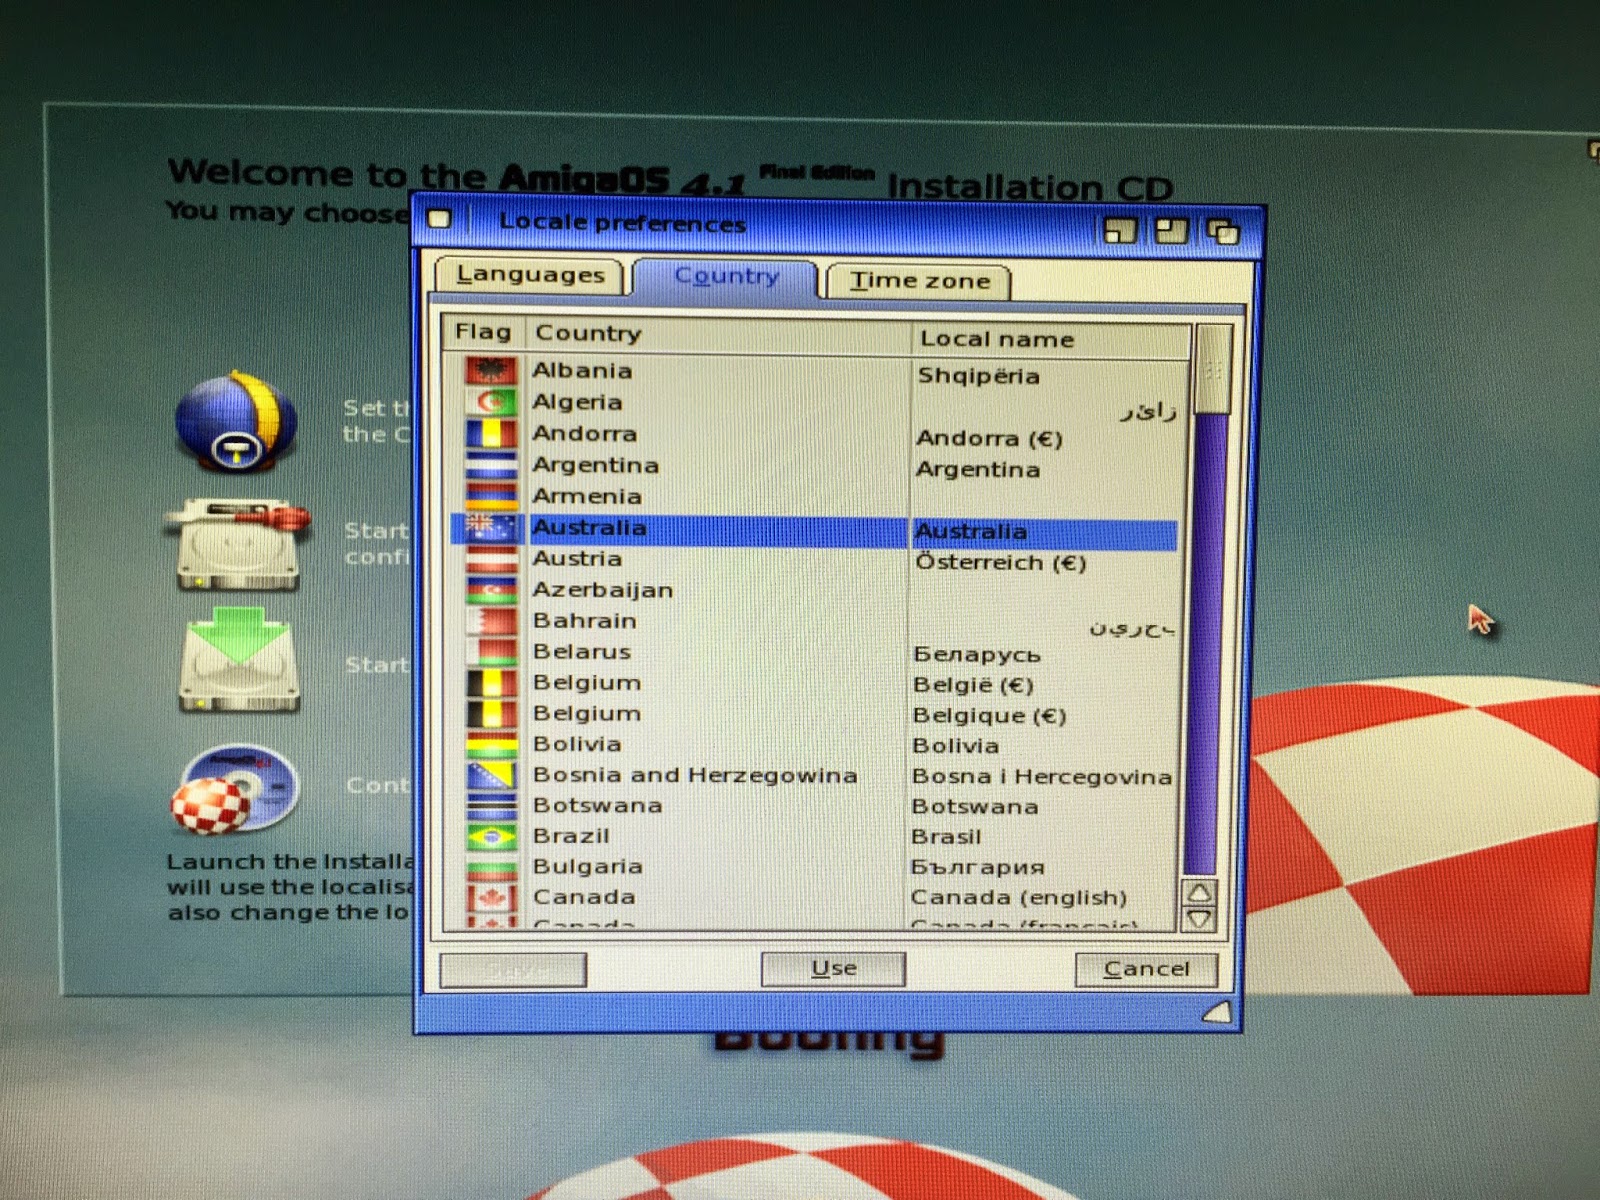
Under the
Country tab I select
Australia of course:
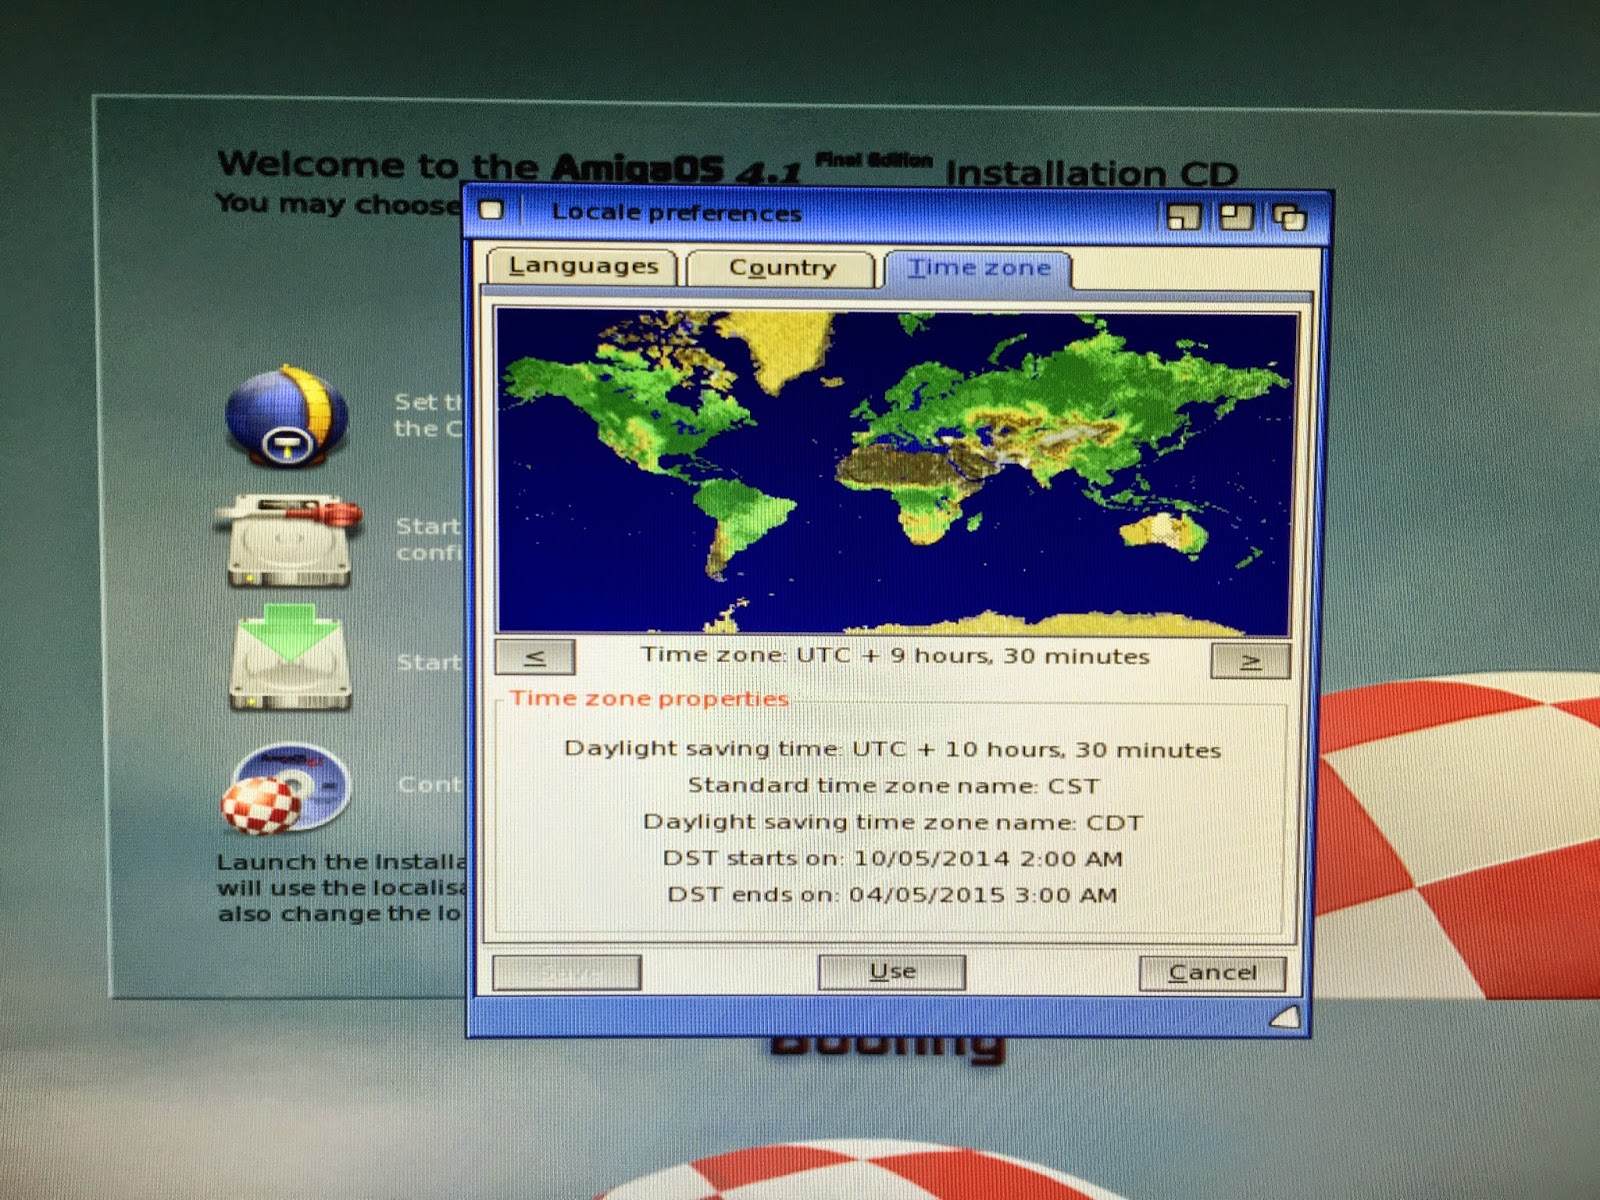
I then select the
Timezone tab and set the timezone to
Adelaide Central Standard Time (GMT+9.30):
I then click on
Use and move onto the next setting screen to setup the keyboard type - which I left as is:
After that I click
Use and it then prepares the installation:
Now we move into the installation proper - Click
Next:
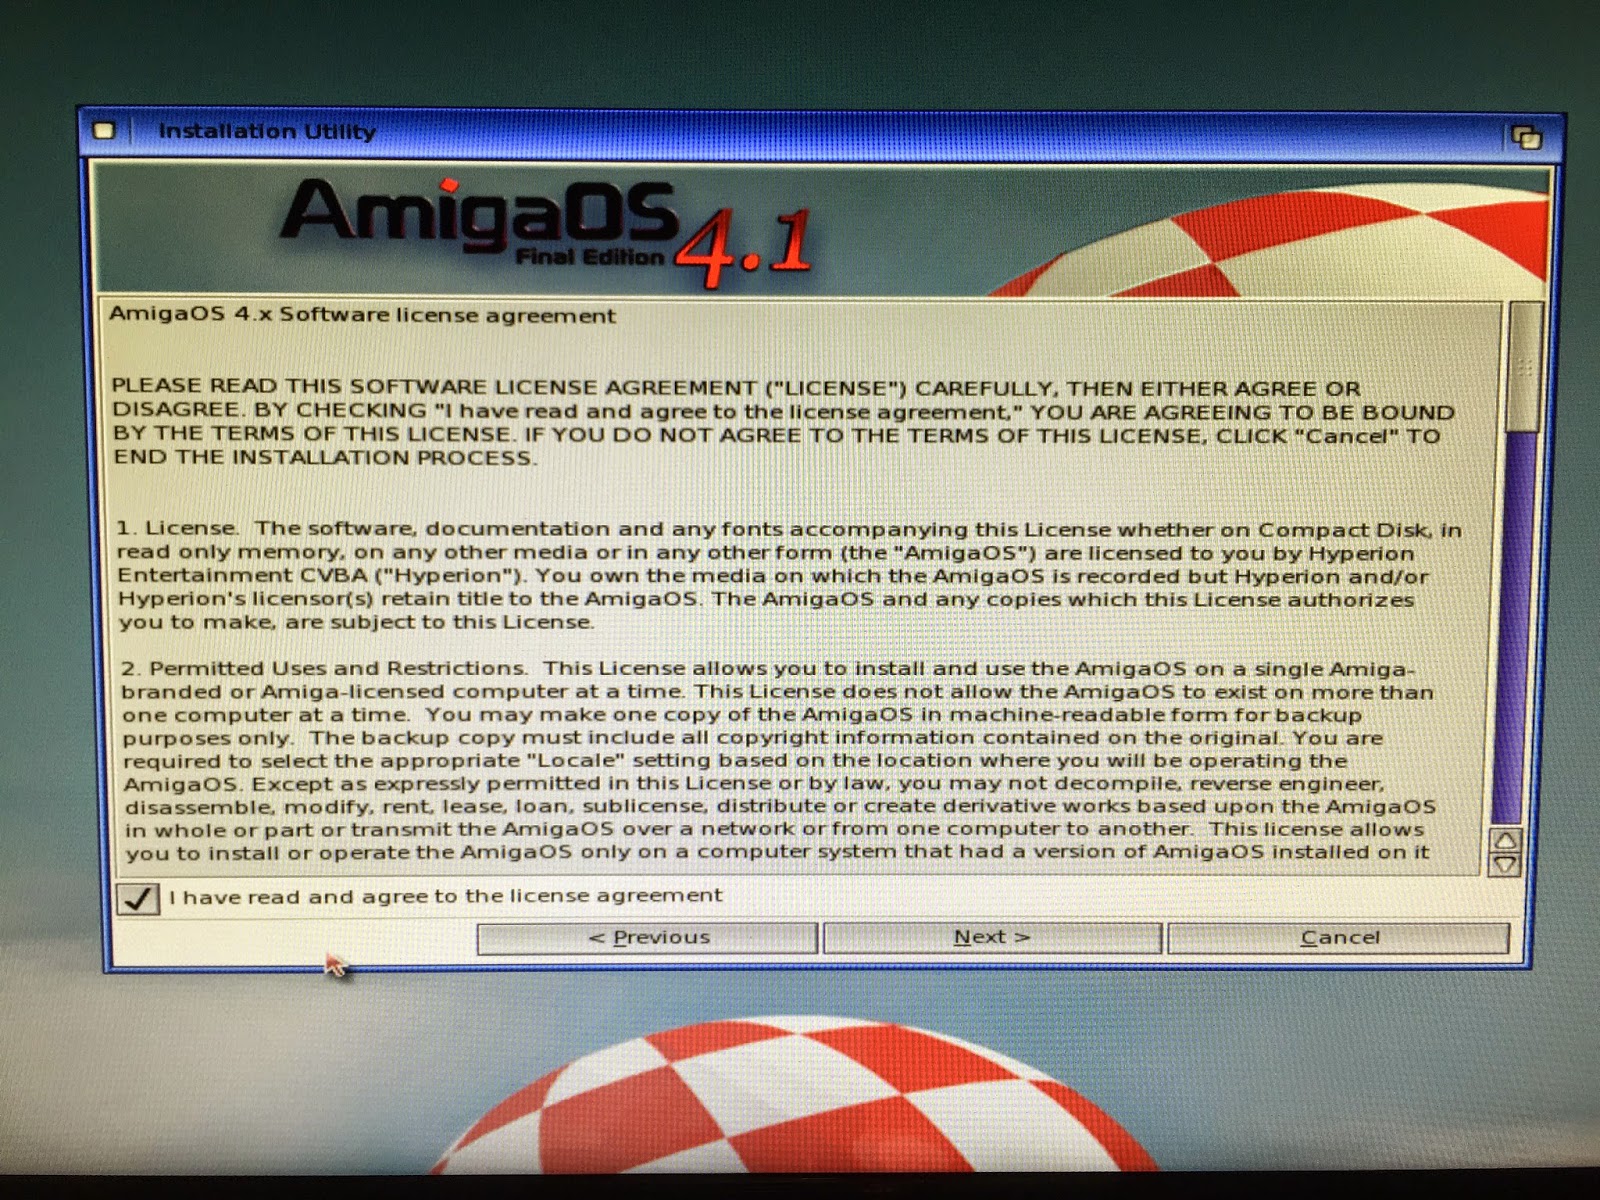
I then agree to all manner of legal things I suppose in the usual license agreement and click
Next:
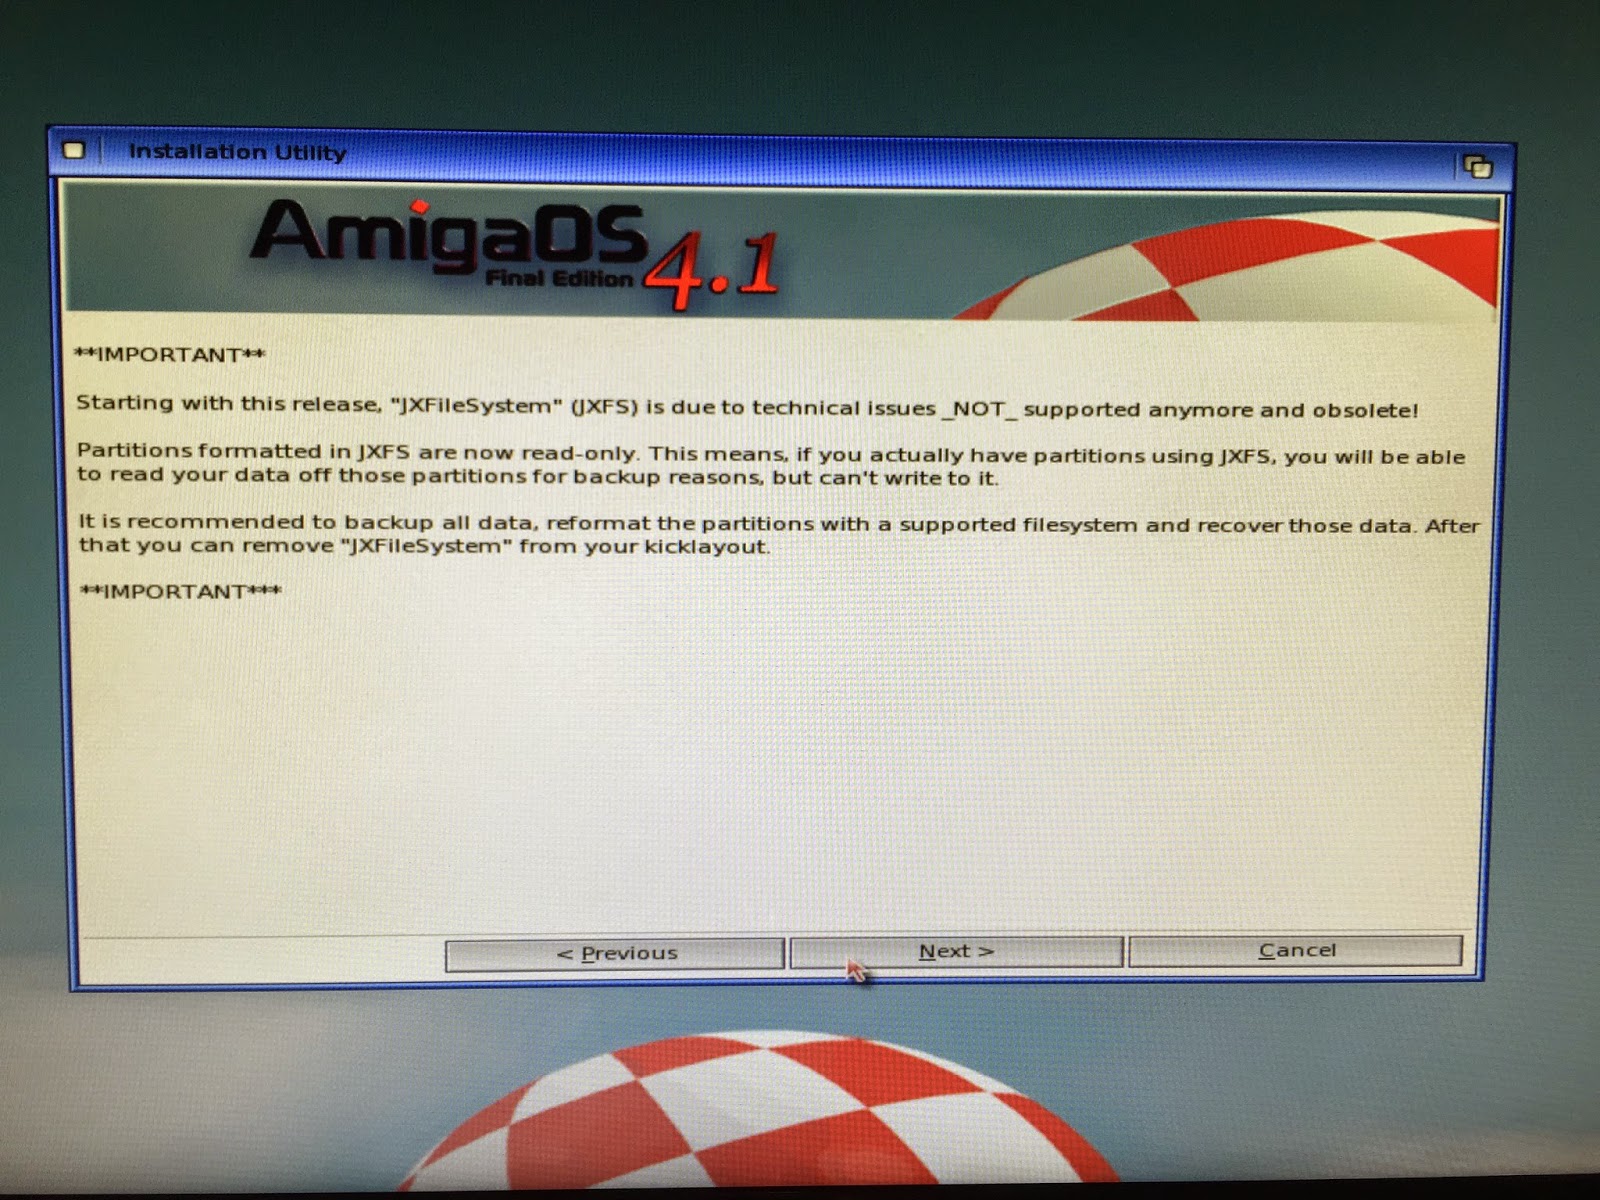
A warning comes up to remind me that JXFS is no longer supported in AmigaOS4.1 Final Edition, and has a read-only legacy mode only. No problem - I don't use it:
After clicking
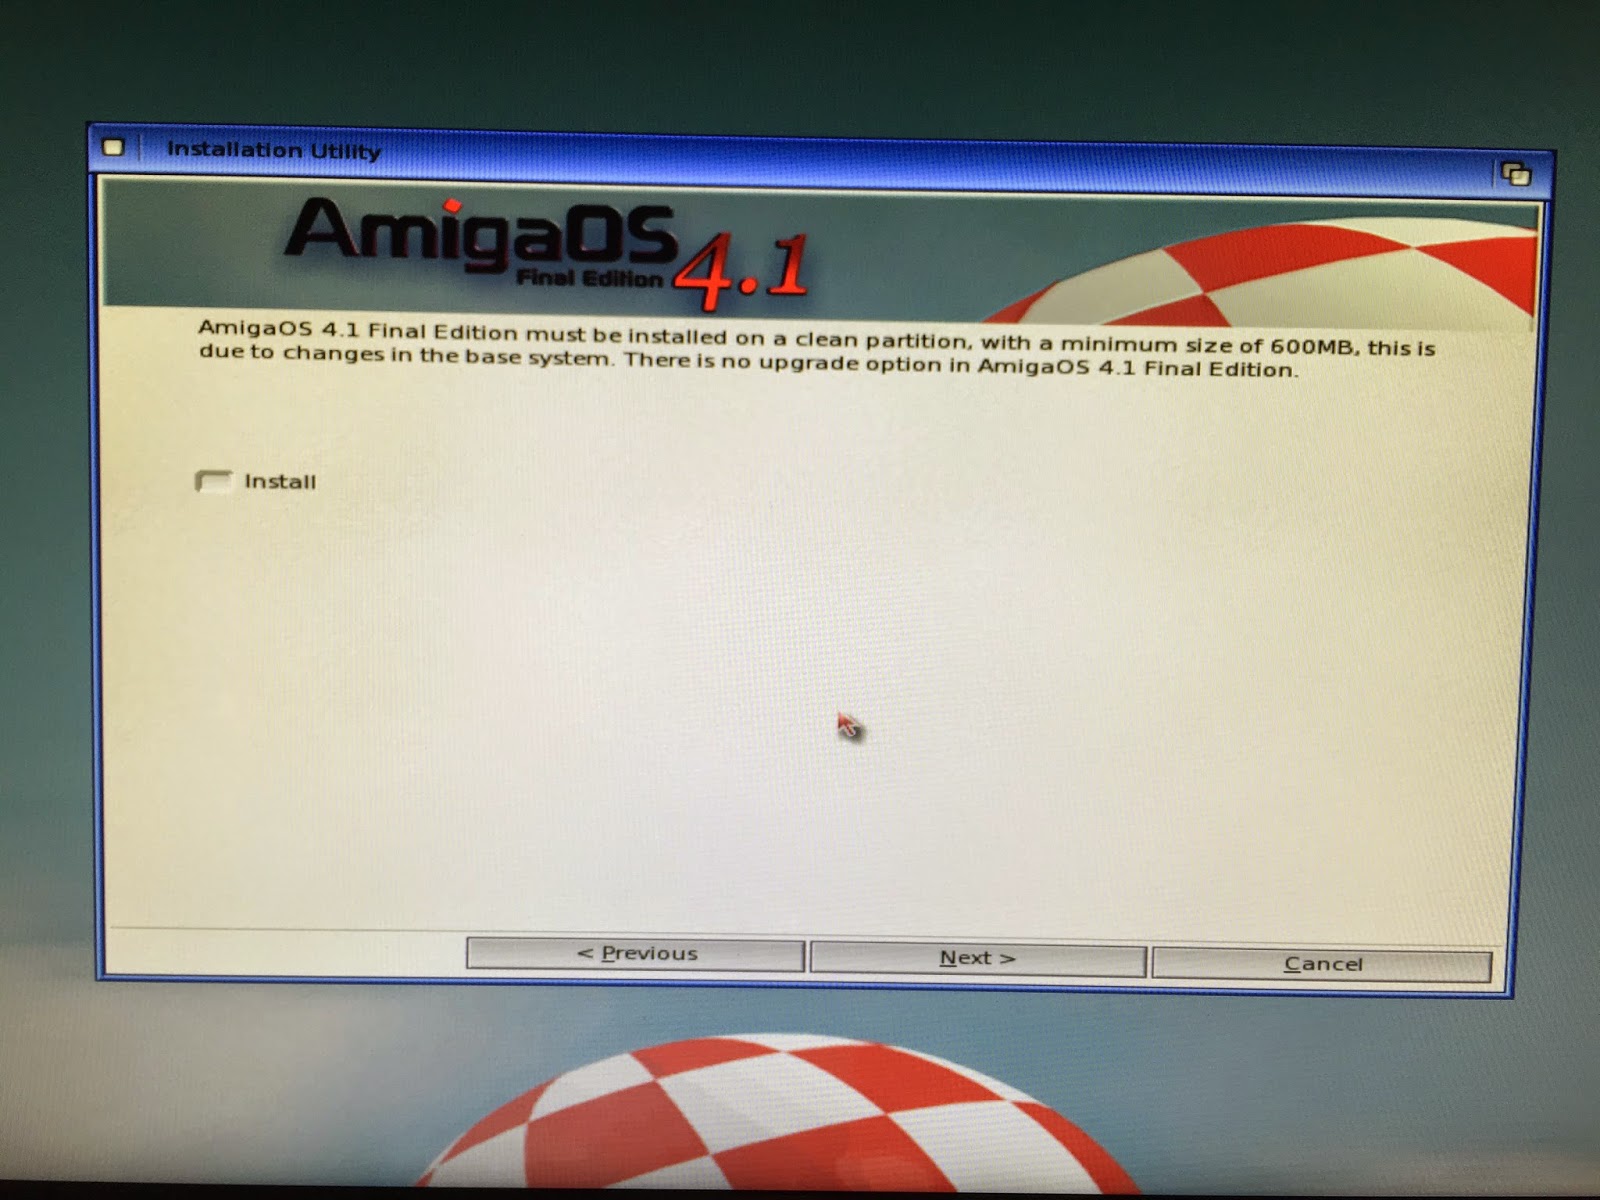
Next, the installer then reminds me that this is not an upgrade and there is no upgrade option - click
Next:
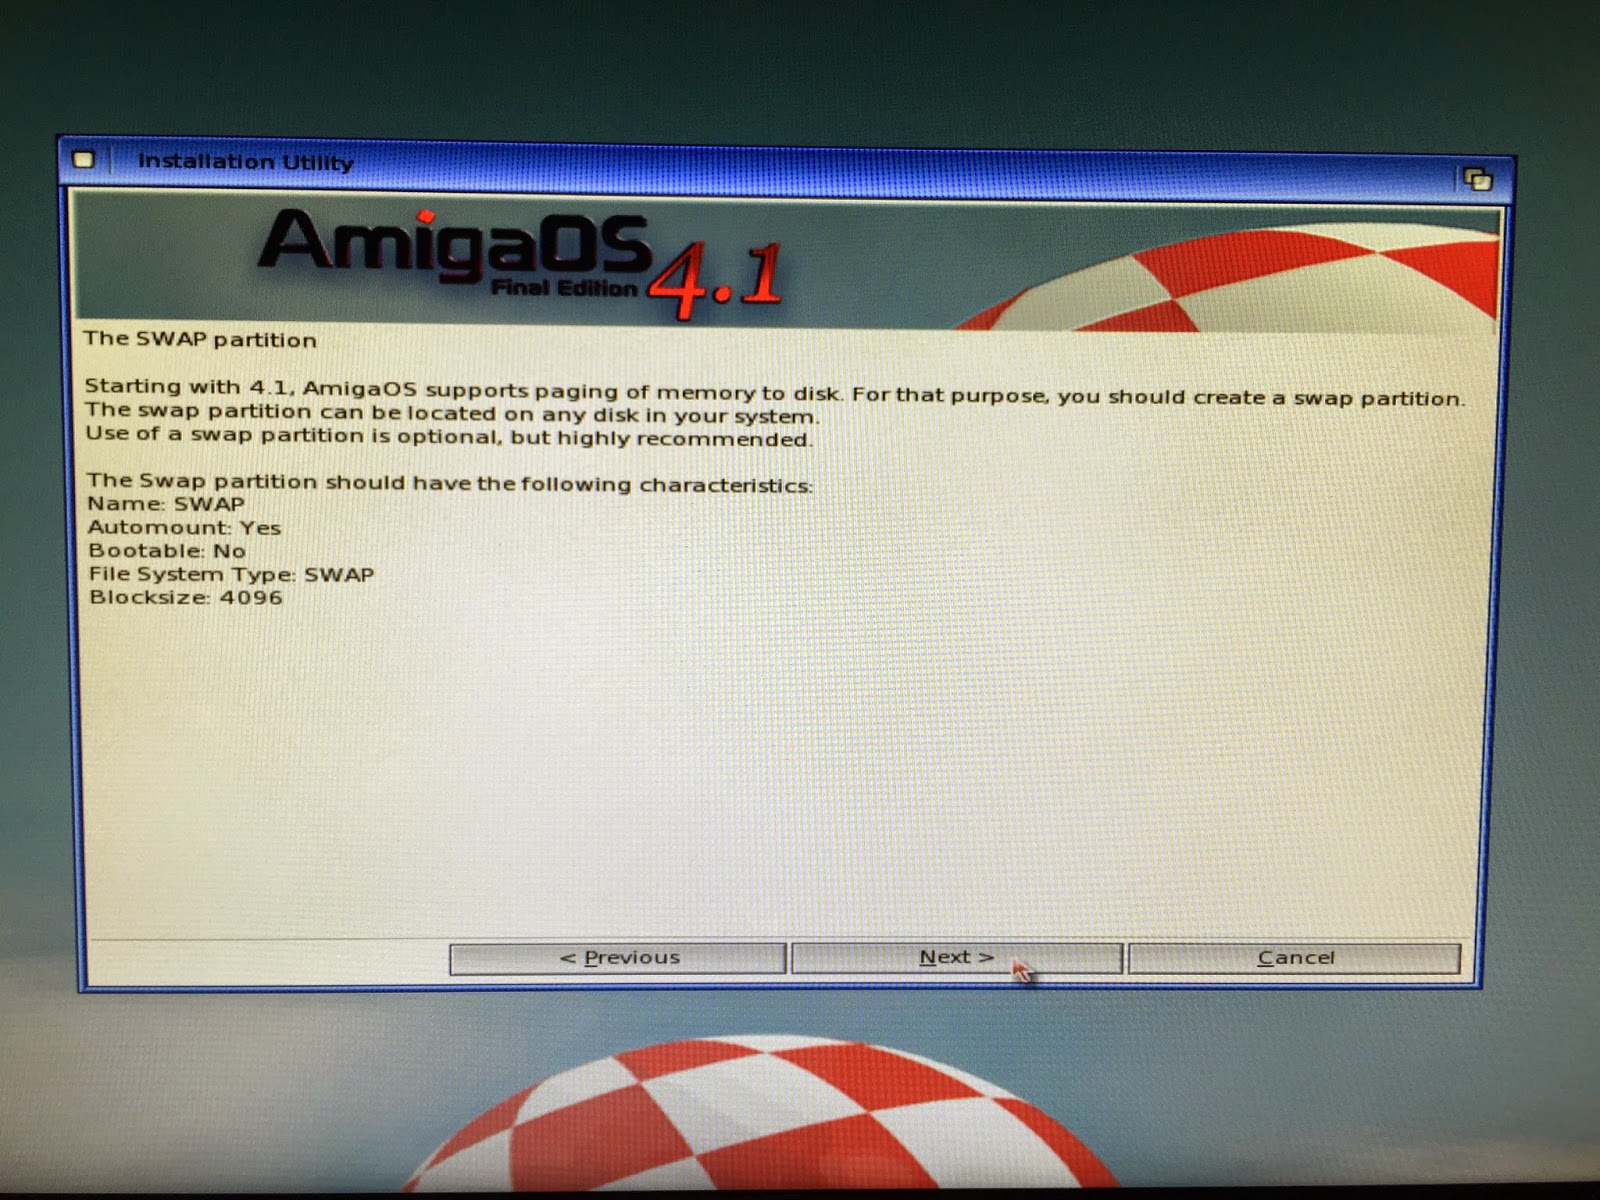
It then asks me to configure a
SWAP partition - on an X1000 with 2GB of memory or more t
his is not needed - I click
Next:
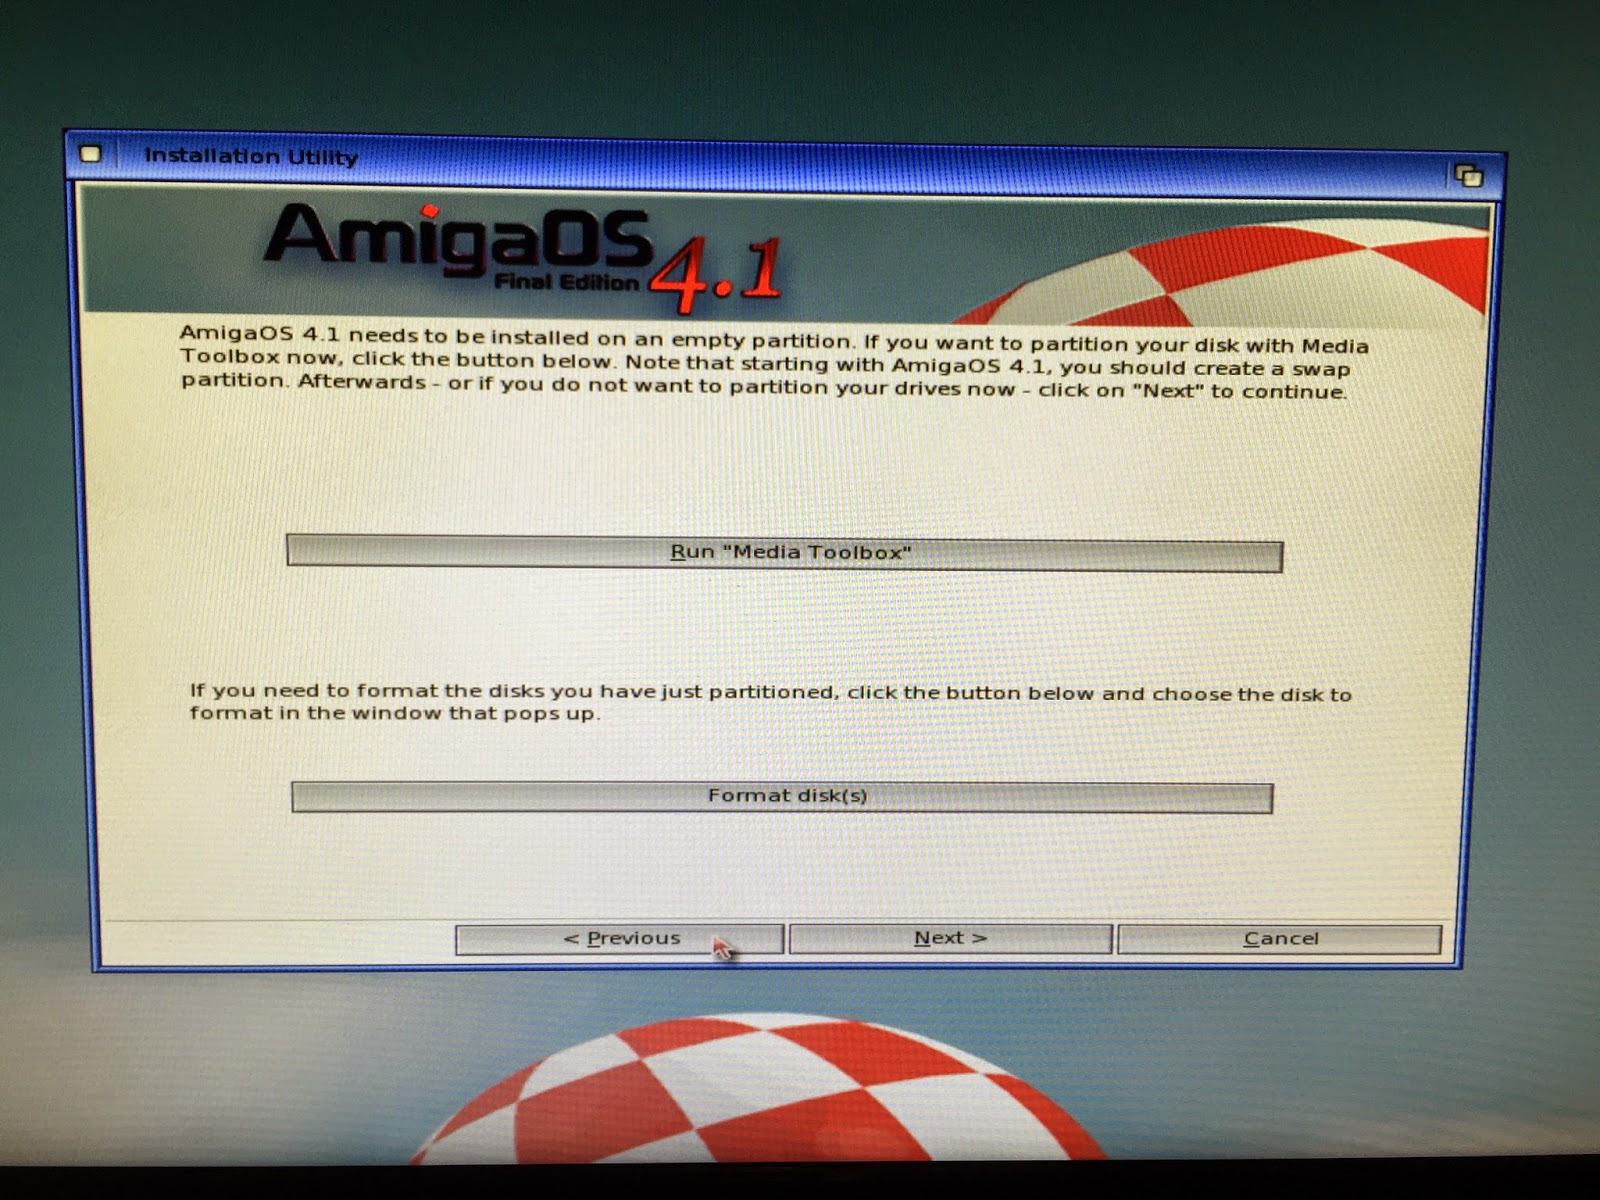
The installer then gives you the chance to open Media Toolbox to setup the SWAP partition and prepare your target partition and format for AmigaOS4.1 Final Edition (if not already done):
I can click
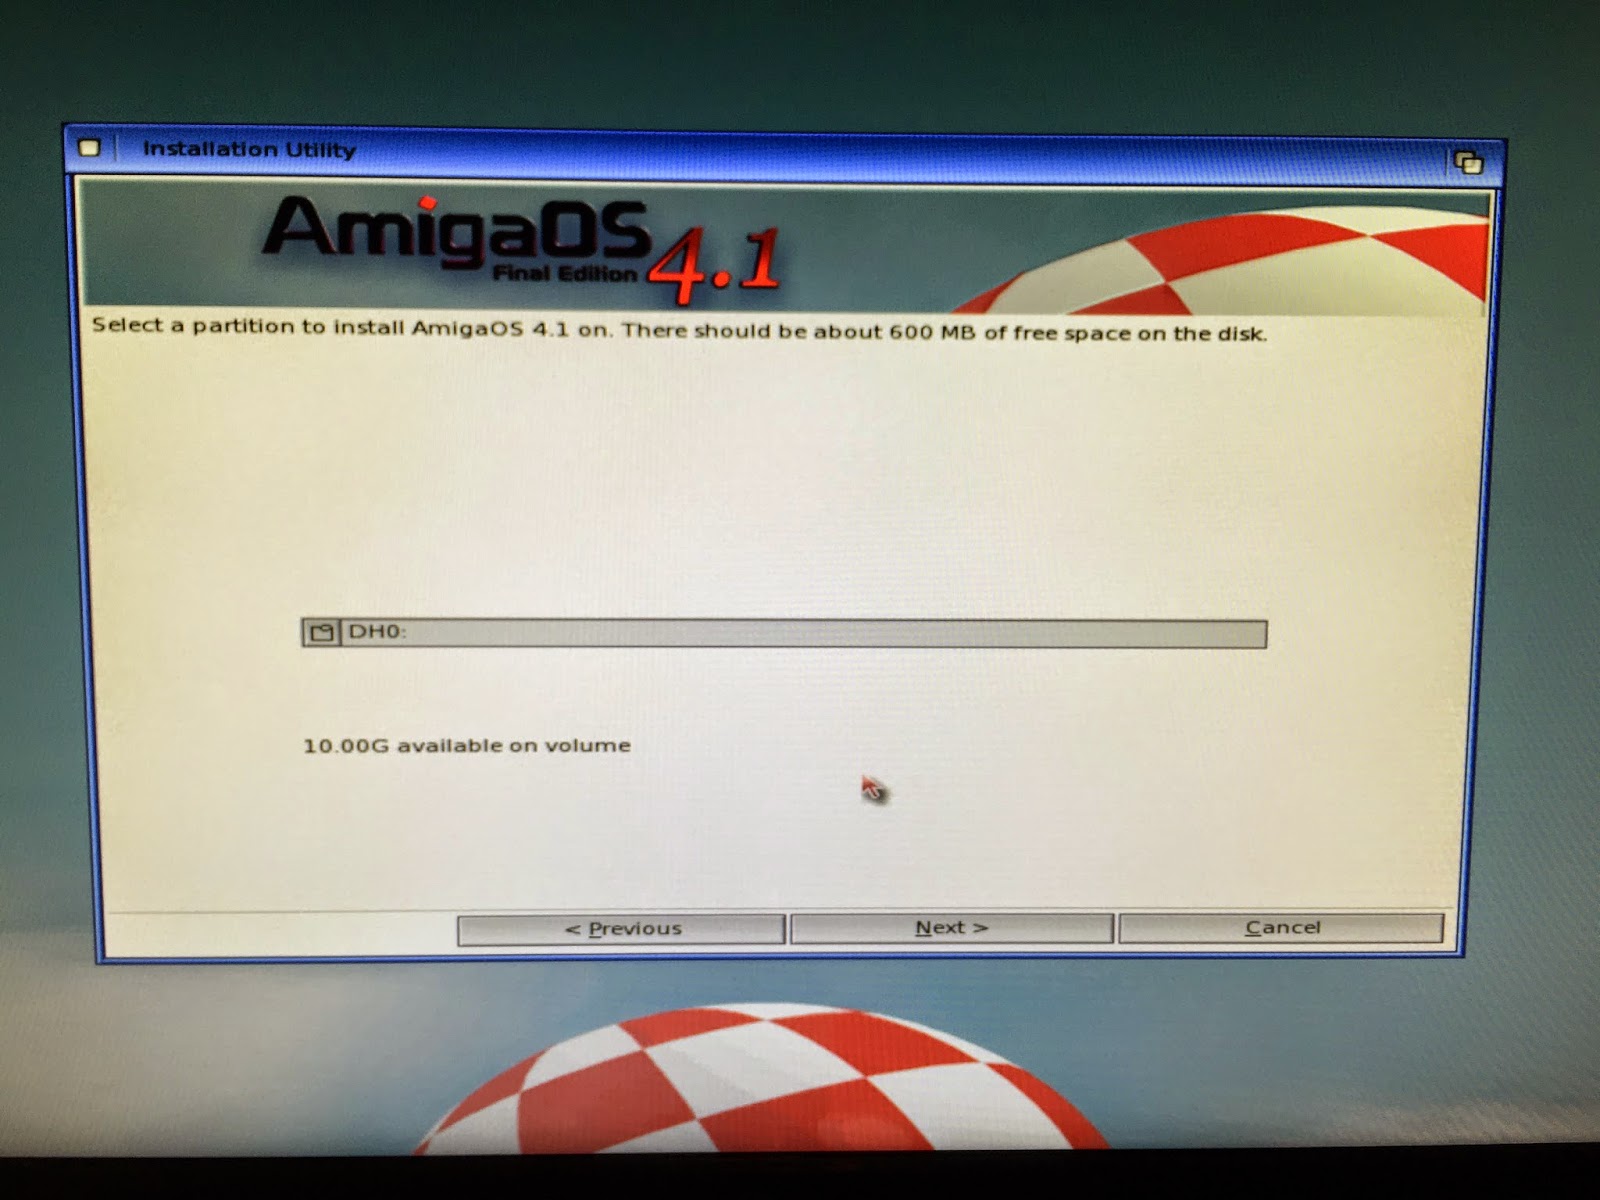
Next here as my hard disk partitions are already prepped. The next screen asks me where I want to install to - I select
DH0 and click on
Next:
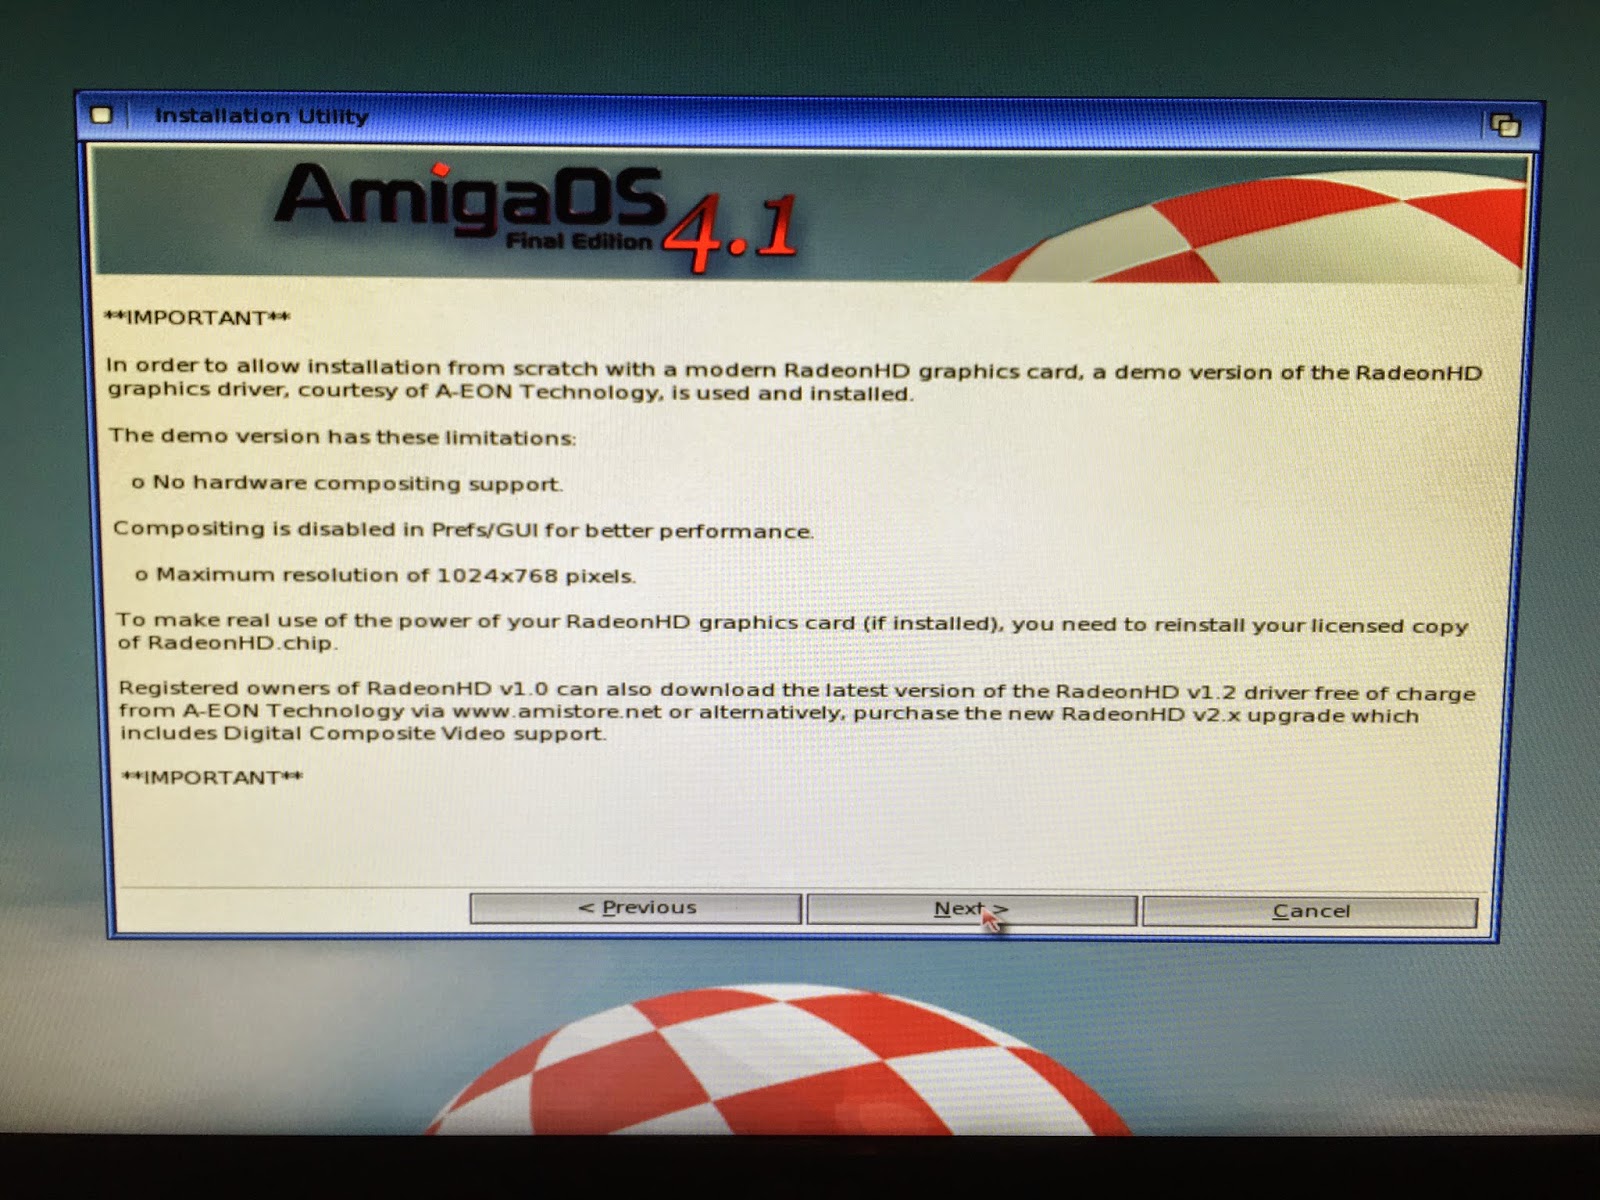
At this point the installer makes you aware of the
Radeon HD Lite video driver included with the default installation - basically stating you are restricted to
1024x768 screen resolution with
no compositing support enabled.
You are encouraged to go and buy an upgraded video driver from AmiStore to unlock the full video functionality of your system.
I personally think it makes more sense to bundle it and charge more for the operating system - but it is their choice of course, and many people already paid for the enhanced drivers previously like myself.
People who paid for the drivers already may not be happy to pay for it again effectively in the price of the upgrade. The Lite driver is a compromise to keep both sets of users happy I guess:
I already bought the Radeon HD 2.4 graphics driver so later on in this process I can upgrade the driver. If you have the Radeon 1.0/1.2 HD graphics driver then you can use that too (as an X1000 owner this was given to us for free - for other SAM440/460 systems you need to buy it from AmiStore).
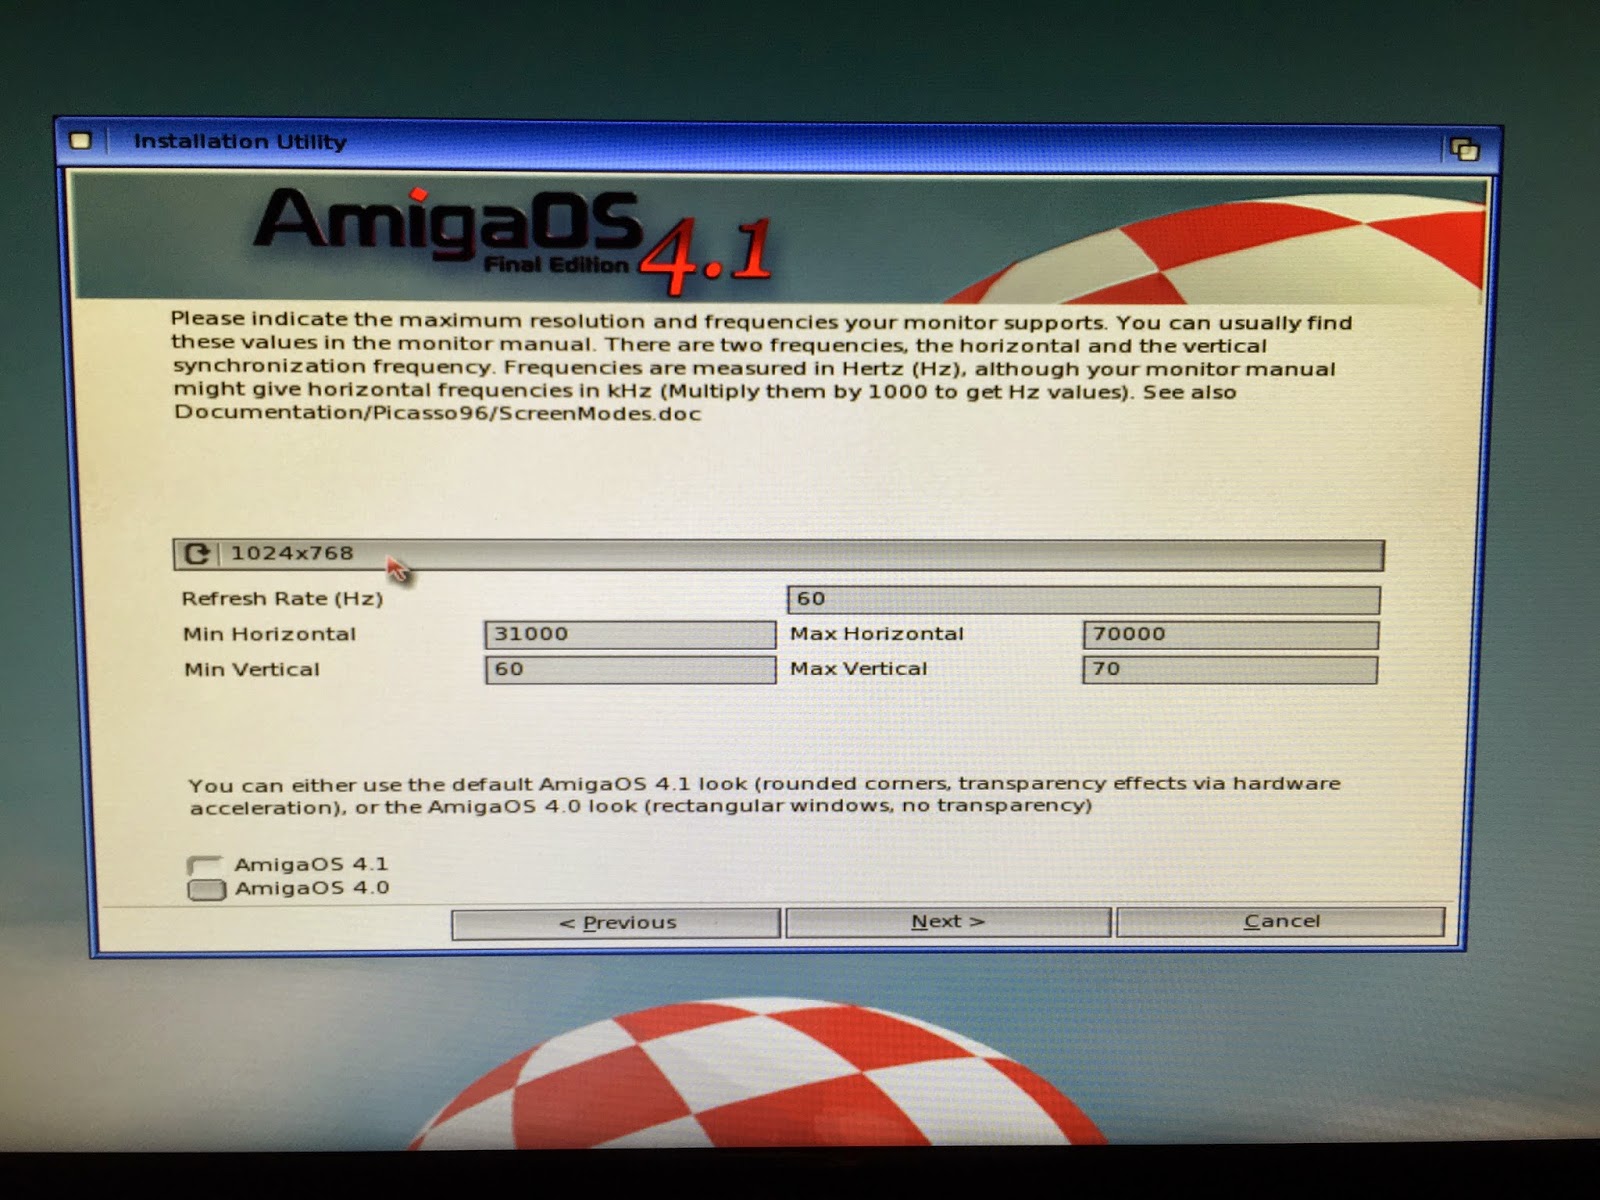
After clicking
Next, the following screen asks you to tell the installer what the maximum resolution your monitor can support, defaulting to
1024x768:
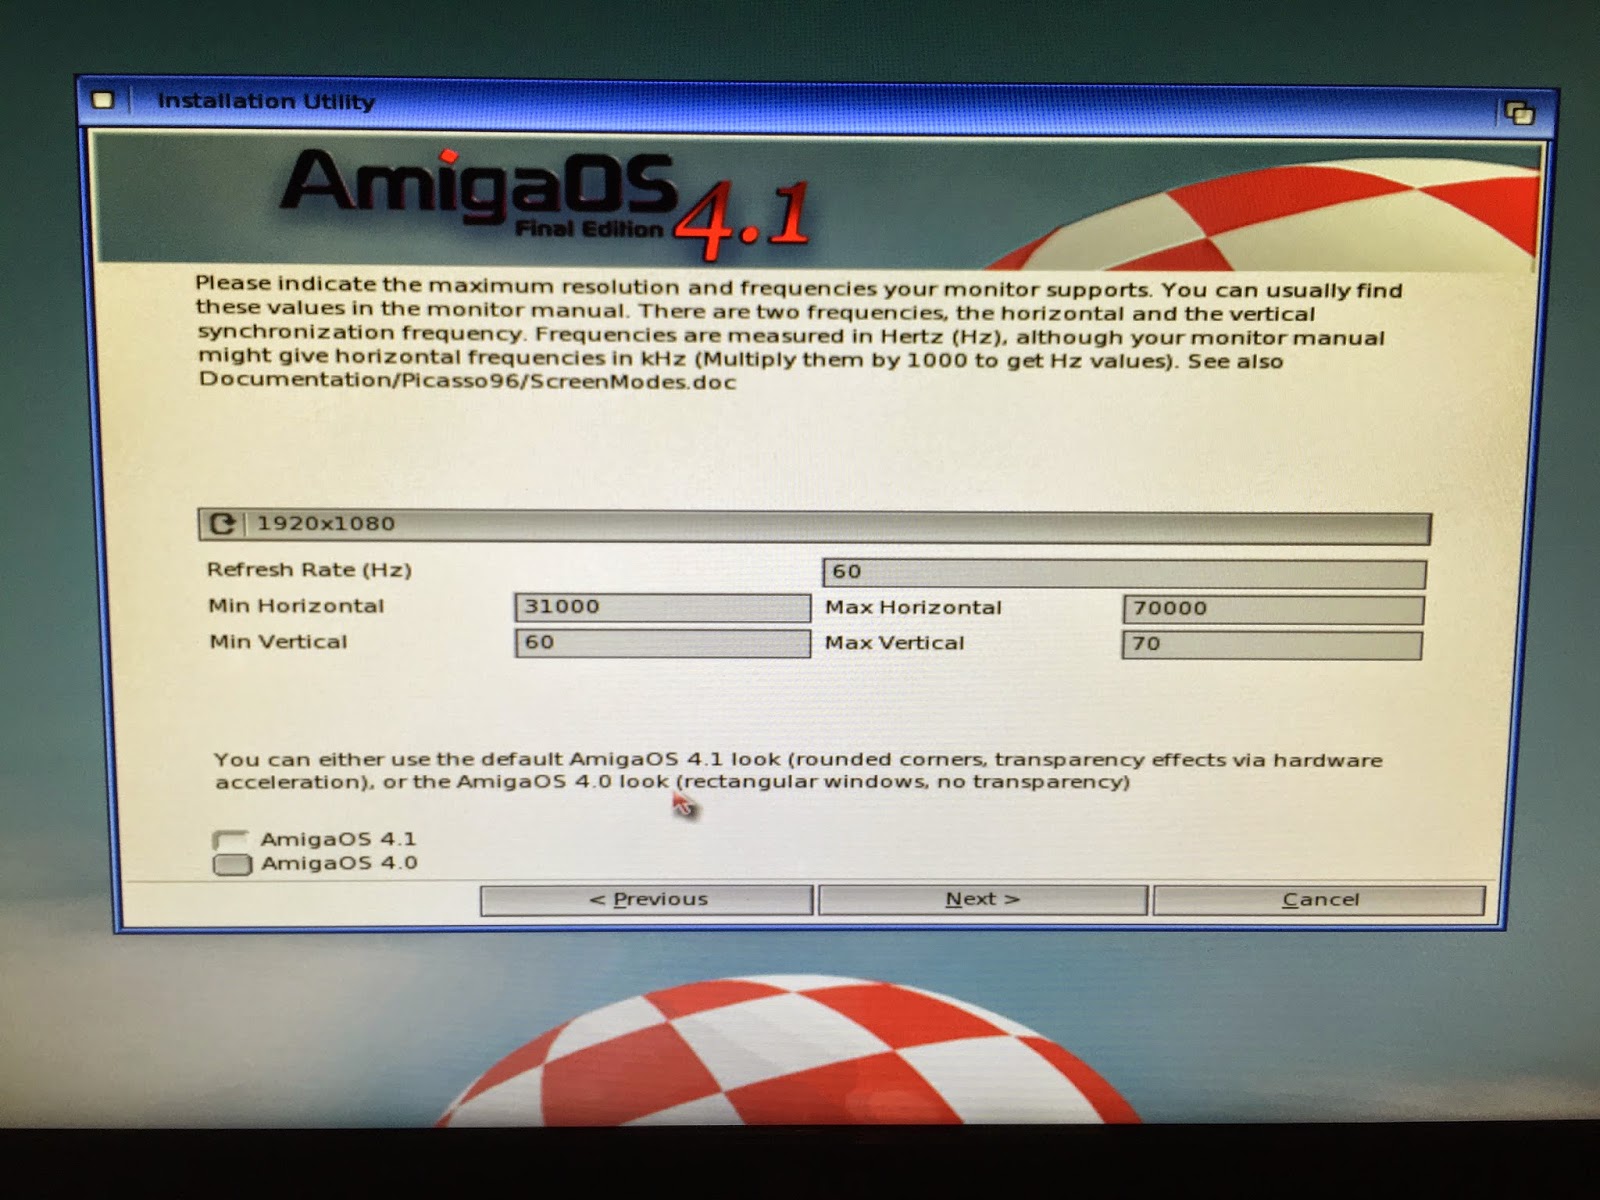
I selected
1920x1080 as my resolution as I use a 24" HD LCD Screen, and left the AmigaOS4.1 look option set - You do have the option to use the look and feel of AmigaOS4.0 if you prefer.
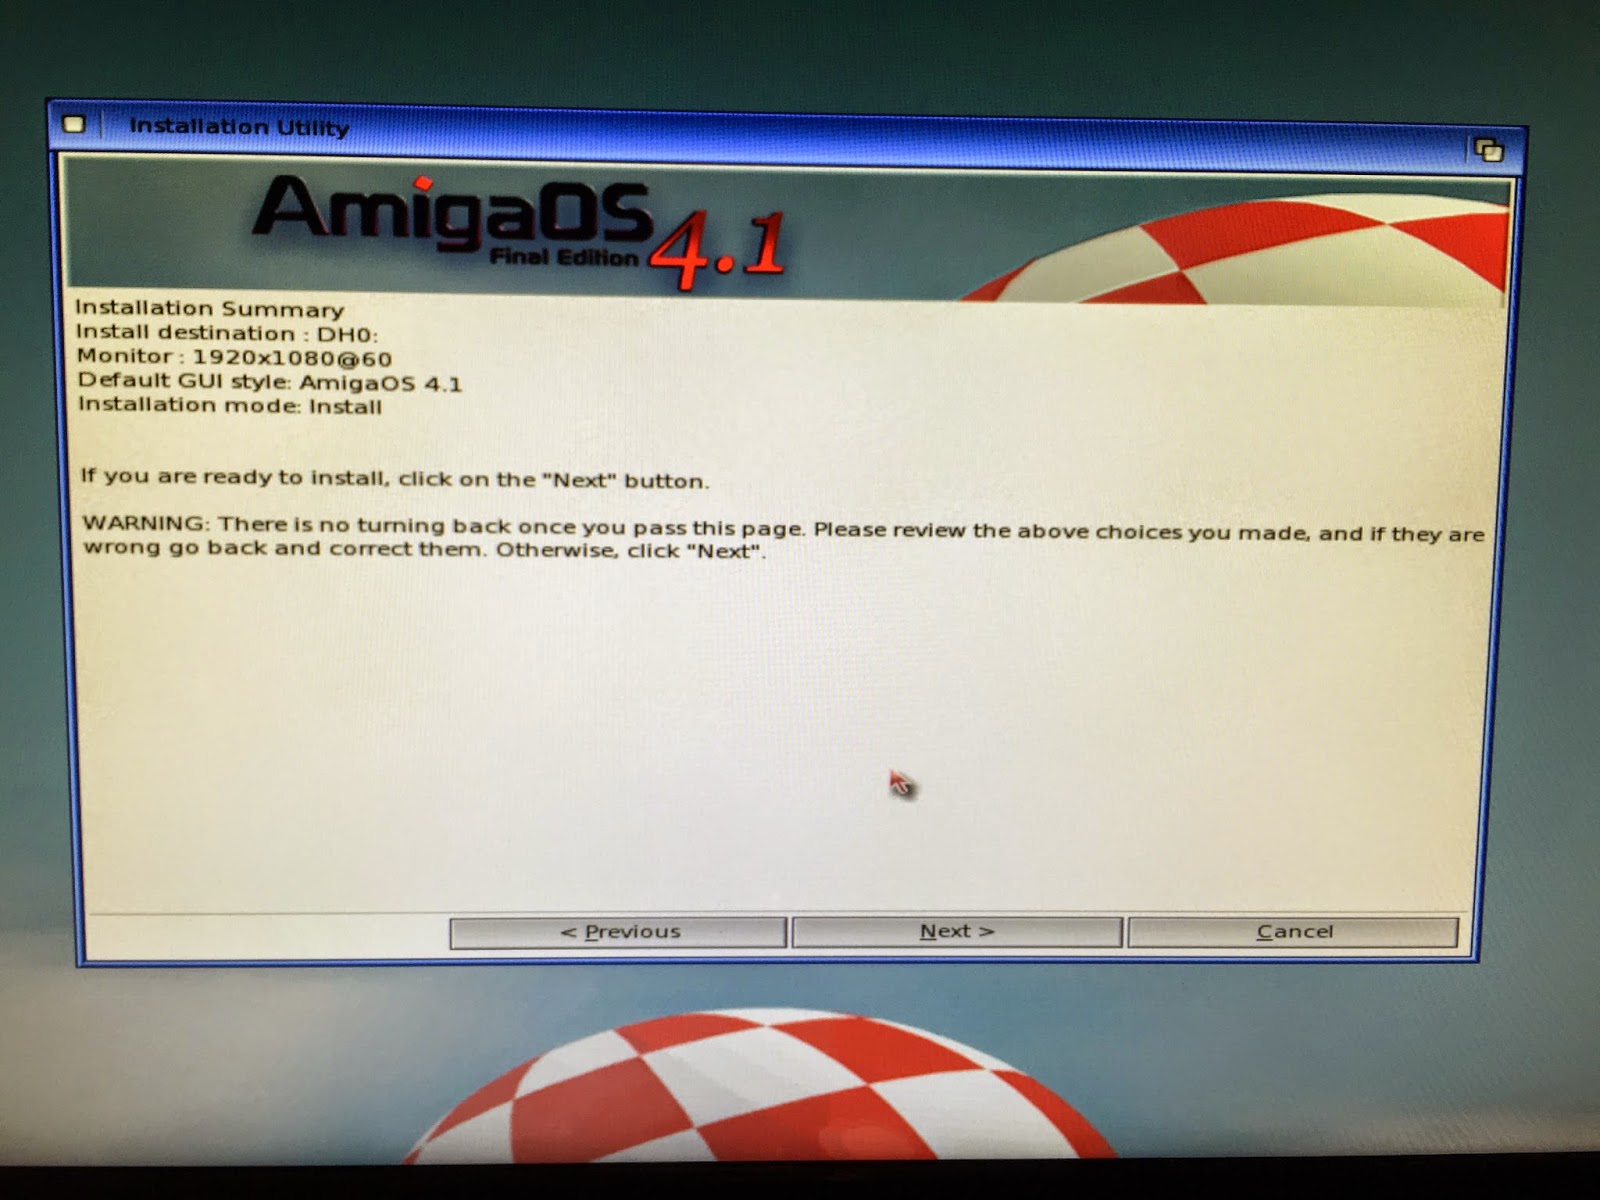
After clicking
Next you get the final confirmation screen of the choices you made in the installer before proceeding with the installation. Last chance to go back and make changes:
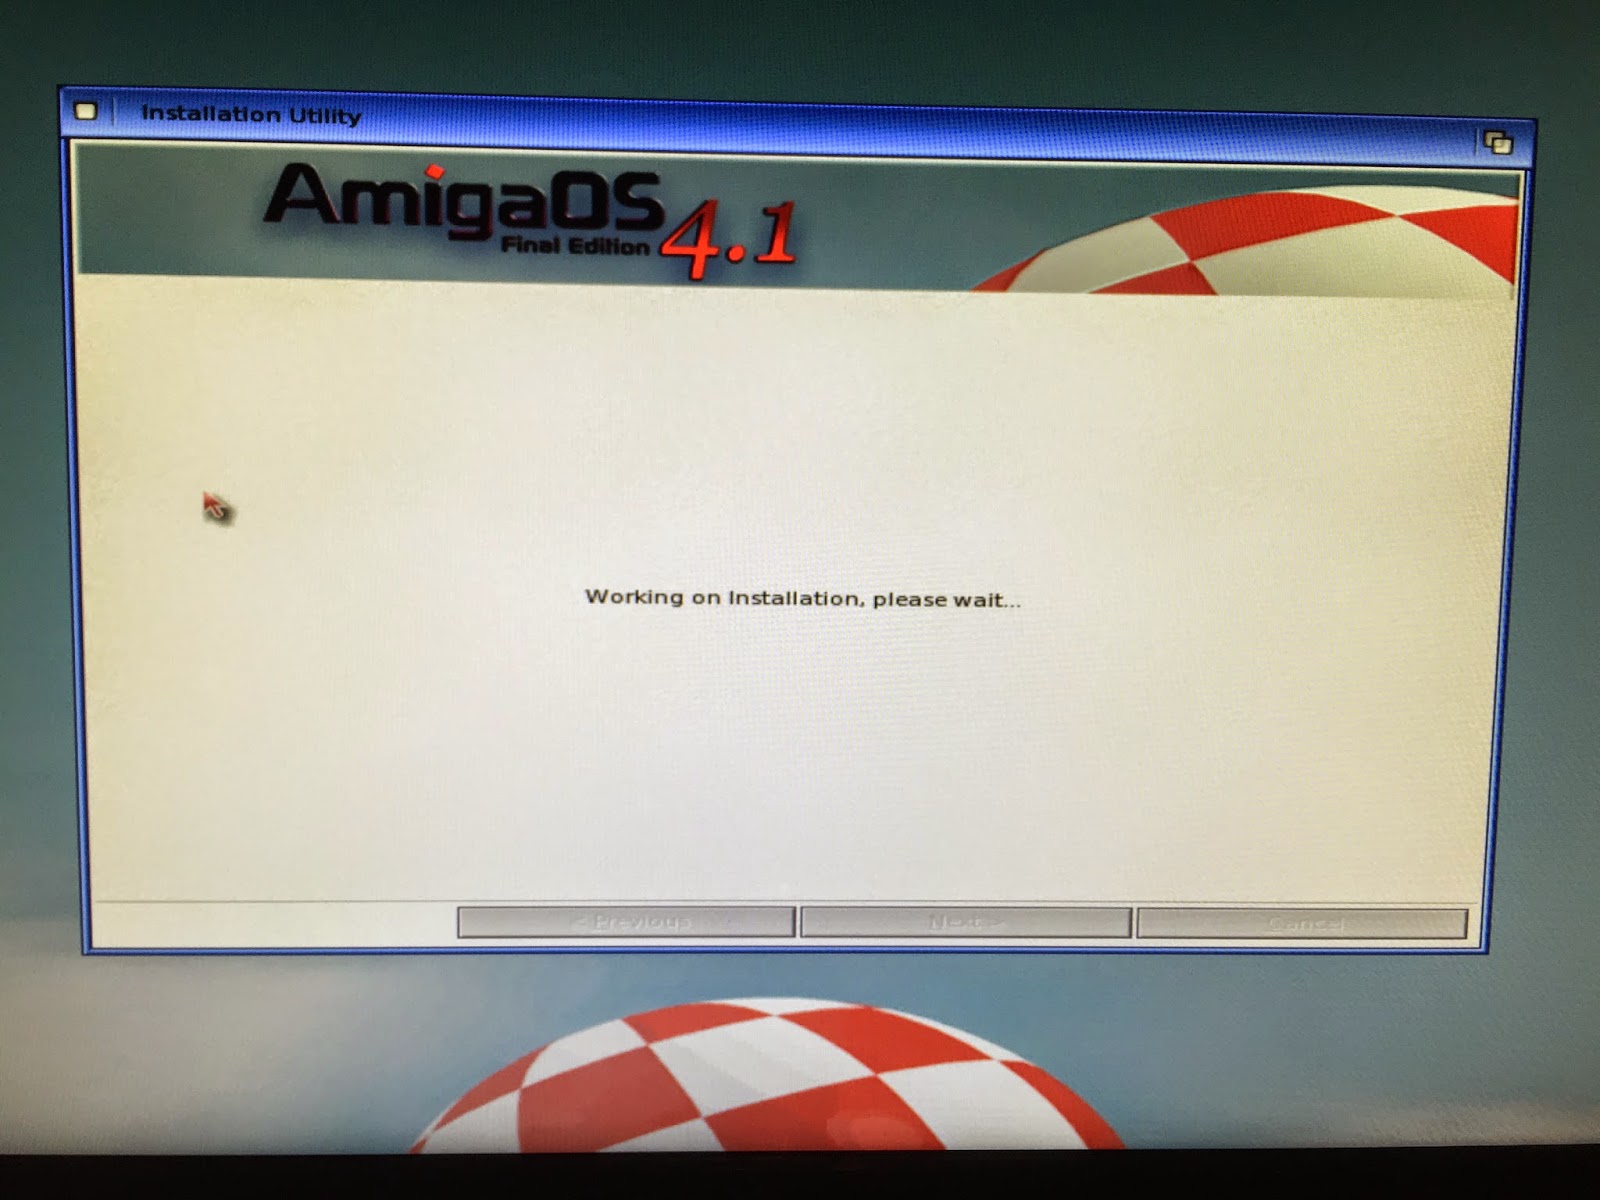
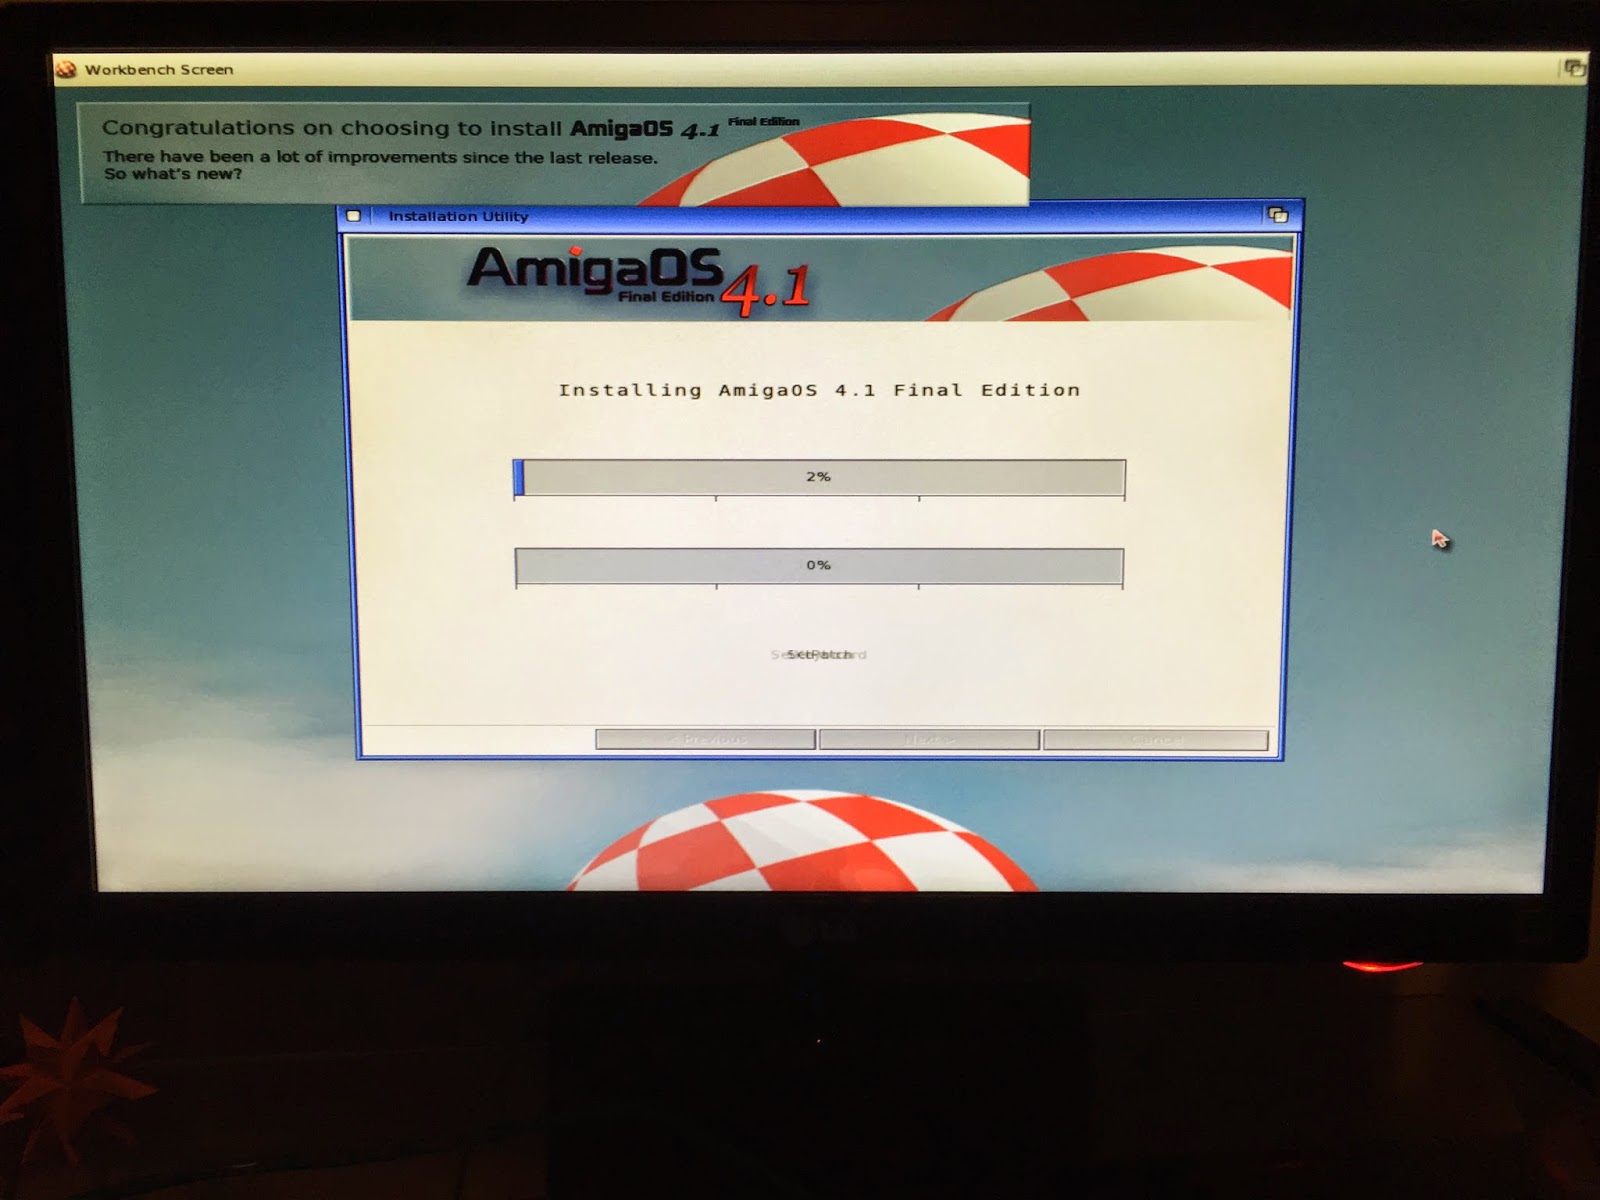
After clicking
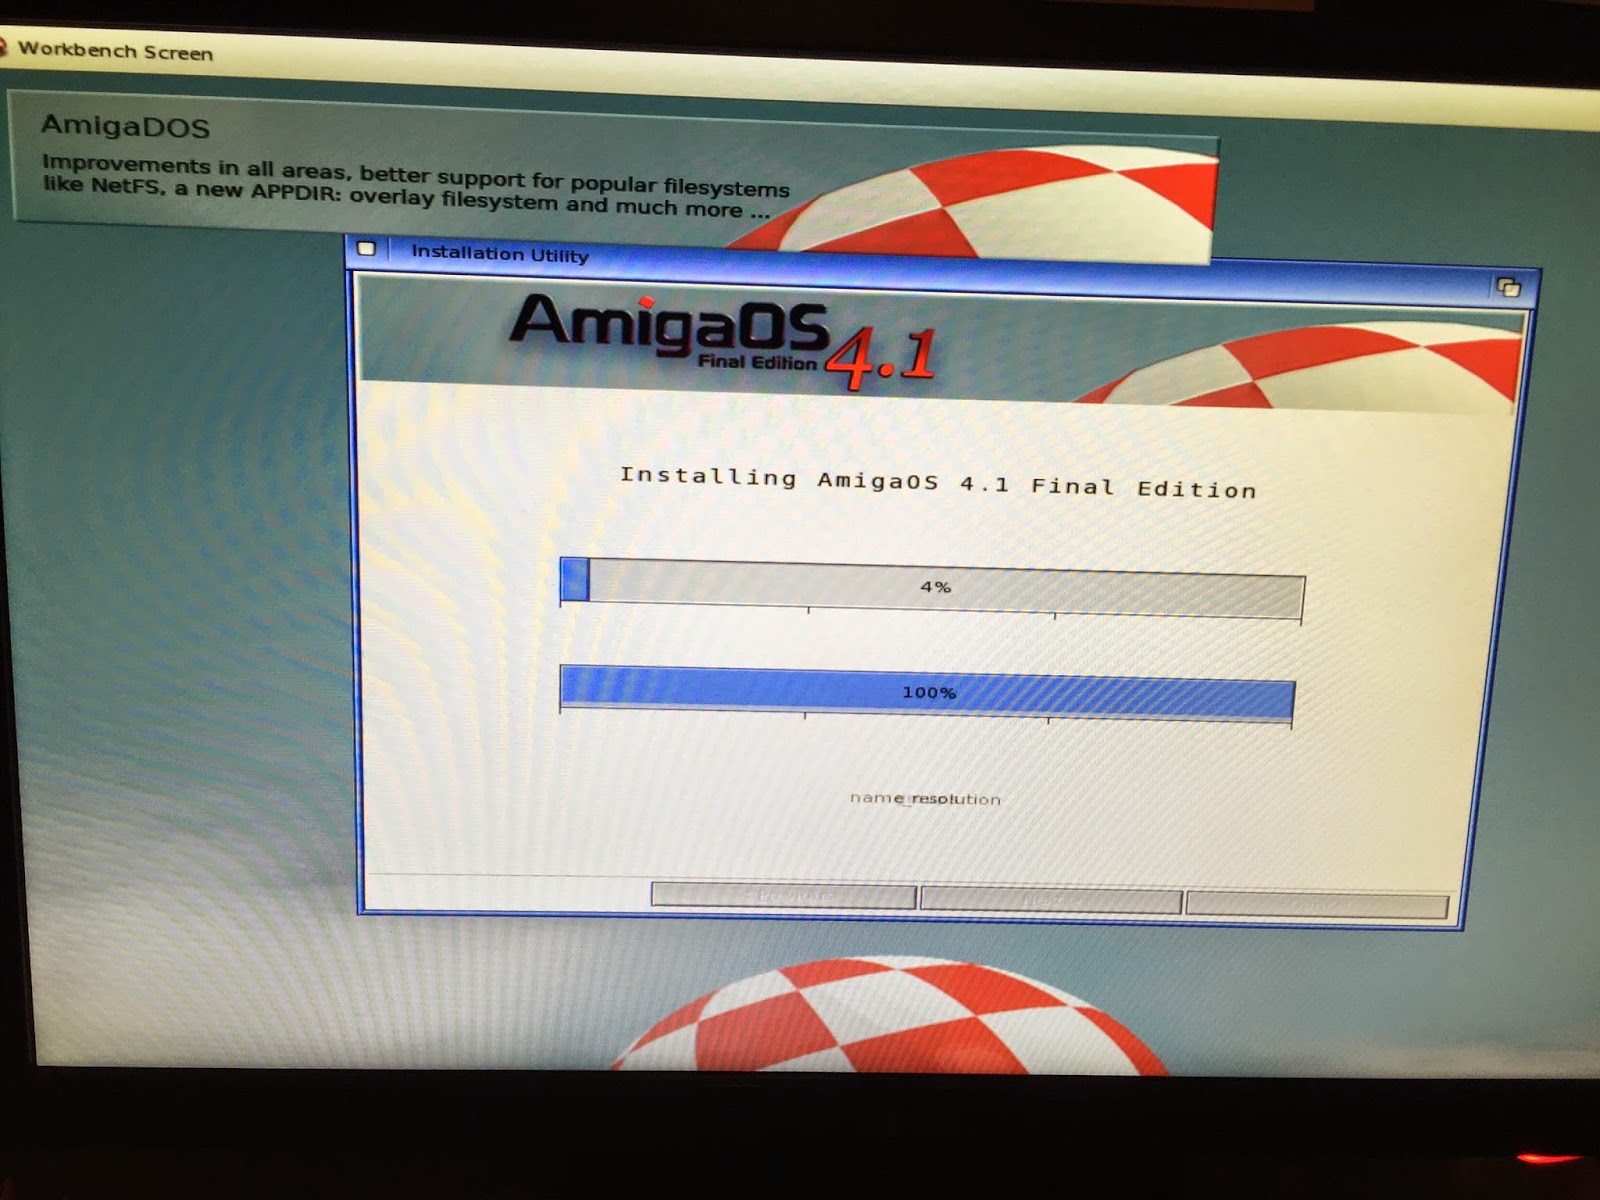
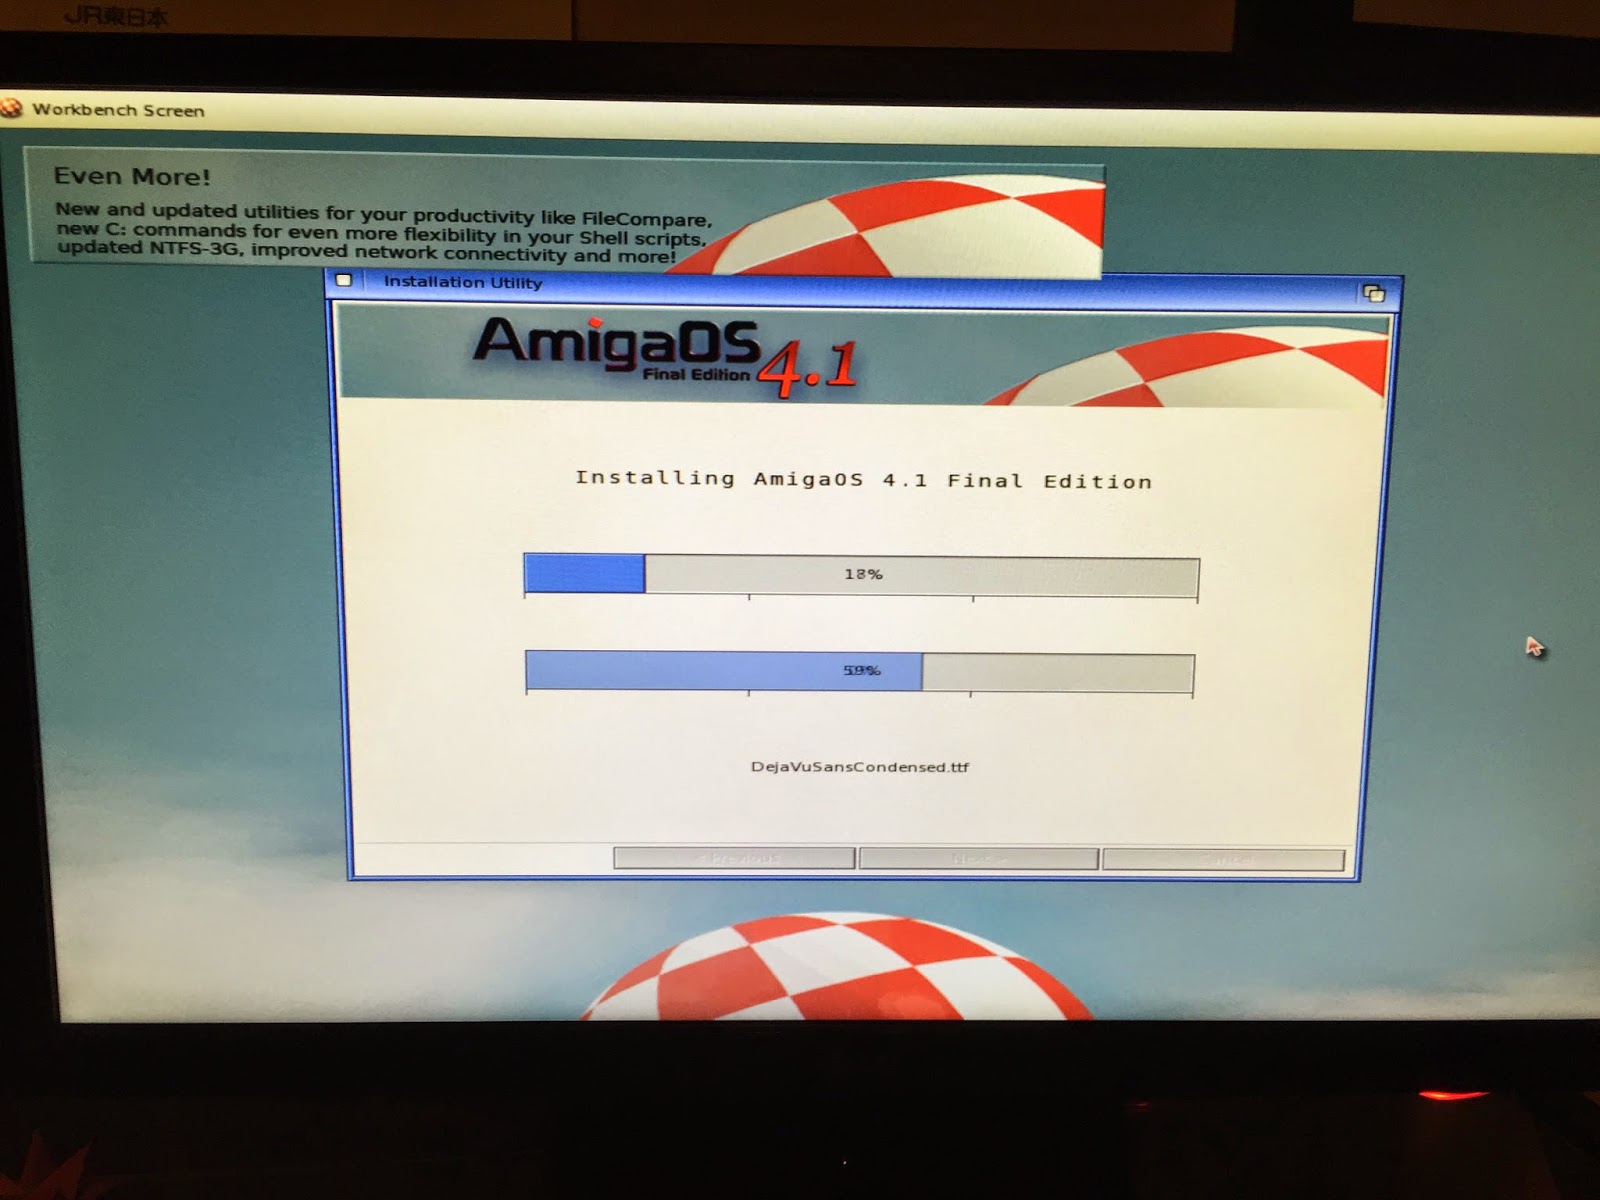
next the installation gets underway - coffee time:
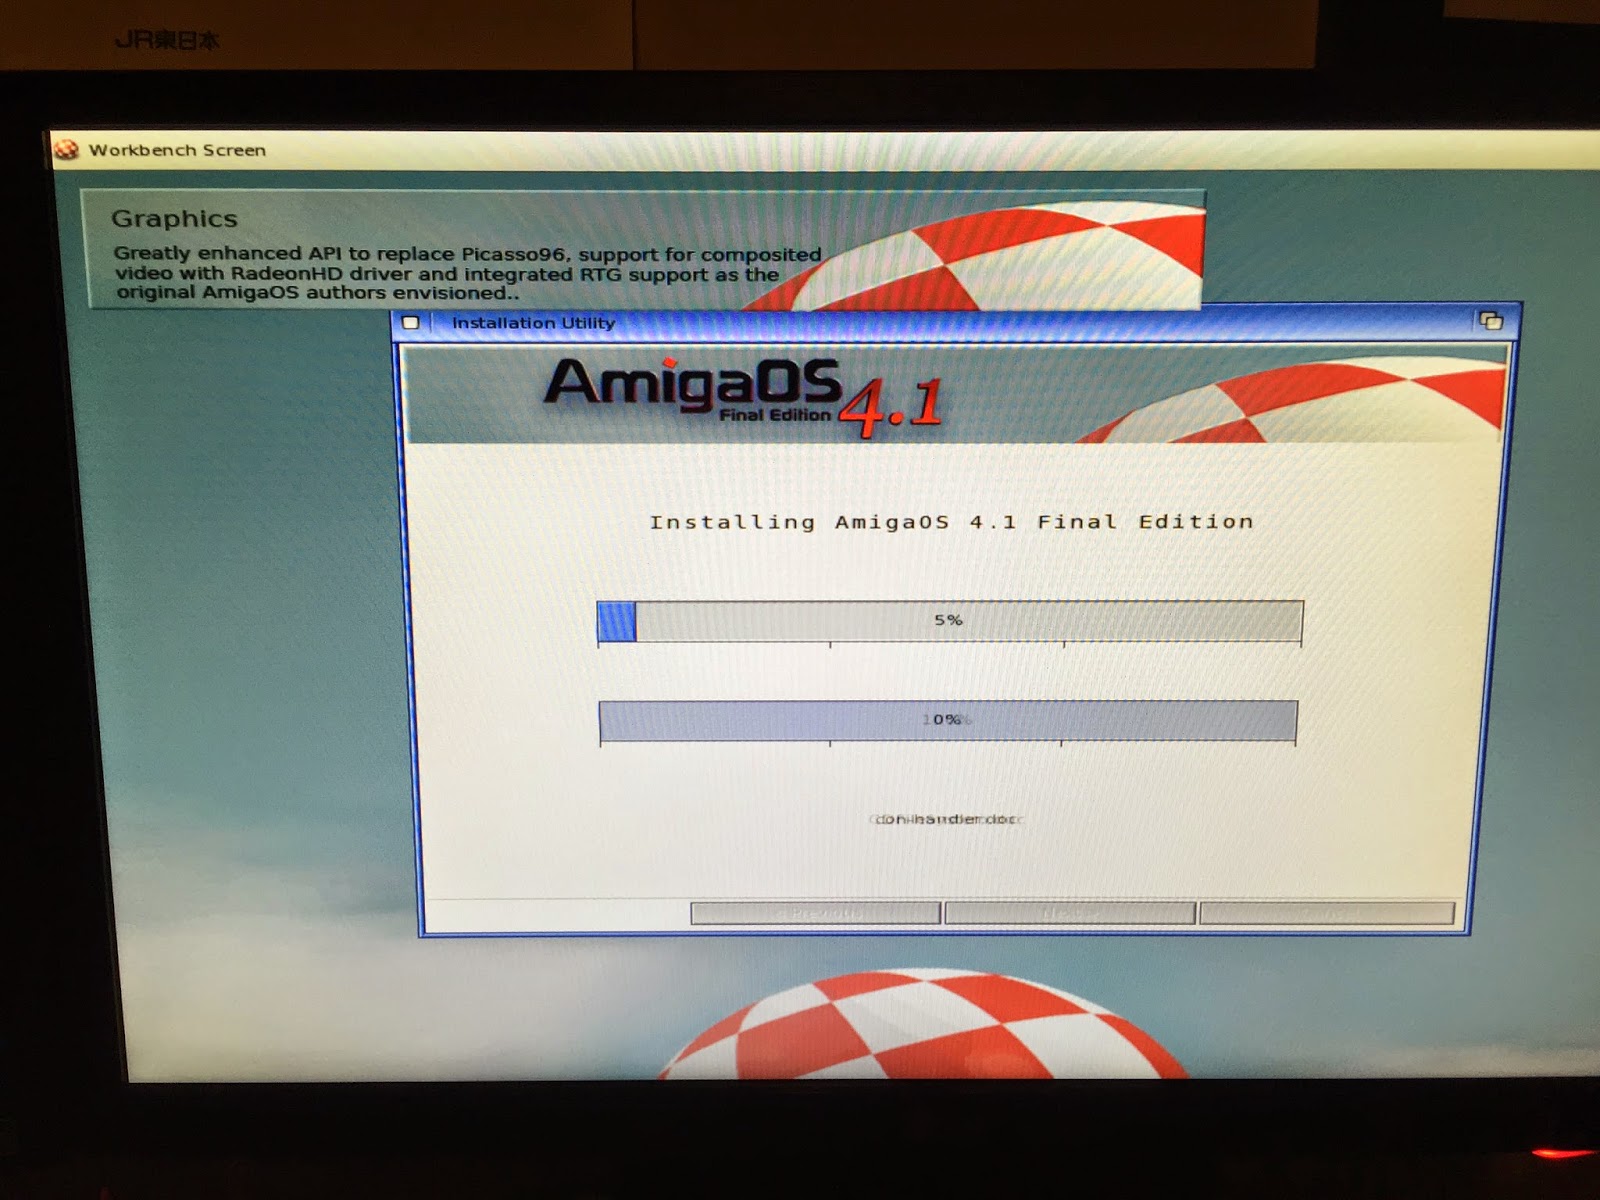
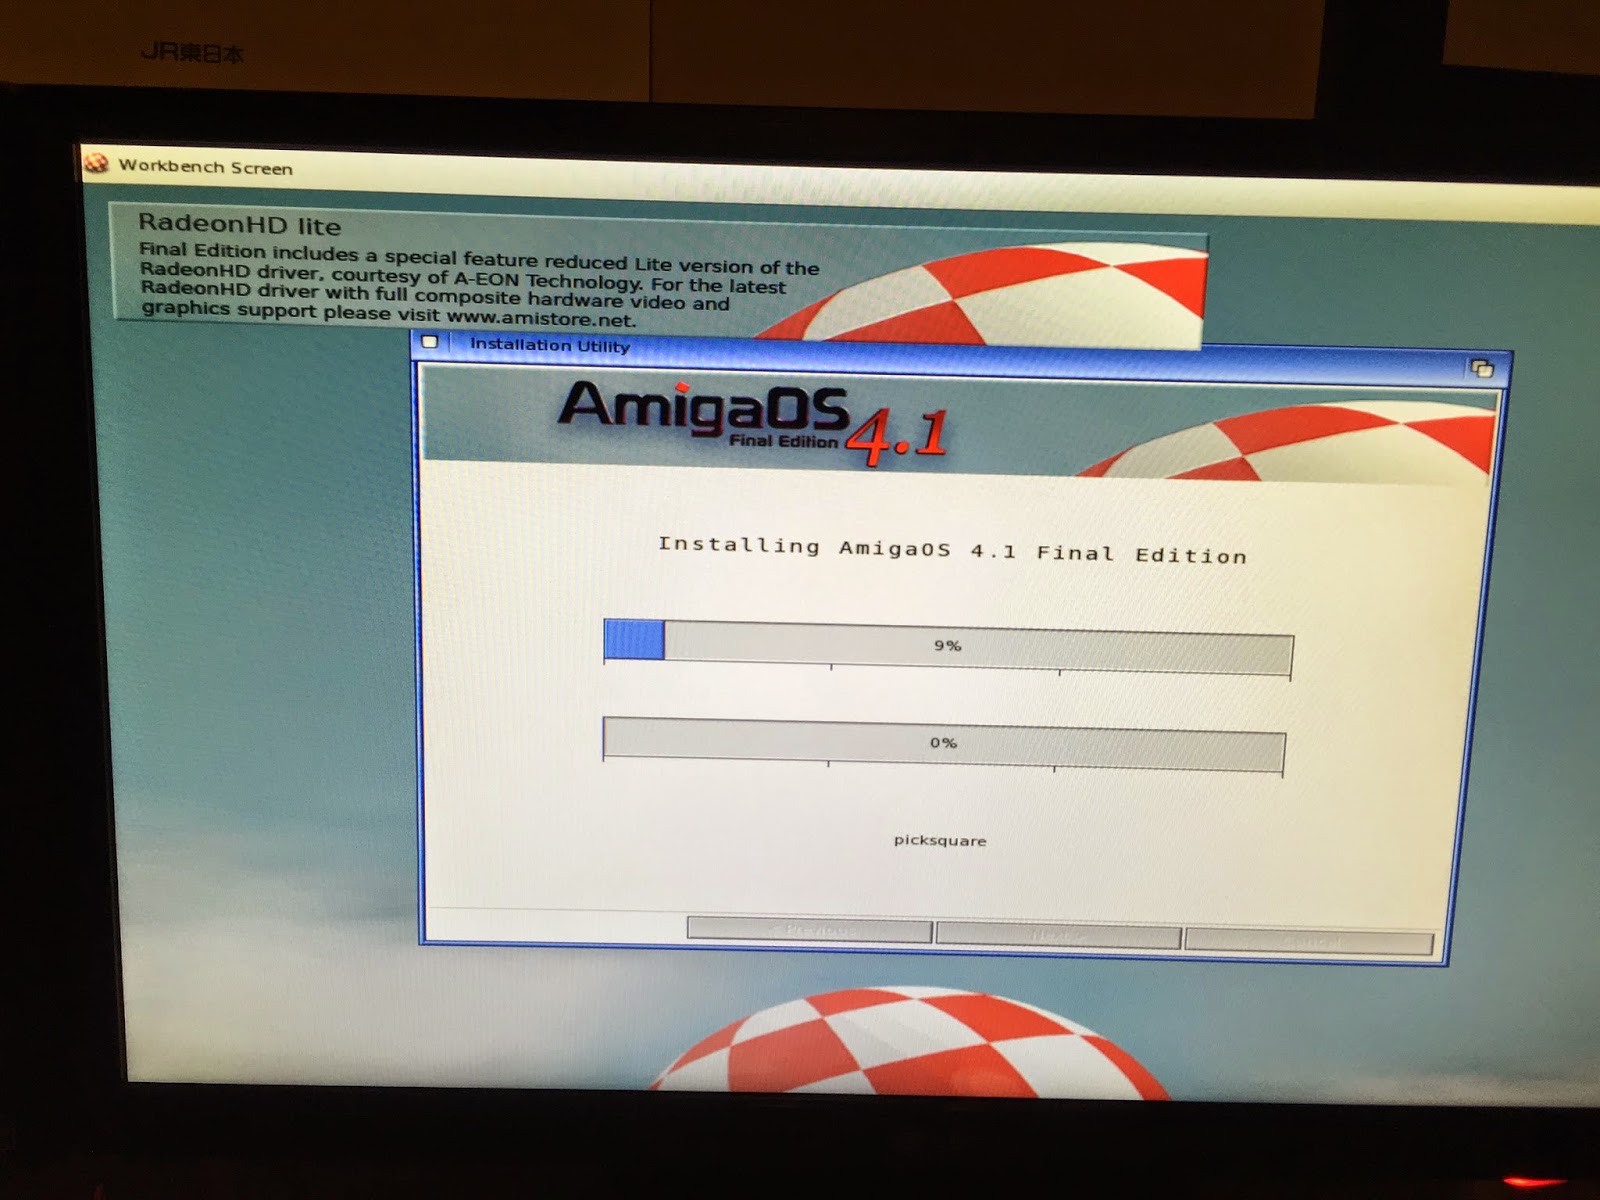
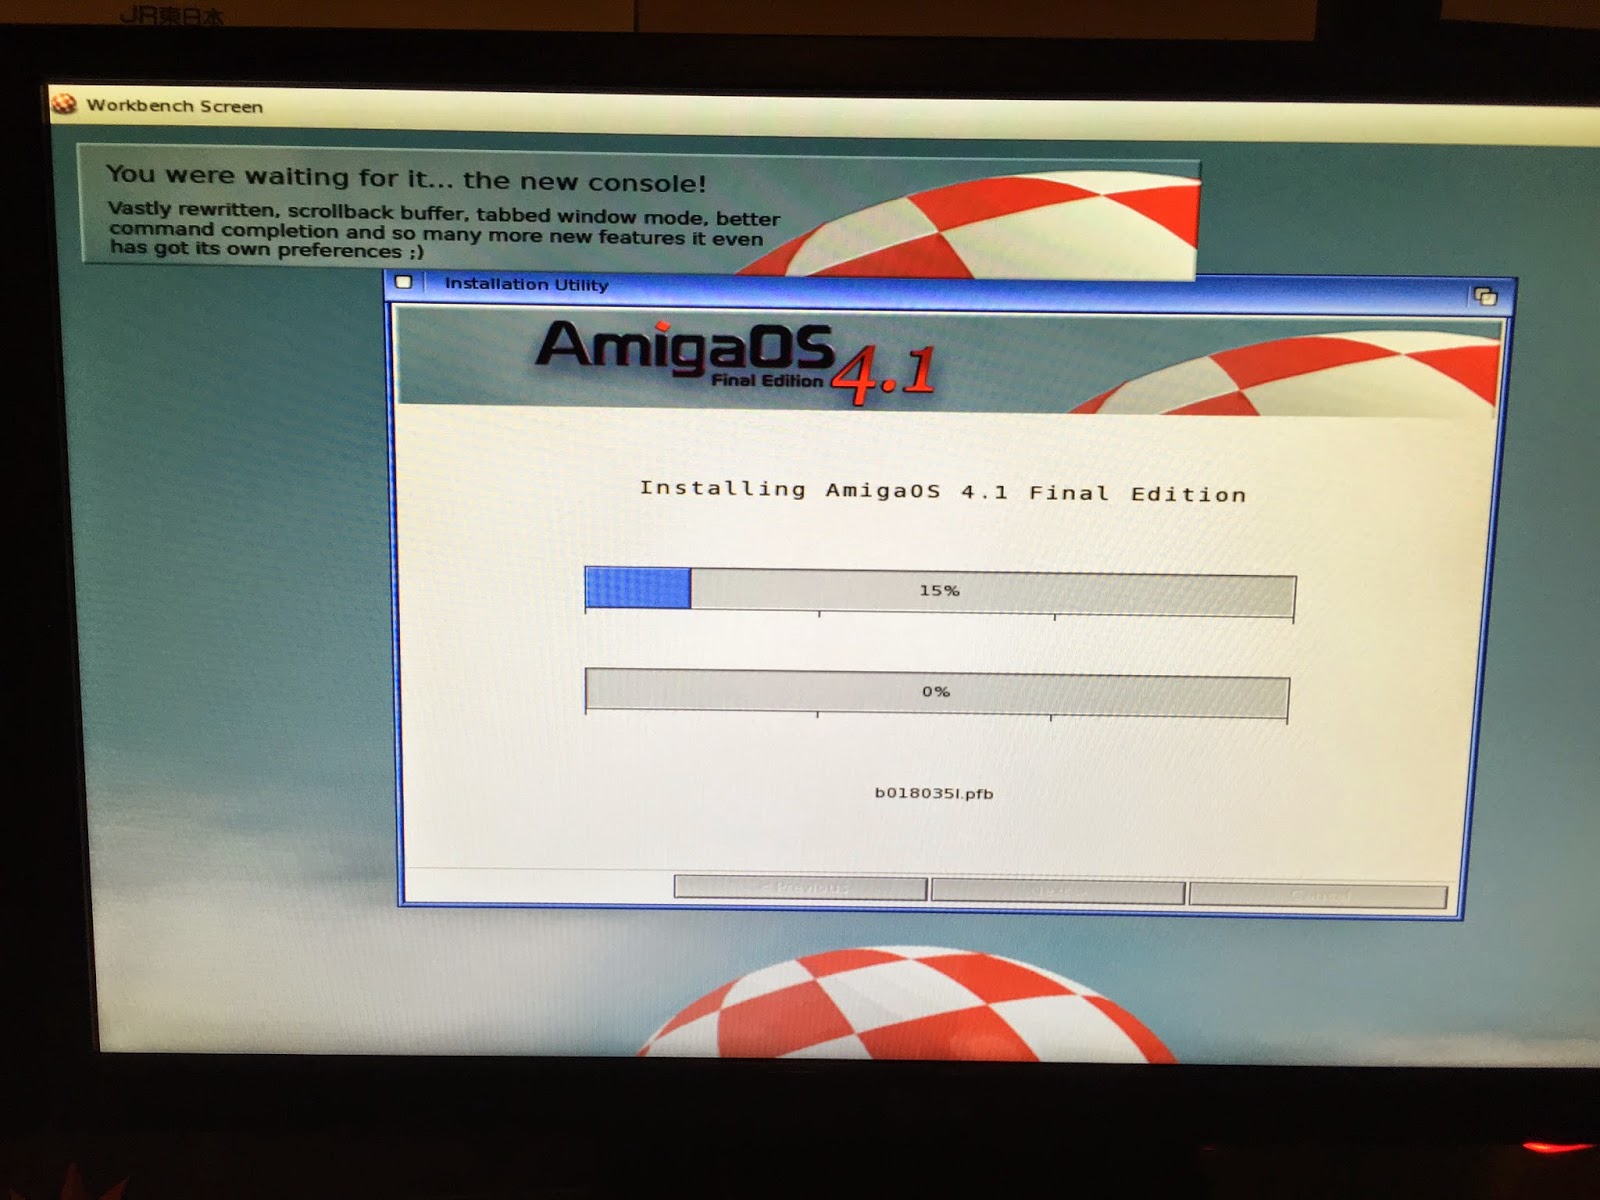
While the installer is running, a small descriptive text changes several times at the top of the screen explaining some of the new features in AmigaOS4.1 Final Edition - starting with AmigaDOS:
Graphics enhancements:
Radeon HD Lite:
Intuition, Workbench and BOOPSI improvements:
Kernel improvements opening up extra memory beyond the 2GB barrier for the first time:
Upgraded Shell:
Other enhancements too:
And a final thank you:
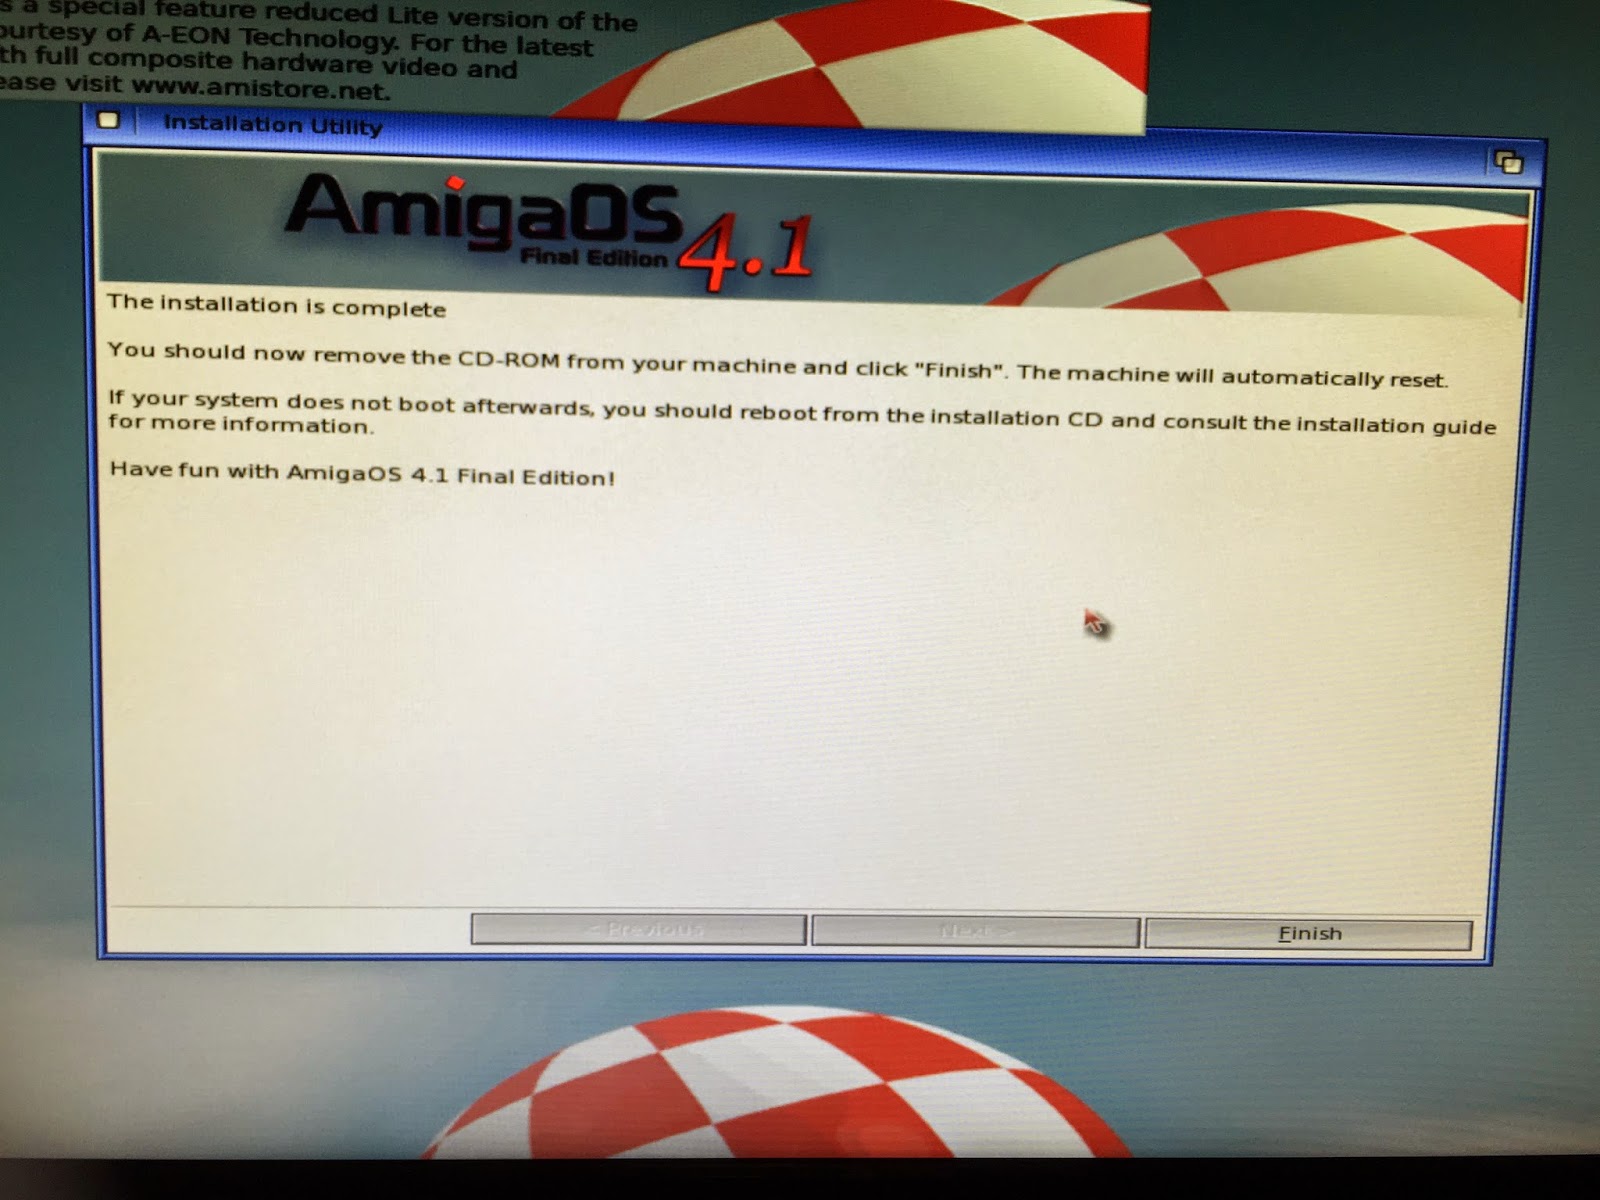
Installation of files and post-install config is now completed successfully:
Click
Next and after a few more things in the background the installation is finished and ready for reboot - with a reminder to
remove the CD from the drive before clicking on
Finish, which reboots the X1000:
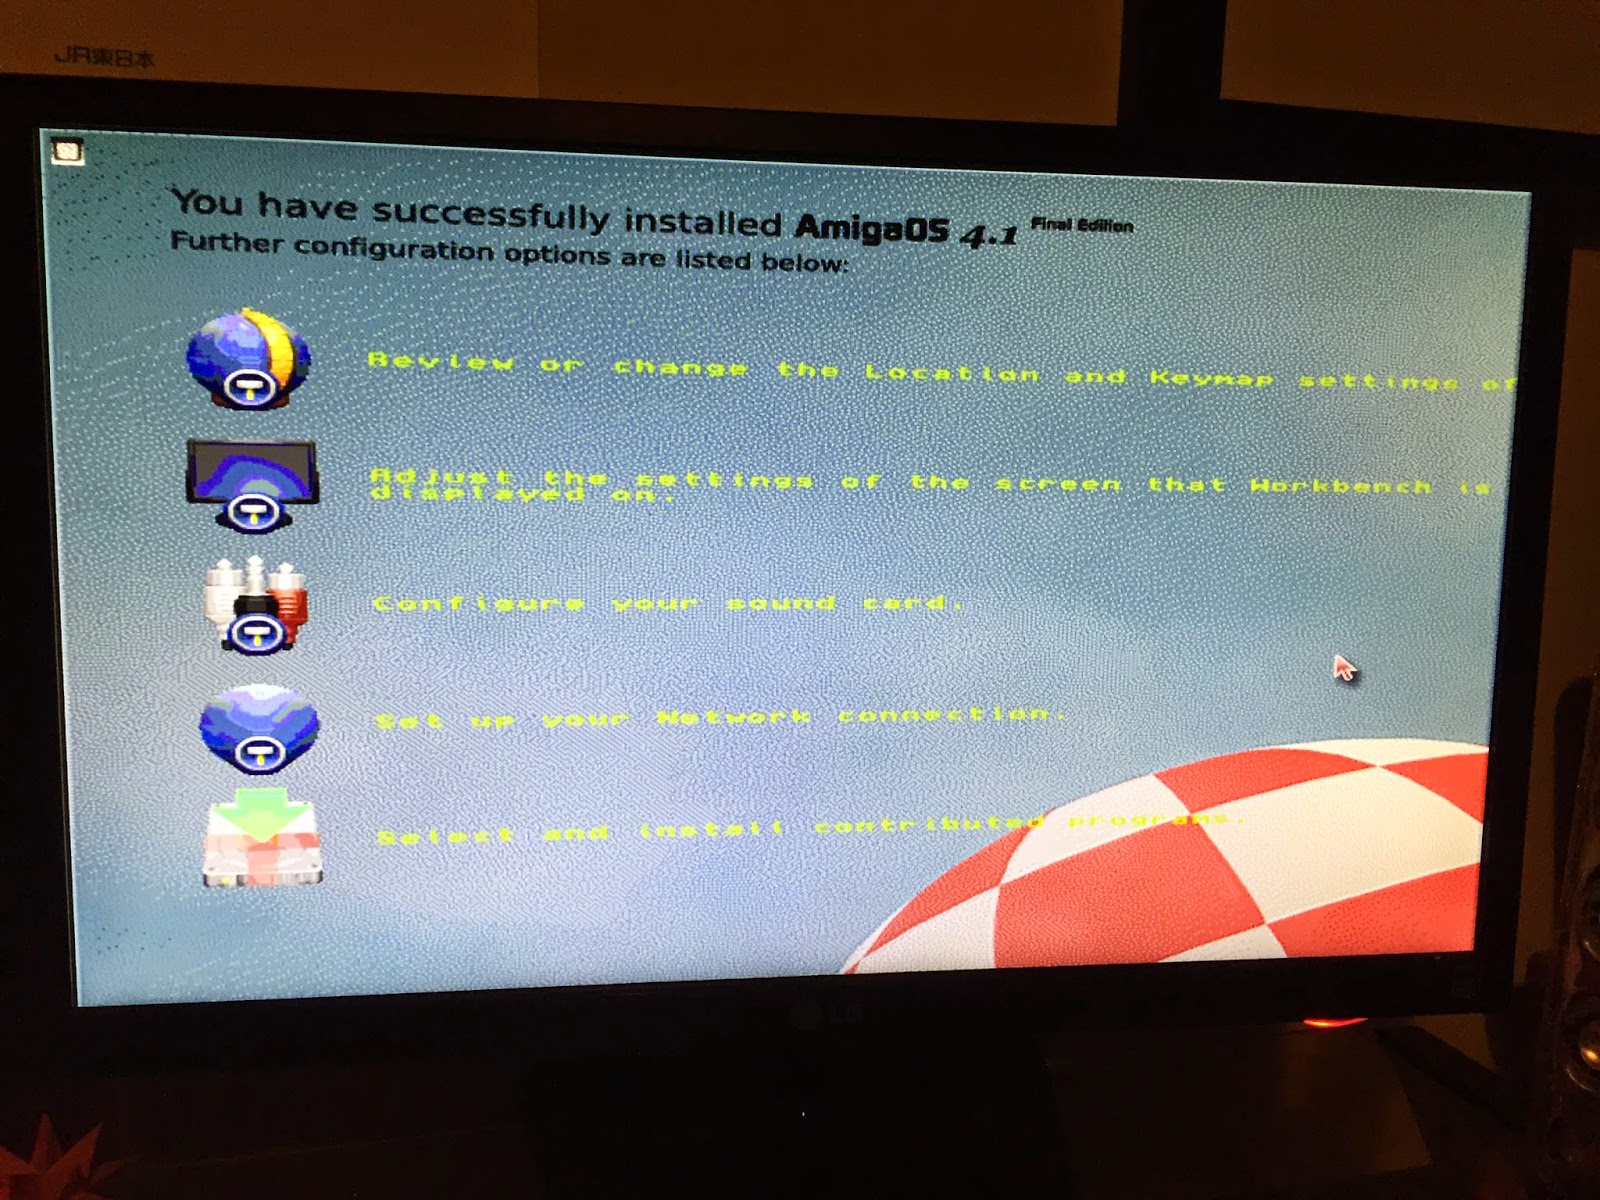
After the Reboot, we see AmigaOS4.1 Final Edition Splash screen:
After that the Workbench appears with a promo for the Radeon HD 2.4 graphics drivers, available to purchase on AmiStore. Seems strange not to include AmiStore with AmigaOS4.1 Final Edition and then promote using it to upgrade the video drivers within the installation!
When you close that window you see the post-install setup screen:
Here you can reconfigure localisations, setup the screenmode for your graphics card, configure sound card, setup the network connection and finally install some of the extra software bundled on the AmigaOS4.1 Final Edition CD (requires the CD to be put back in).
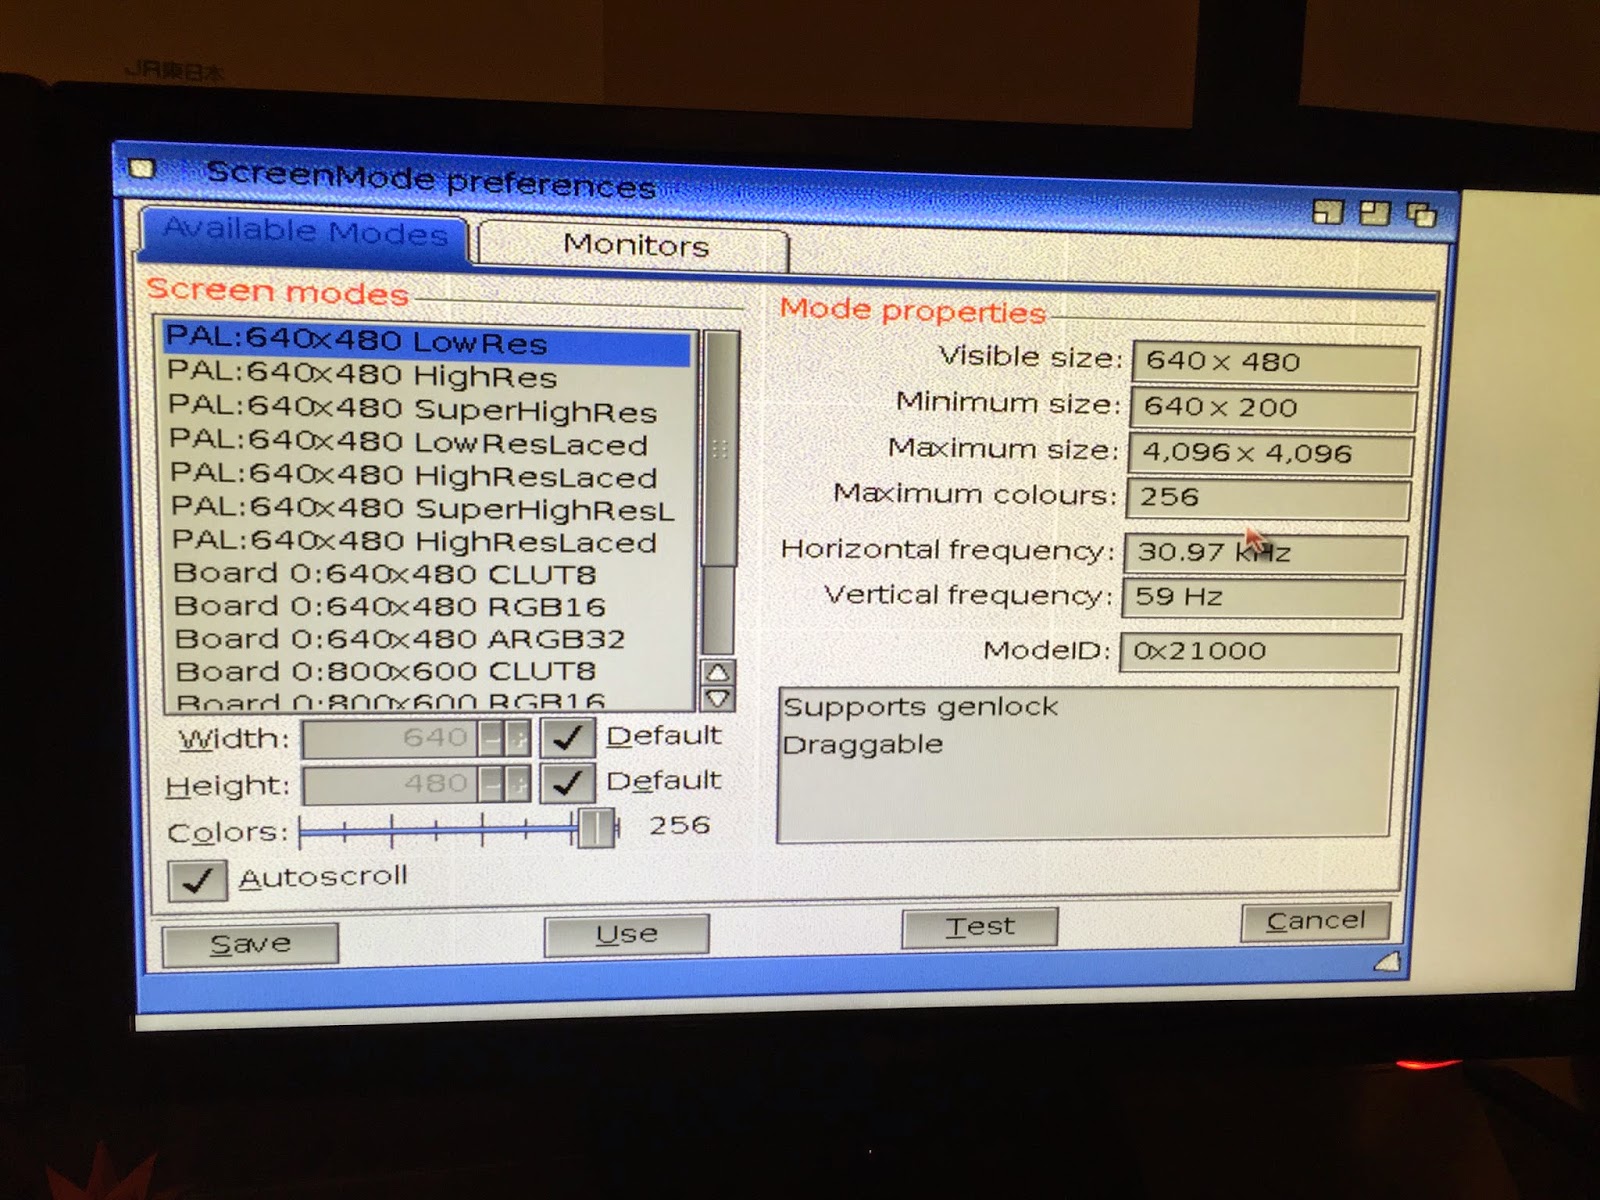
First things first, let's set the screenmode - by default it is
640x480 LowRes so let's fix that:
Scrolling down I note that in AmigaOS4.1 Final Edition the graphics board name has changed from
Radeon R730 to
Board 0. I select the
1024x768 32 bit screen mode as below:
I click on
Test first to make sure the screen mode works correctly - which it does:
I click on
OK, then
Save on the screenmode settings. The screen went away but the screen mode
didn't change - at this stage I was confused why it didn't change (found of why later on), but continued on anyway.
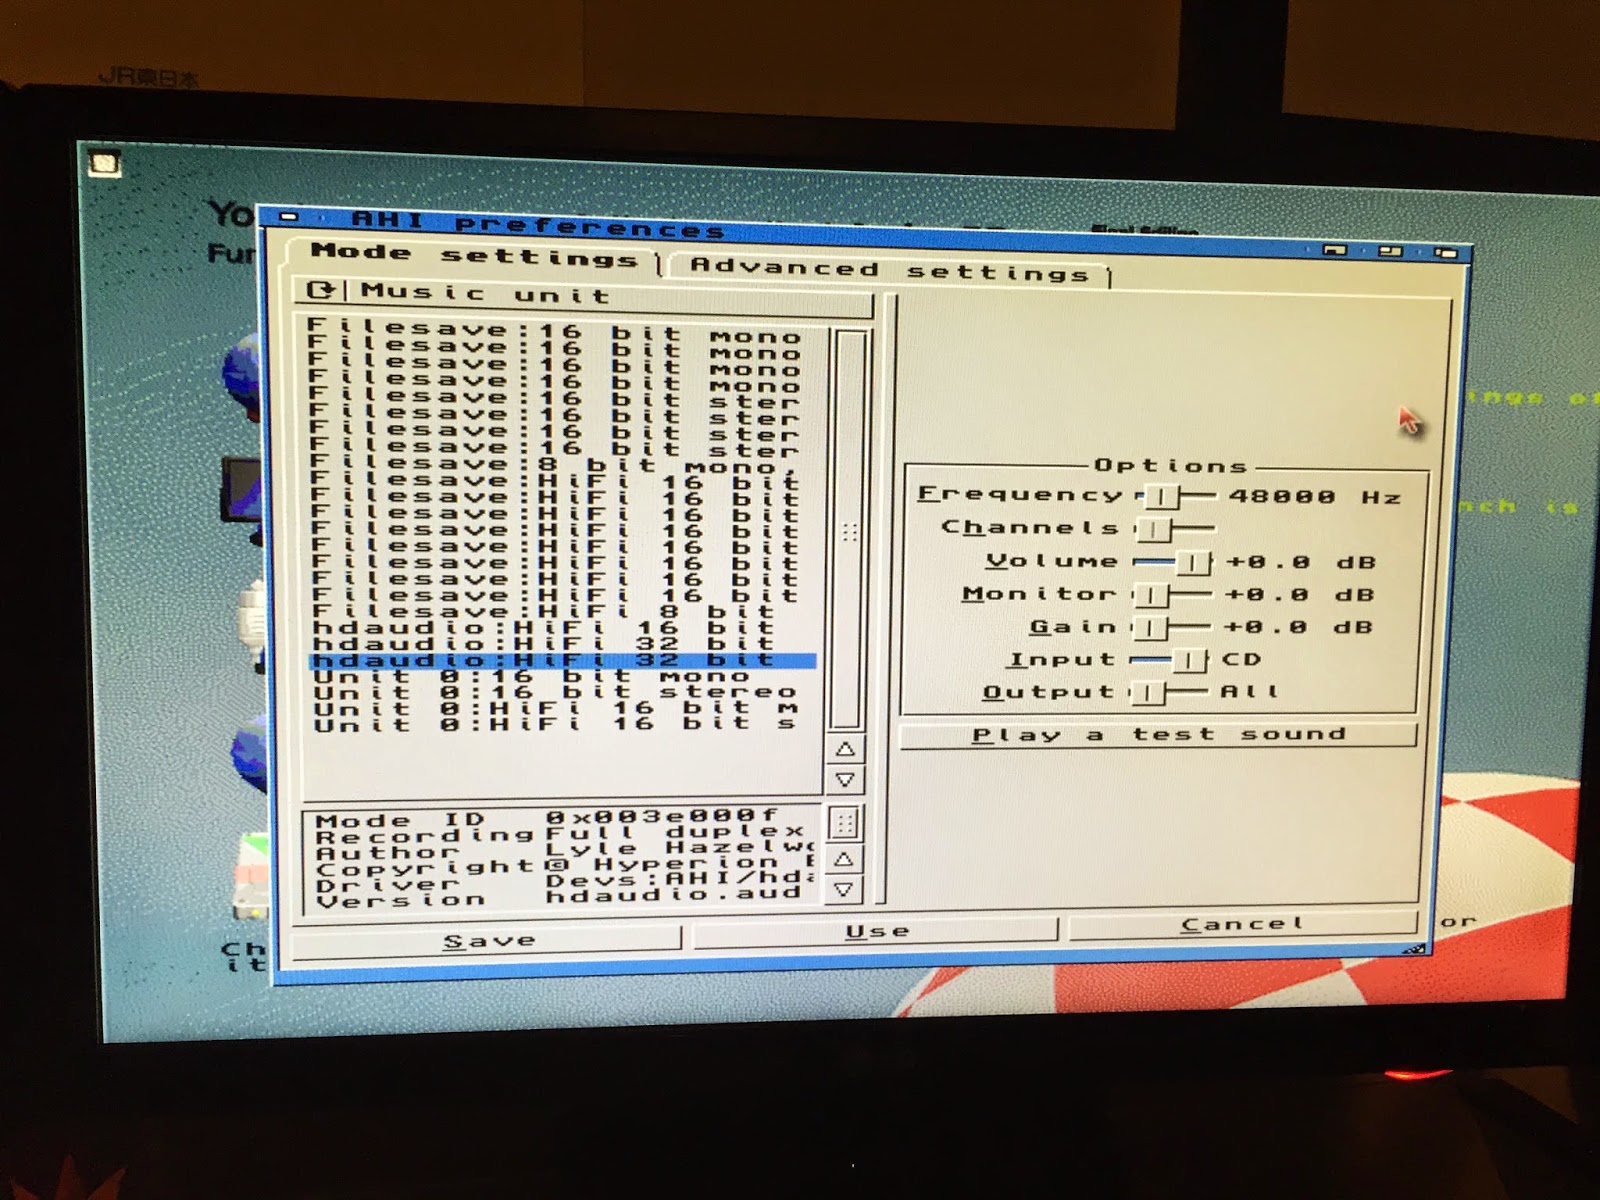
Next post-install option was to configure the Audio - when you select the option the
AHI preferences window comes up. On the X1000 the
internal audio card is used, so just make sure the
hdaudio Hifi 32 bit is selected - then click
Play a test sound to make sure it works, then
Save:
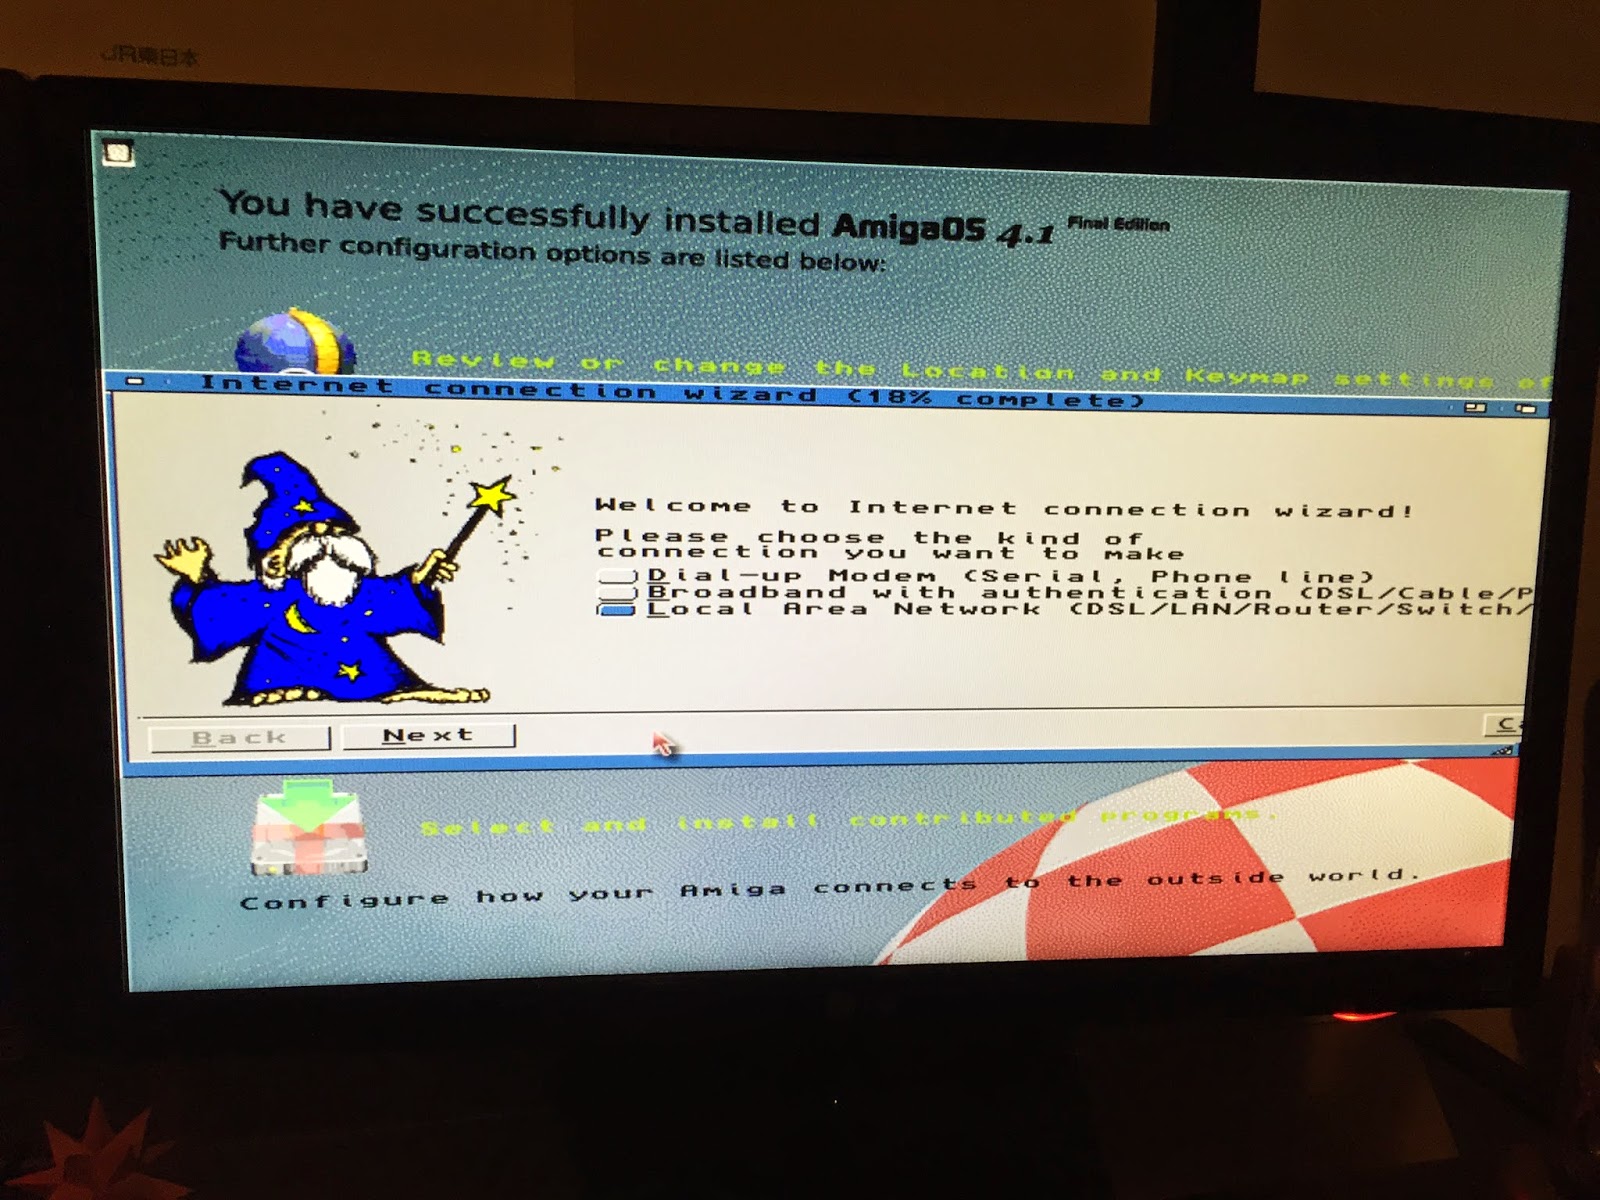
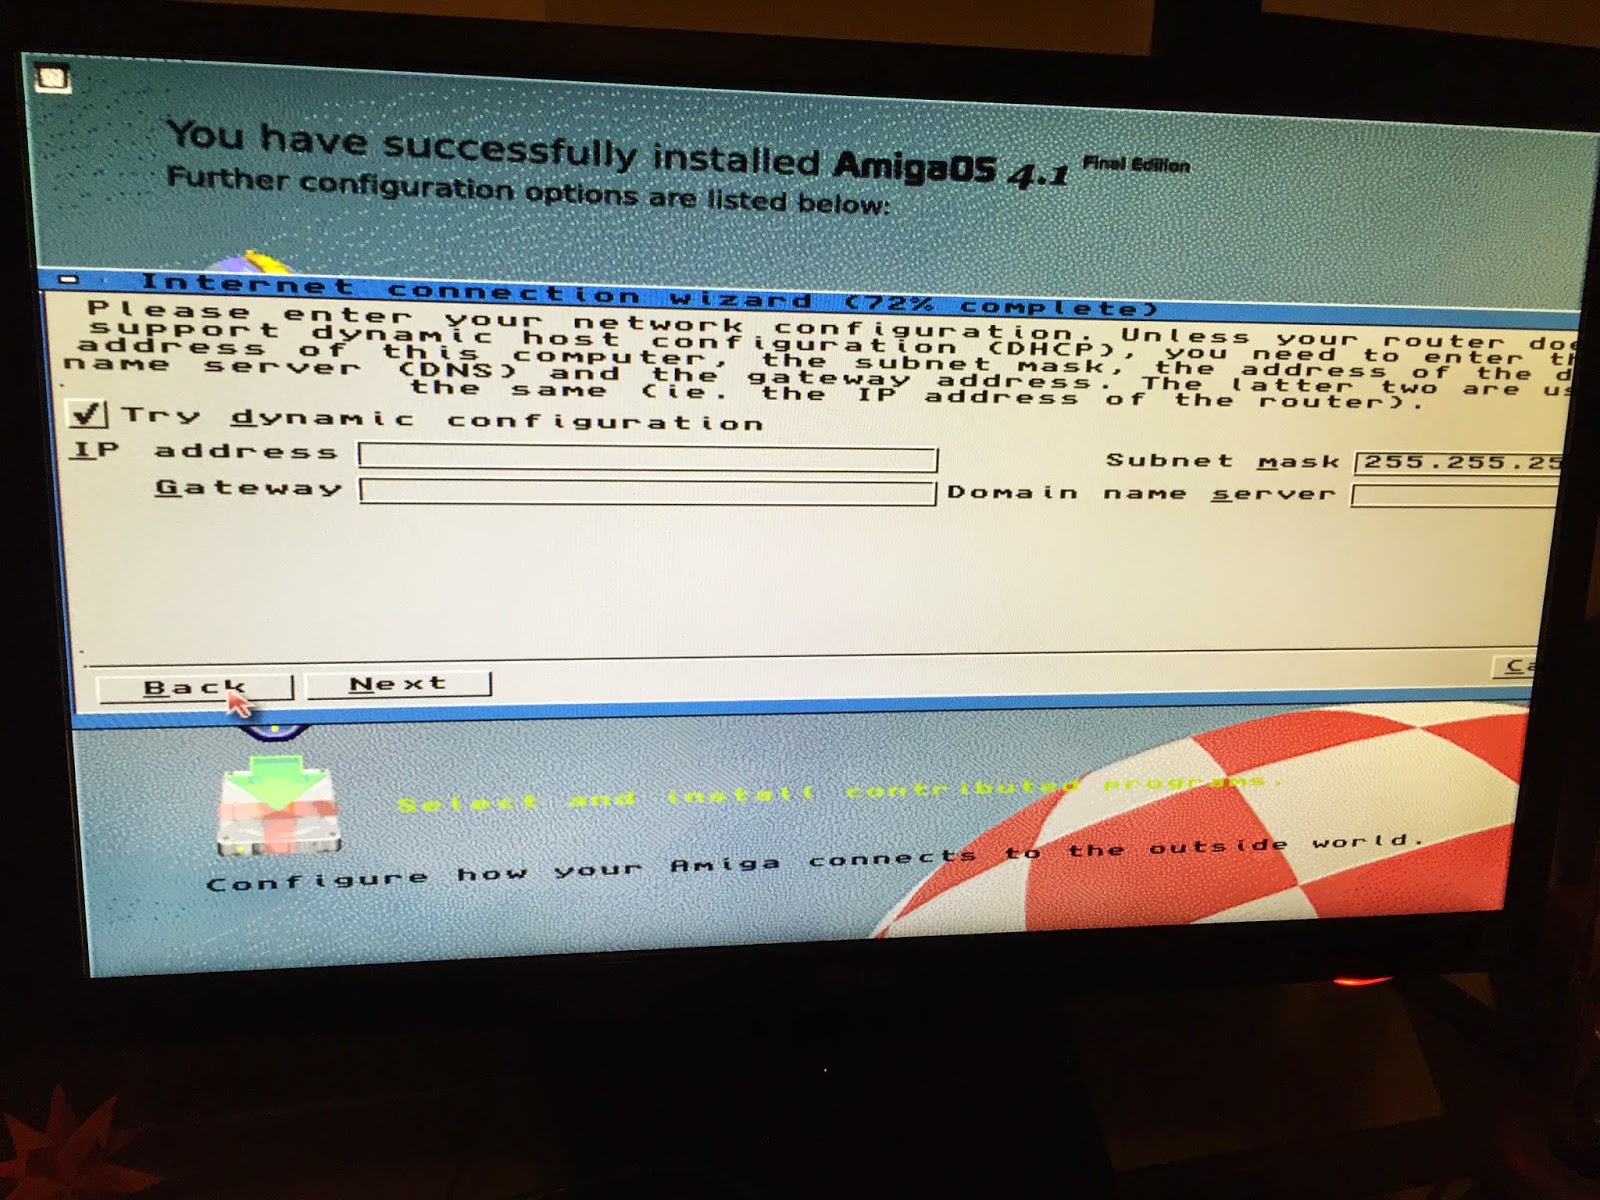
Next up is configuring the Network settings - select the
Local Area Network option and click on
Next:
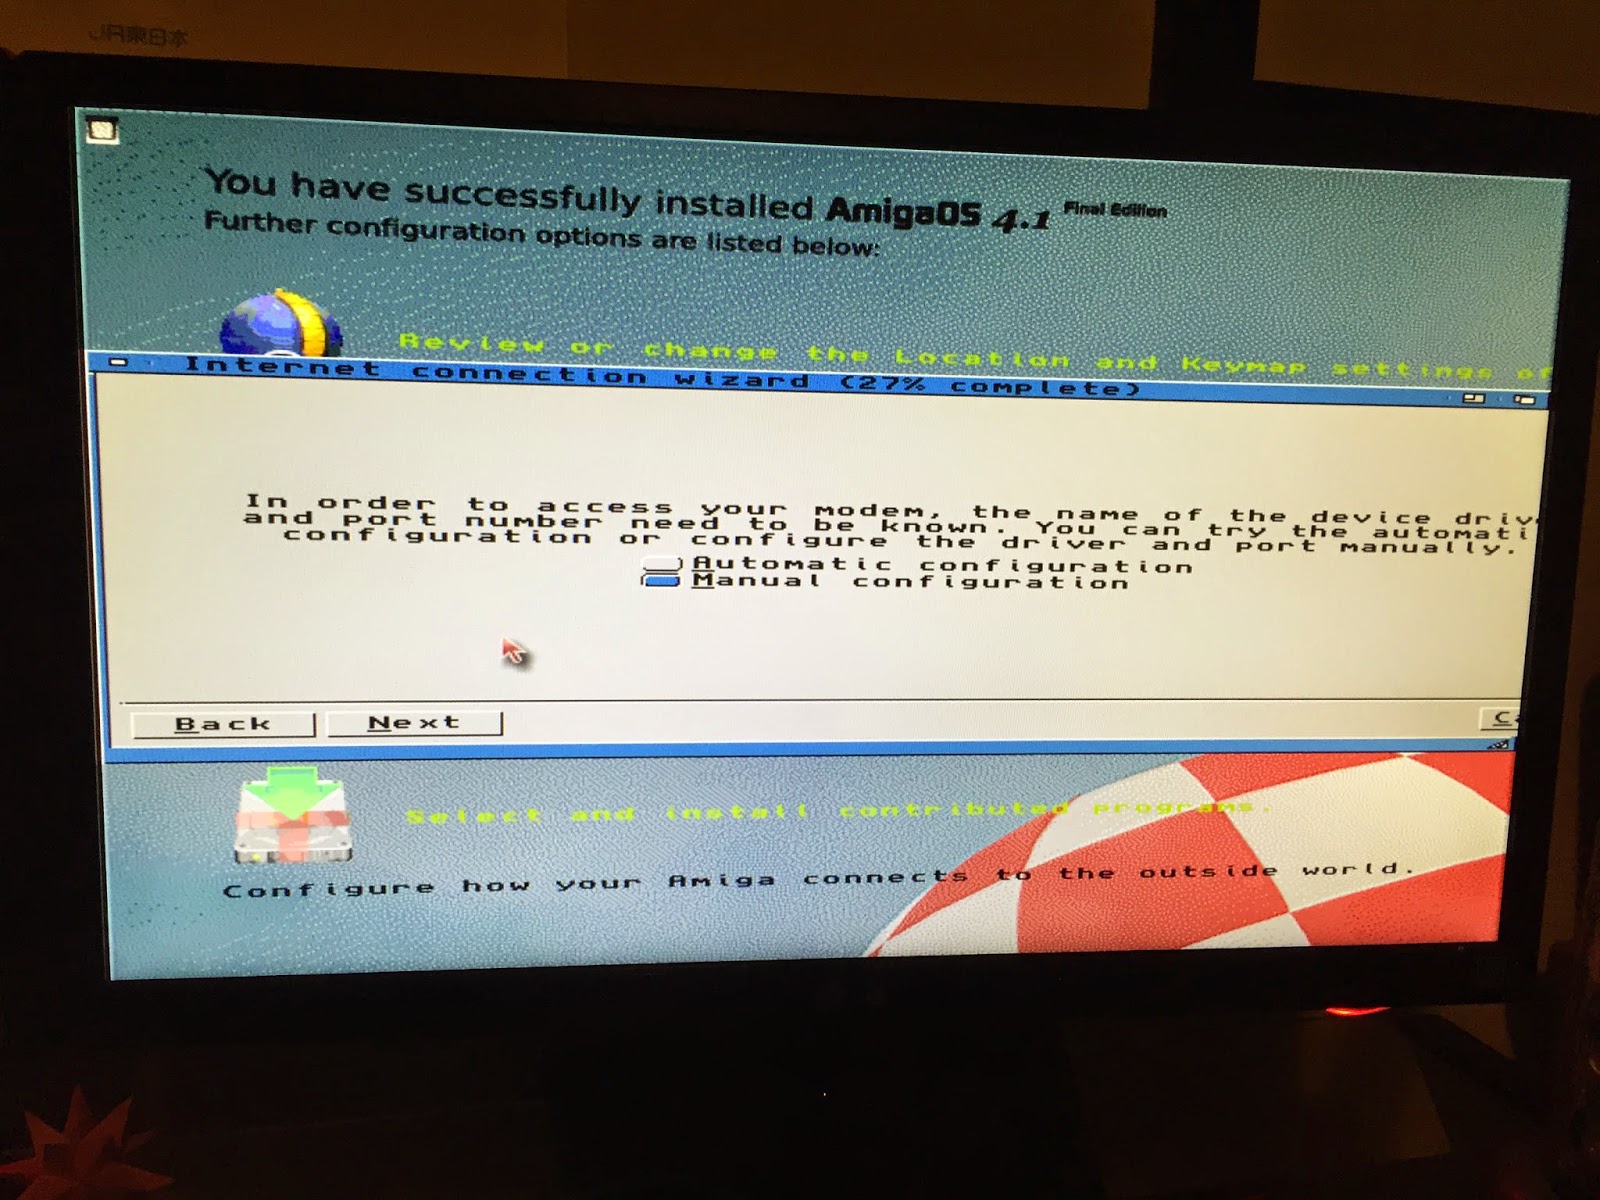
You can do automatic configuration, but I chose to use
manual configuration, and clicked
Next:
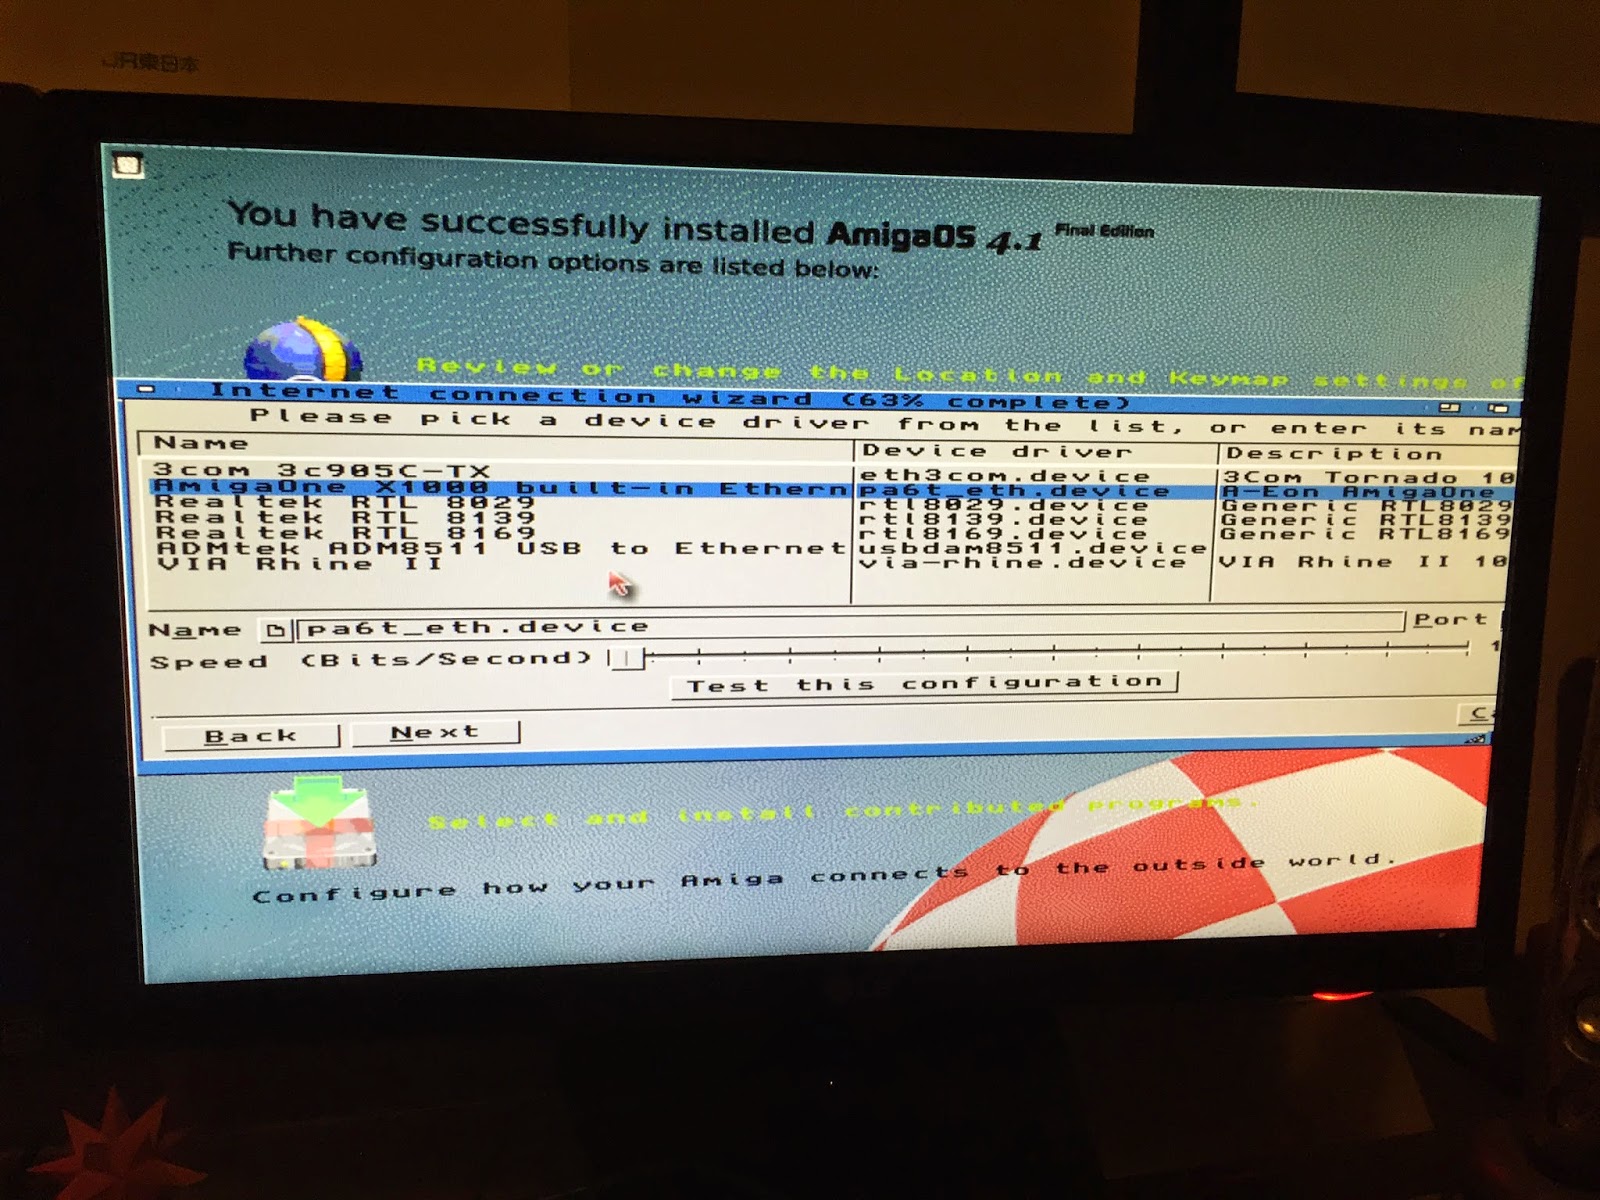
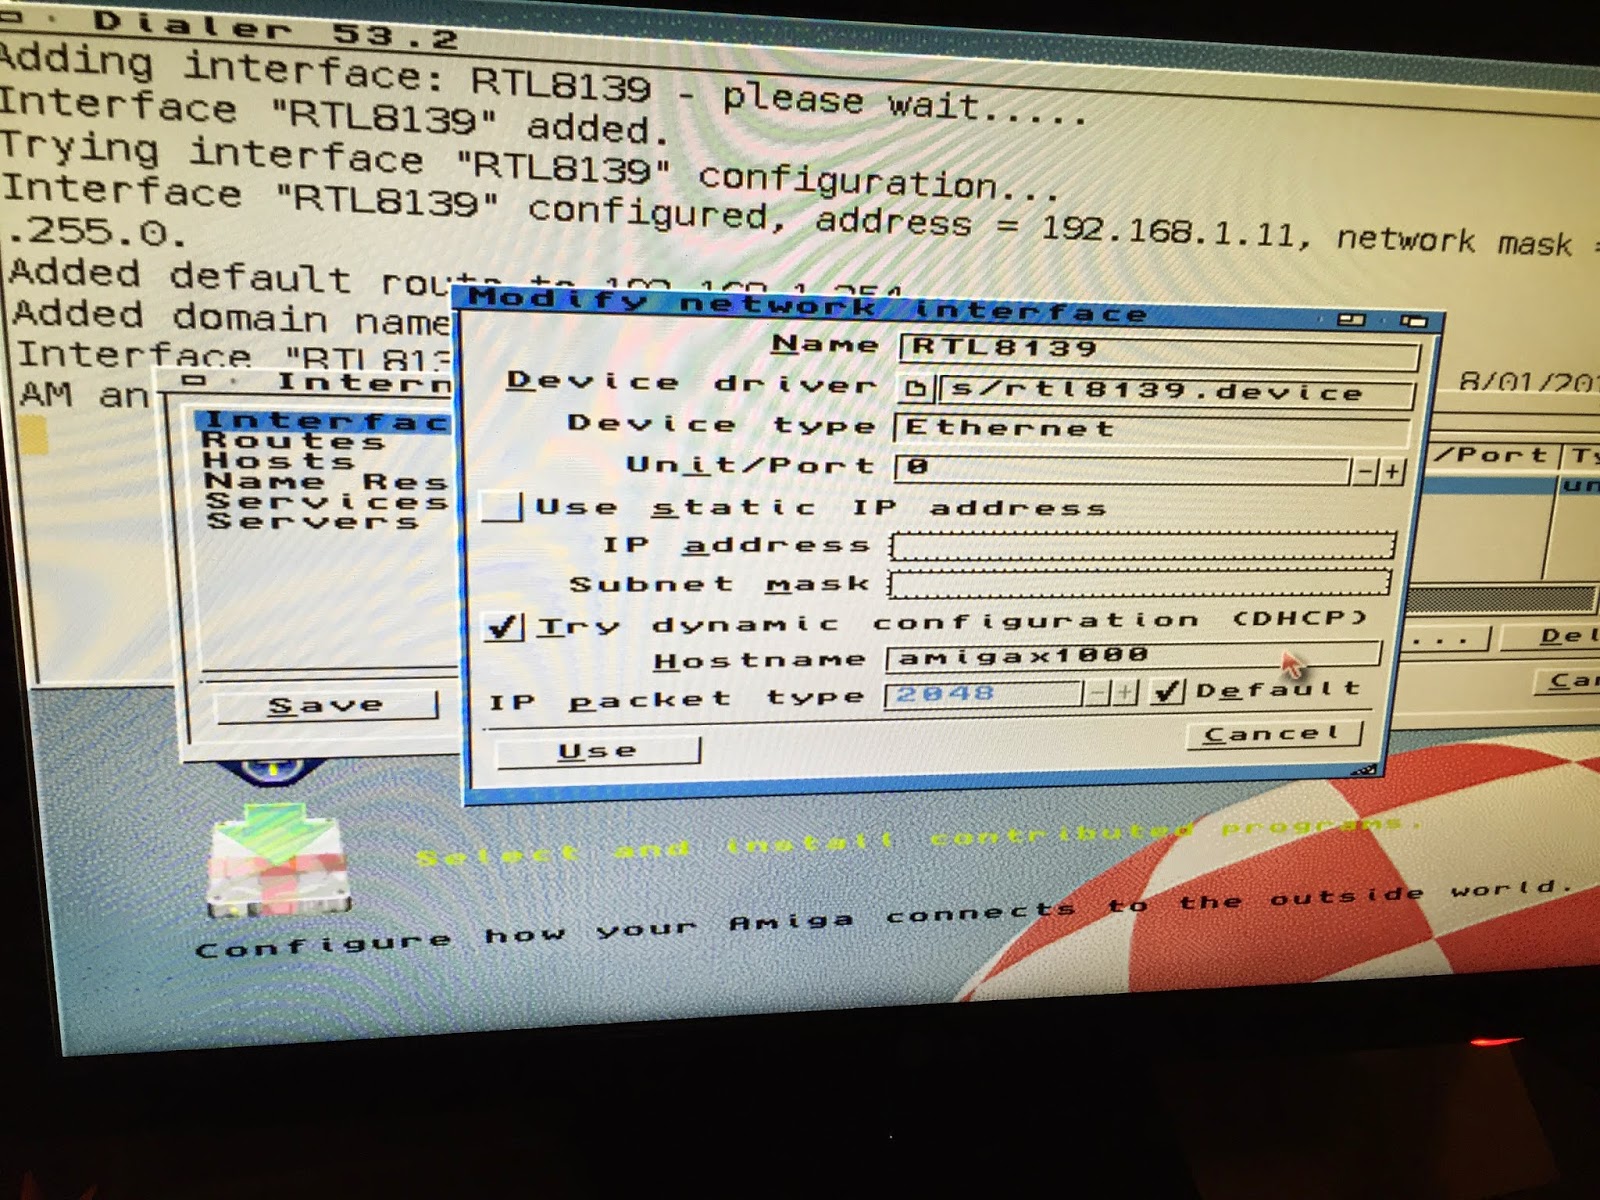
You are then asked to choose your network card. I got a bit excited when I saw that the
built in X1000 network adapter is included as an option (we have to use a PCI network card under AmigaOS4.1.6). I selected the built in adapter and click on
Test this Configuration:
Unfortunately it didn't work - I also subsequently found out the
built-in network driver has dropout issues and shouldn't be used by X1000 owners at this time.So, I went and selected the
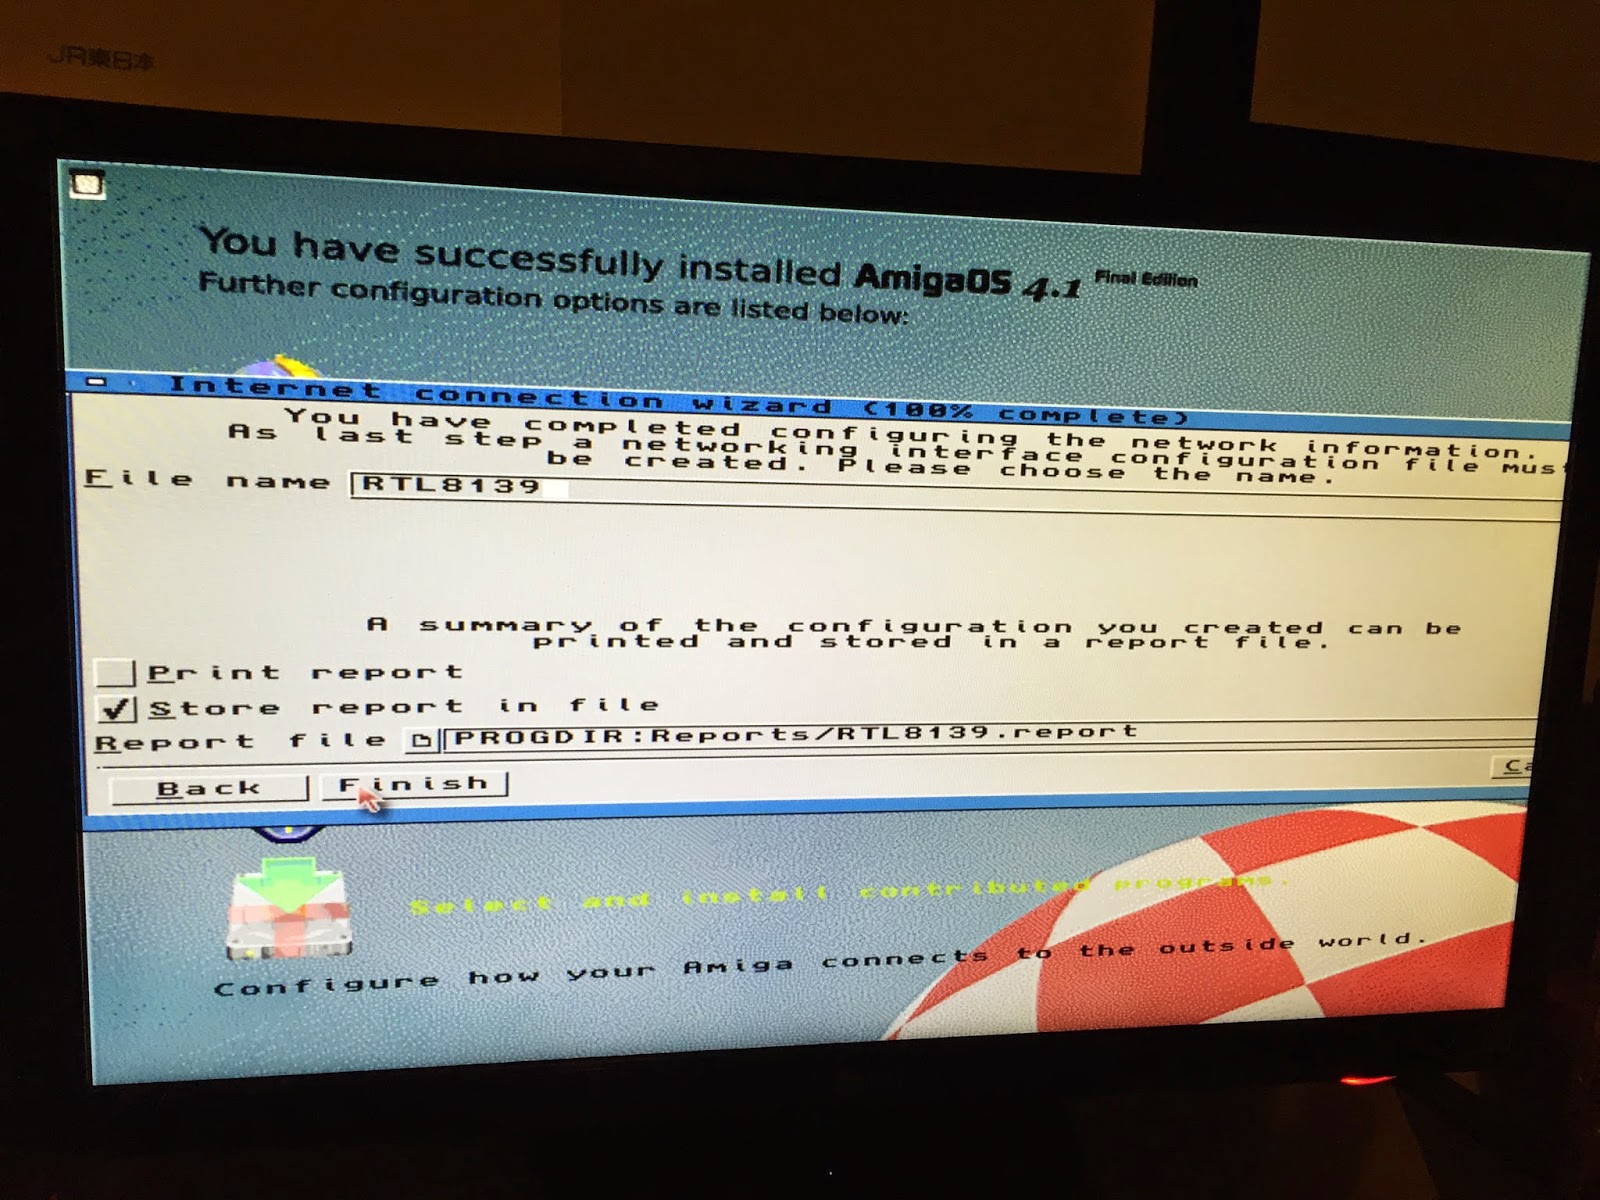
RTL 8139 PCI network adapter in my X1000 (as I used in AmigaOS4.1.6):
I tested the configuration again, and success - it found the card:
After clicking on
Next, I then got the screen to specify
DHCP or
static IP Address for my X1000. I chose
DHCP and clicked
Next:
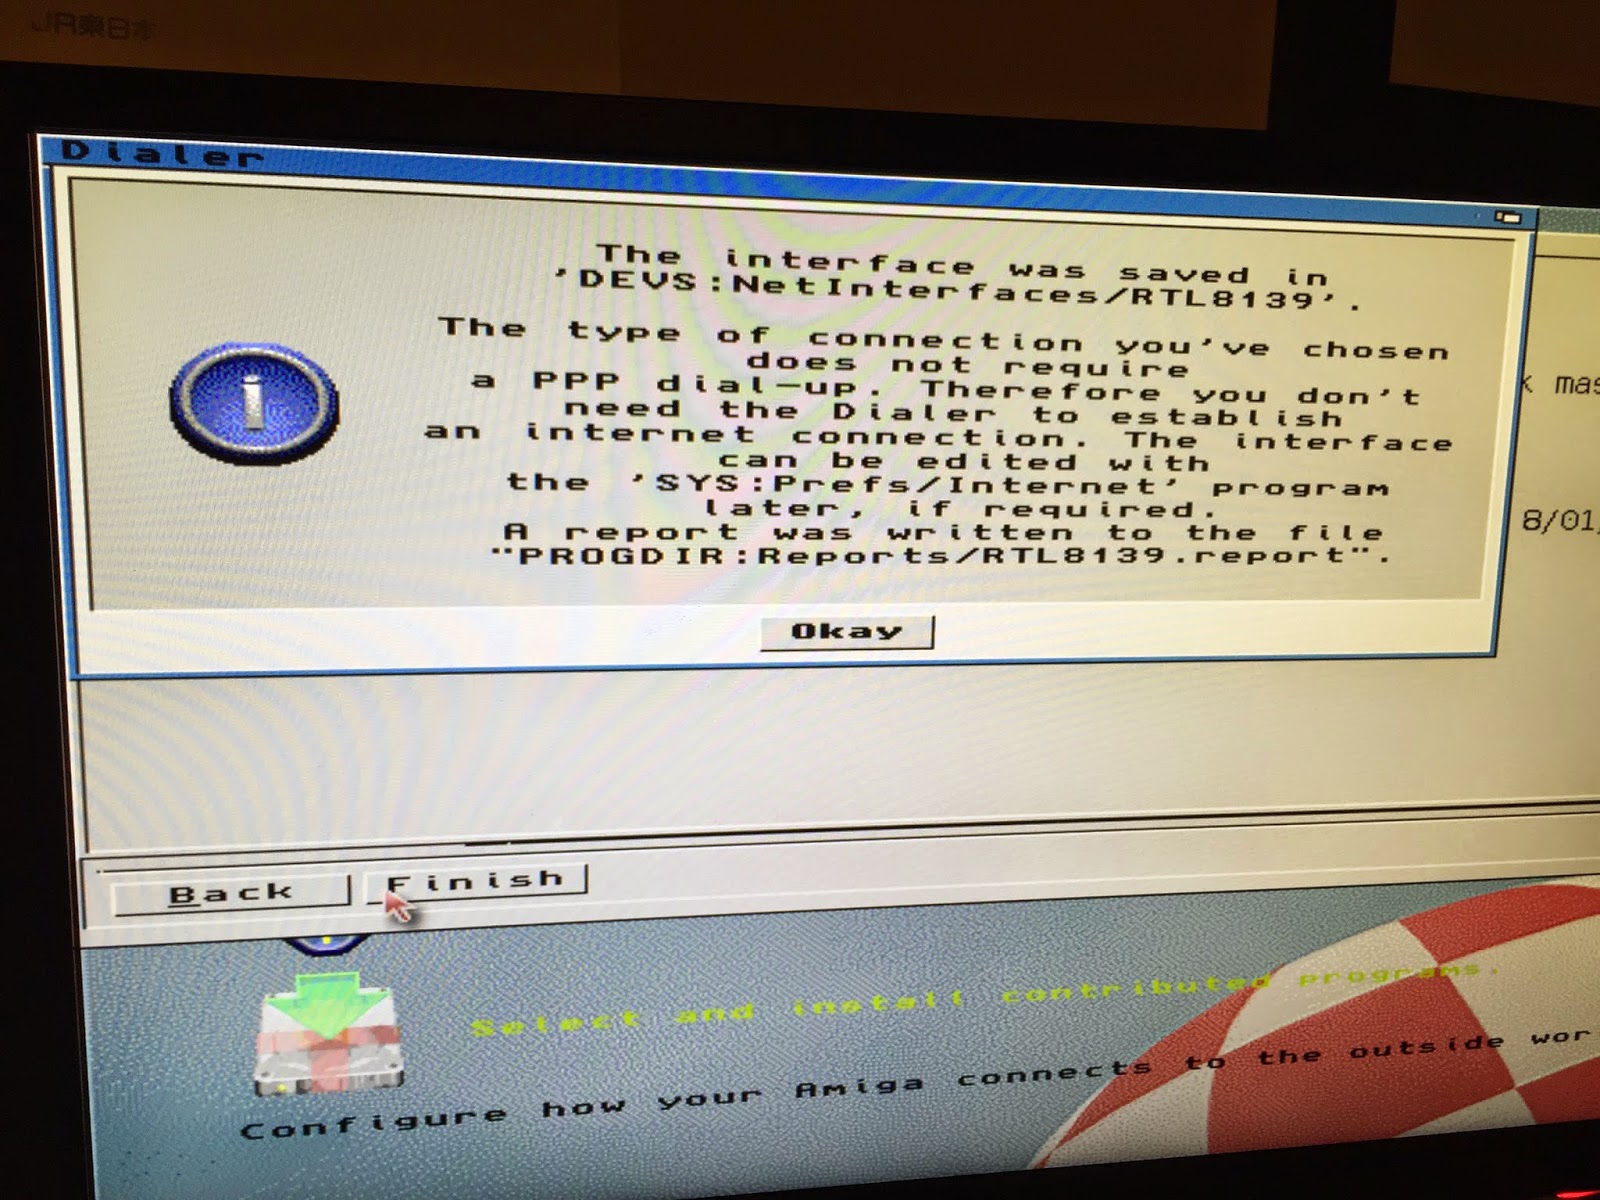
It asks for a filename for the Configuration - I named it the same as the Network Adapter for easy future reference, and clicked on
Finish:
Next the network initialises:
An information screen appears when this is done saying the configuration is done, I clicked on
Okay:
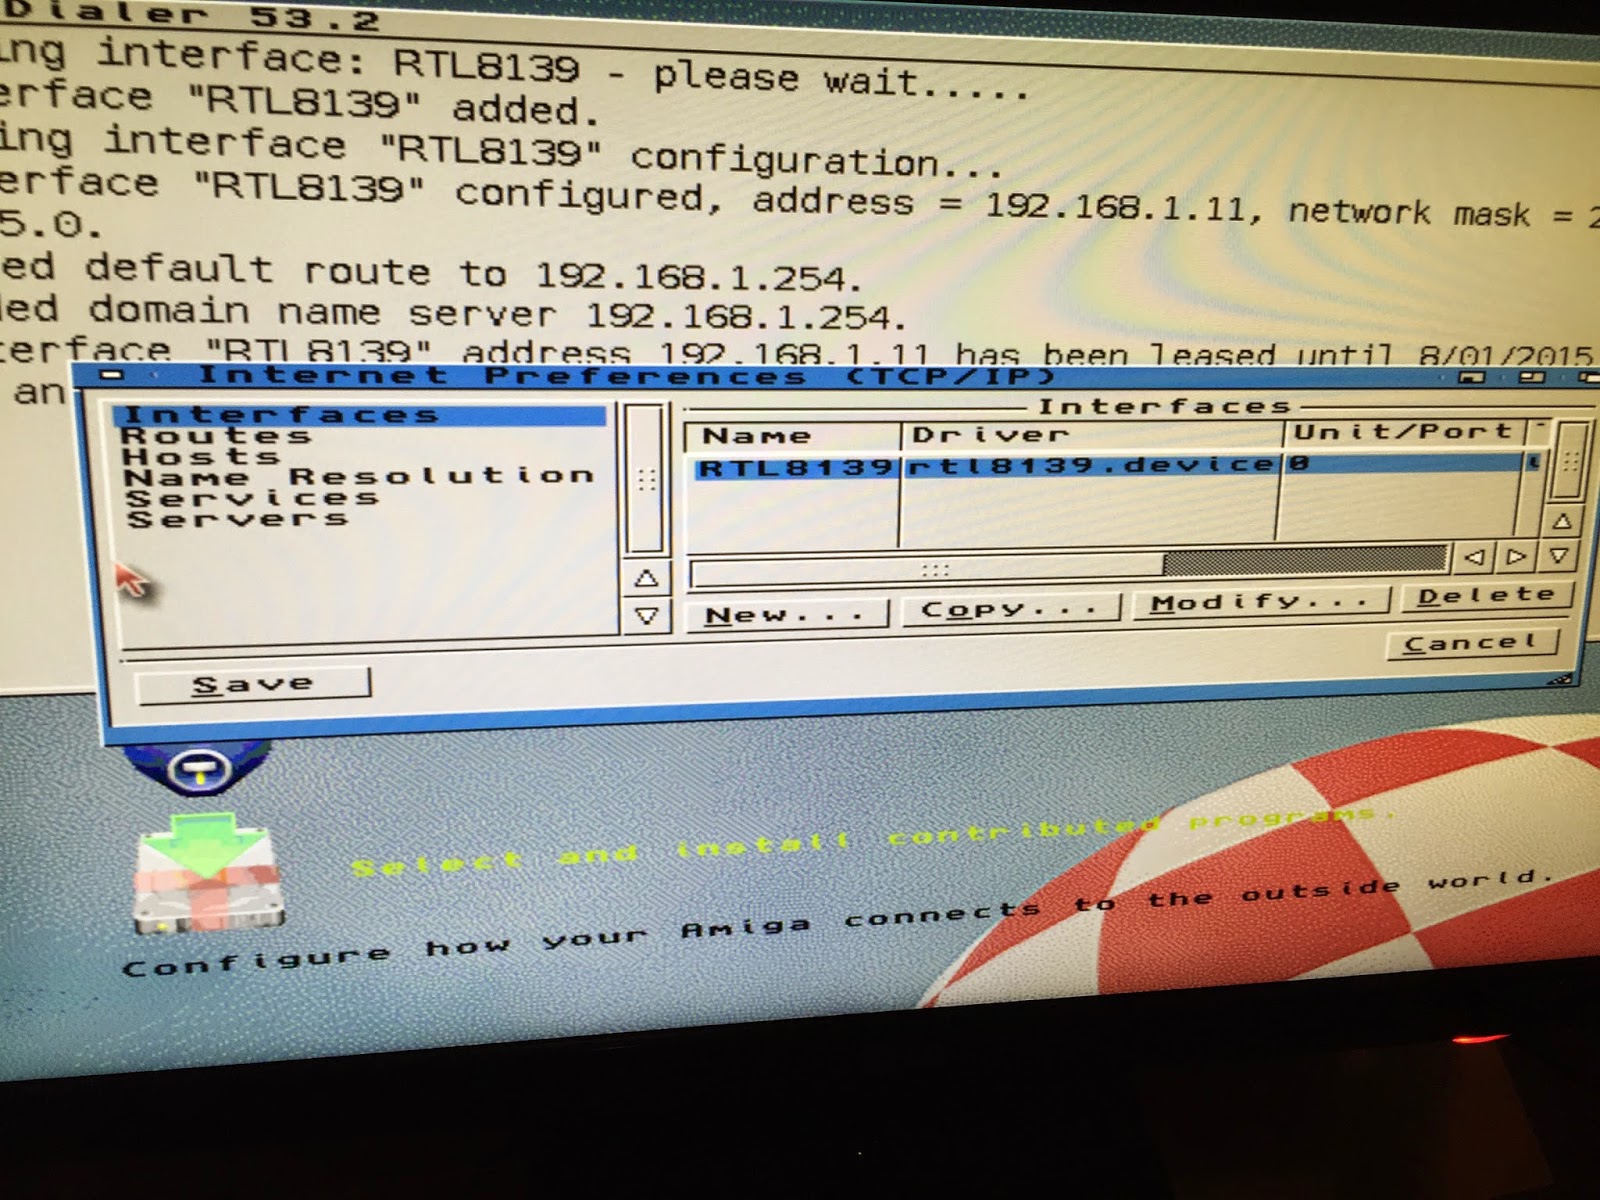
It gives you the option to configure advanced settings too - I didn't change these but clicked
Yes to show them to you:
Network Interface configuration - can set the hostname here:
Routes for network traffic are defined here:
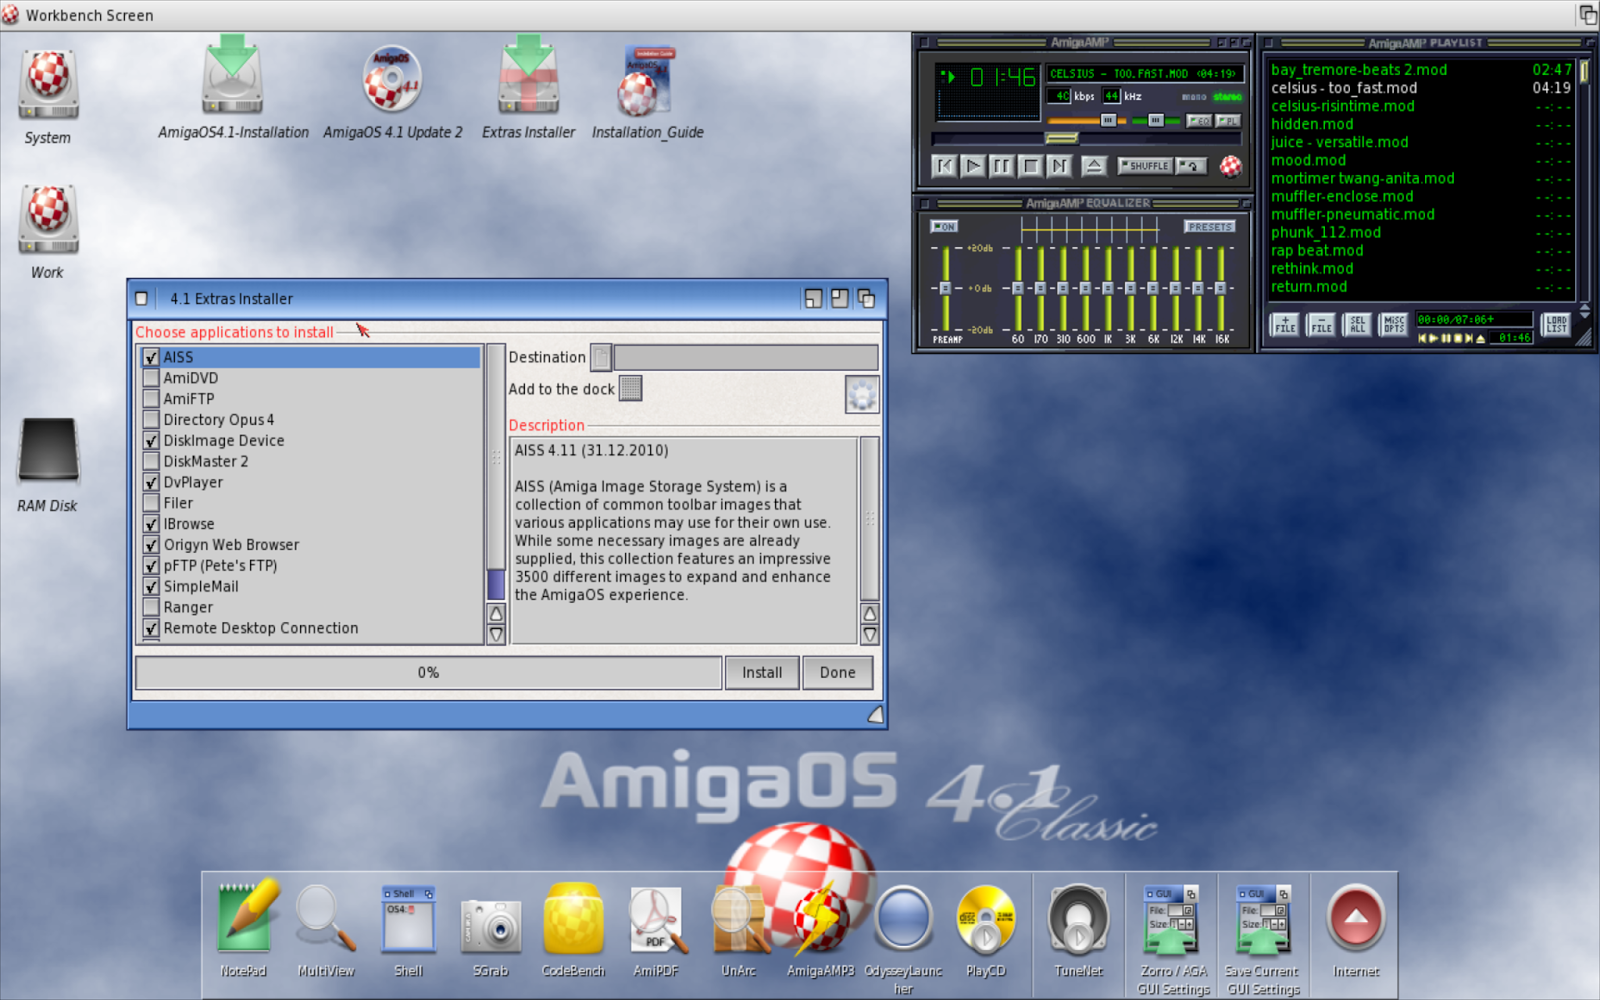
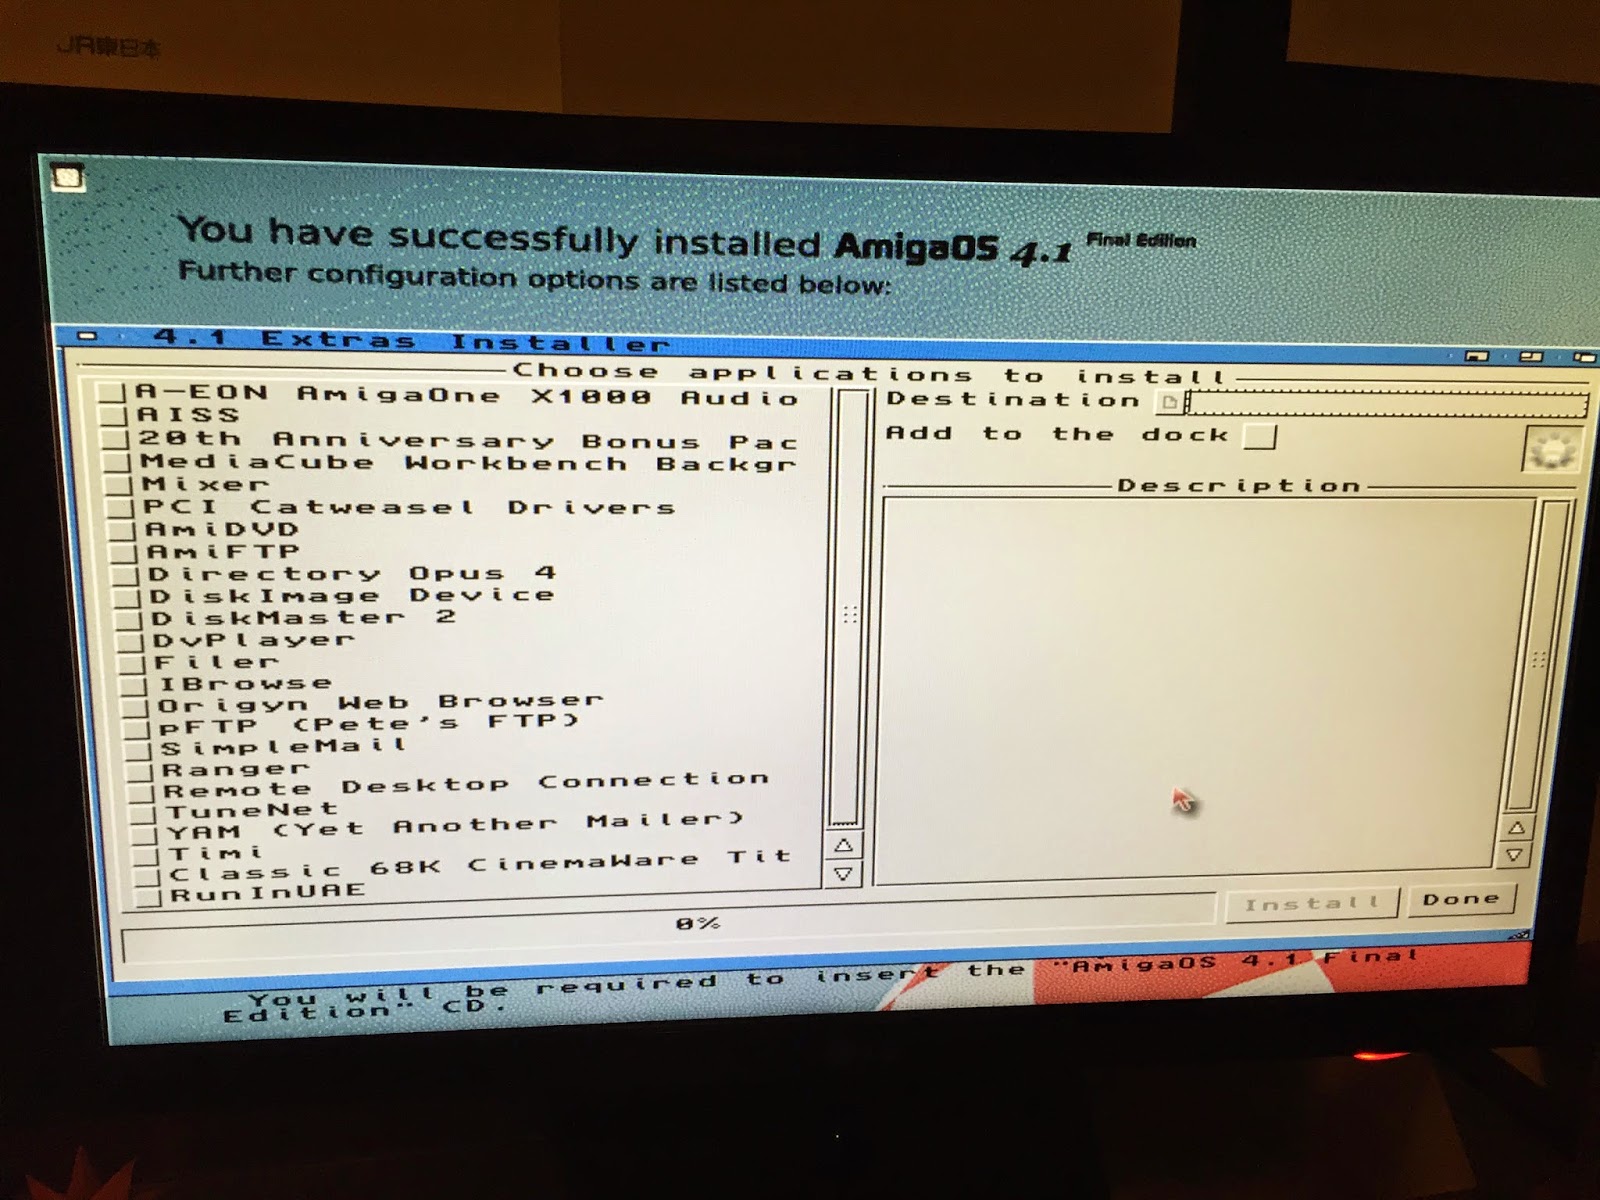
Having finished the Network configuration, I moved onto
installing the Extras included with the AmigaOS4.1 Final Edition CD - accordingly it
prompts me to put the CD back in to the X1000:
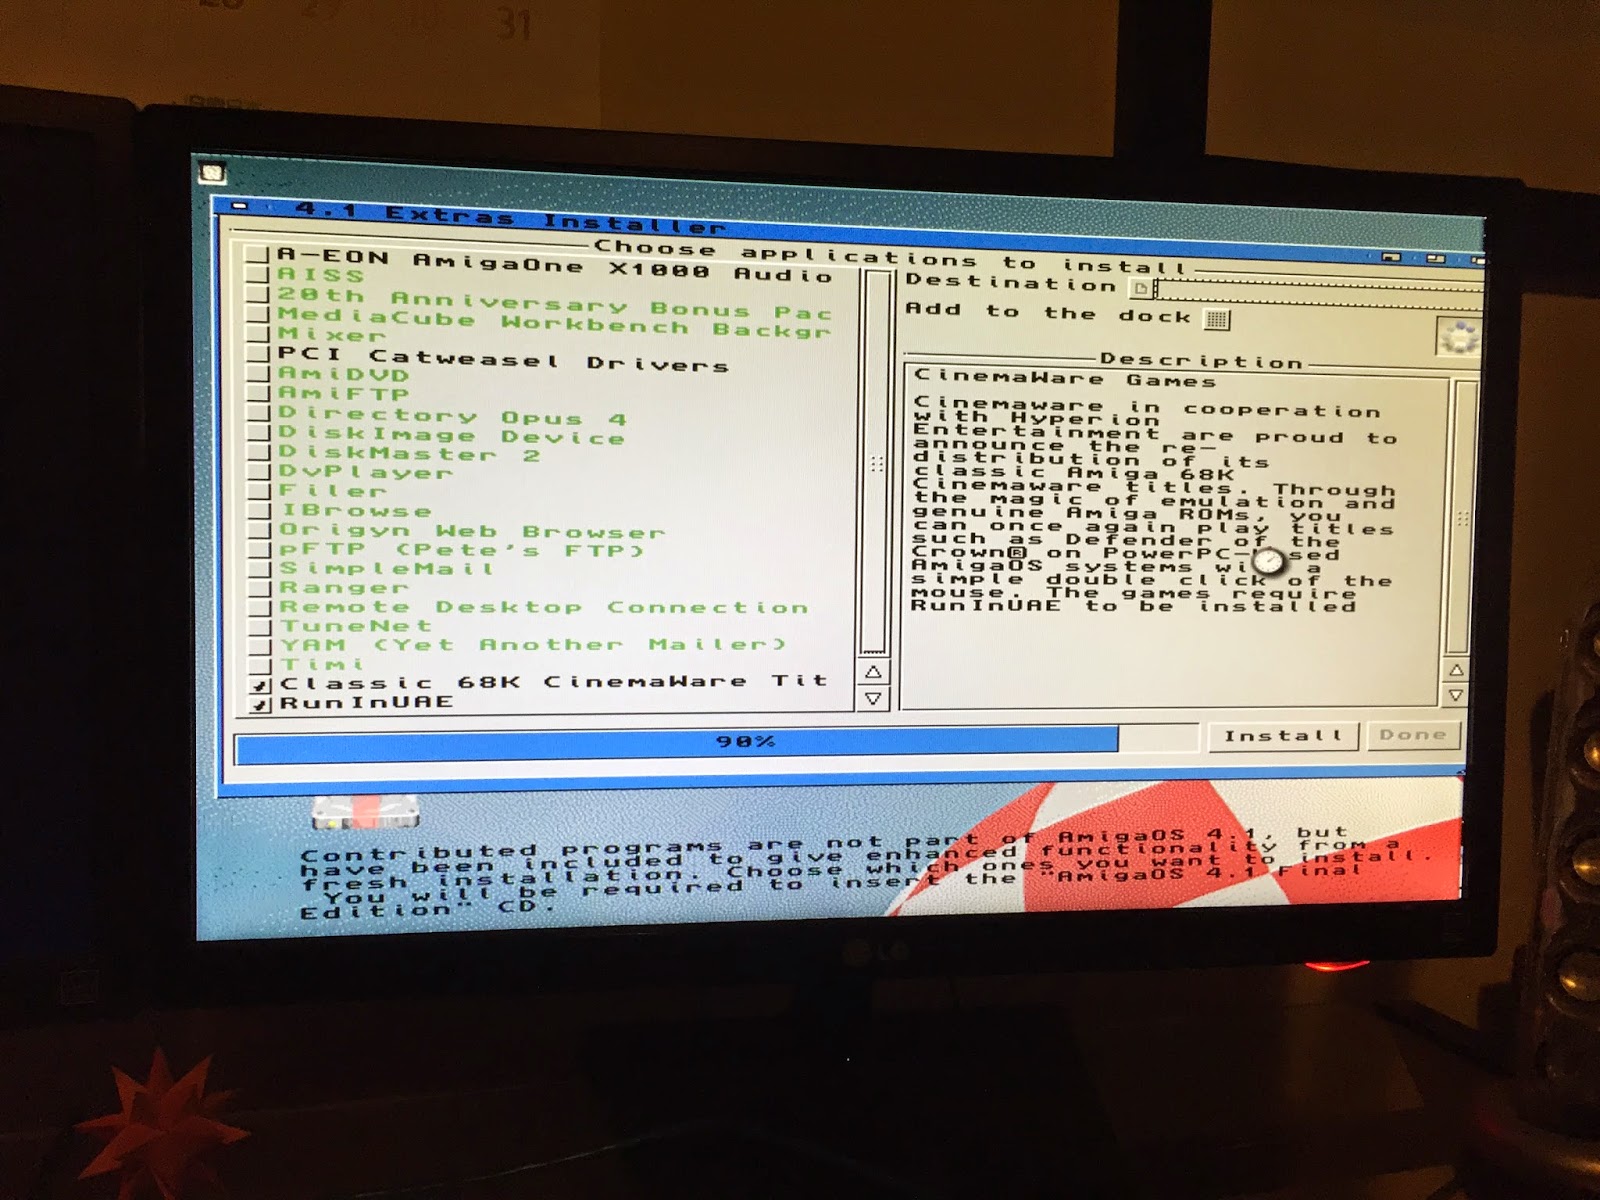
It then shows a window with a number of bonus software to install:
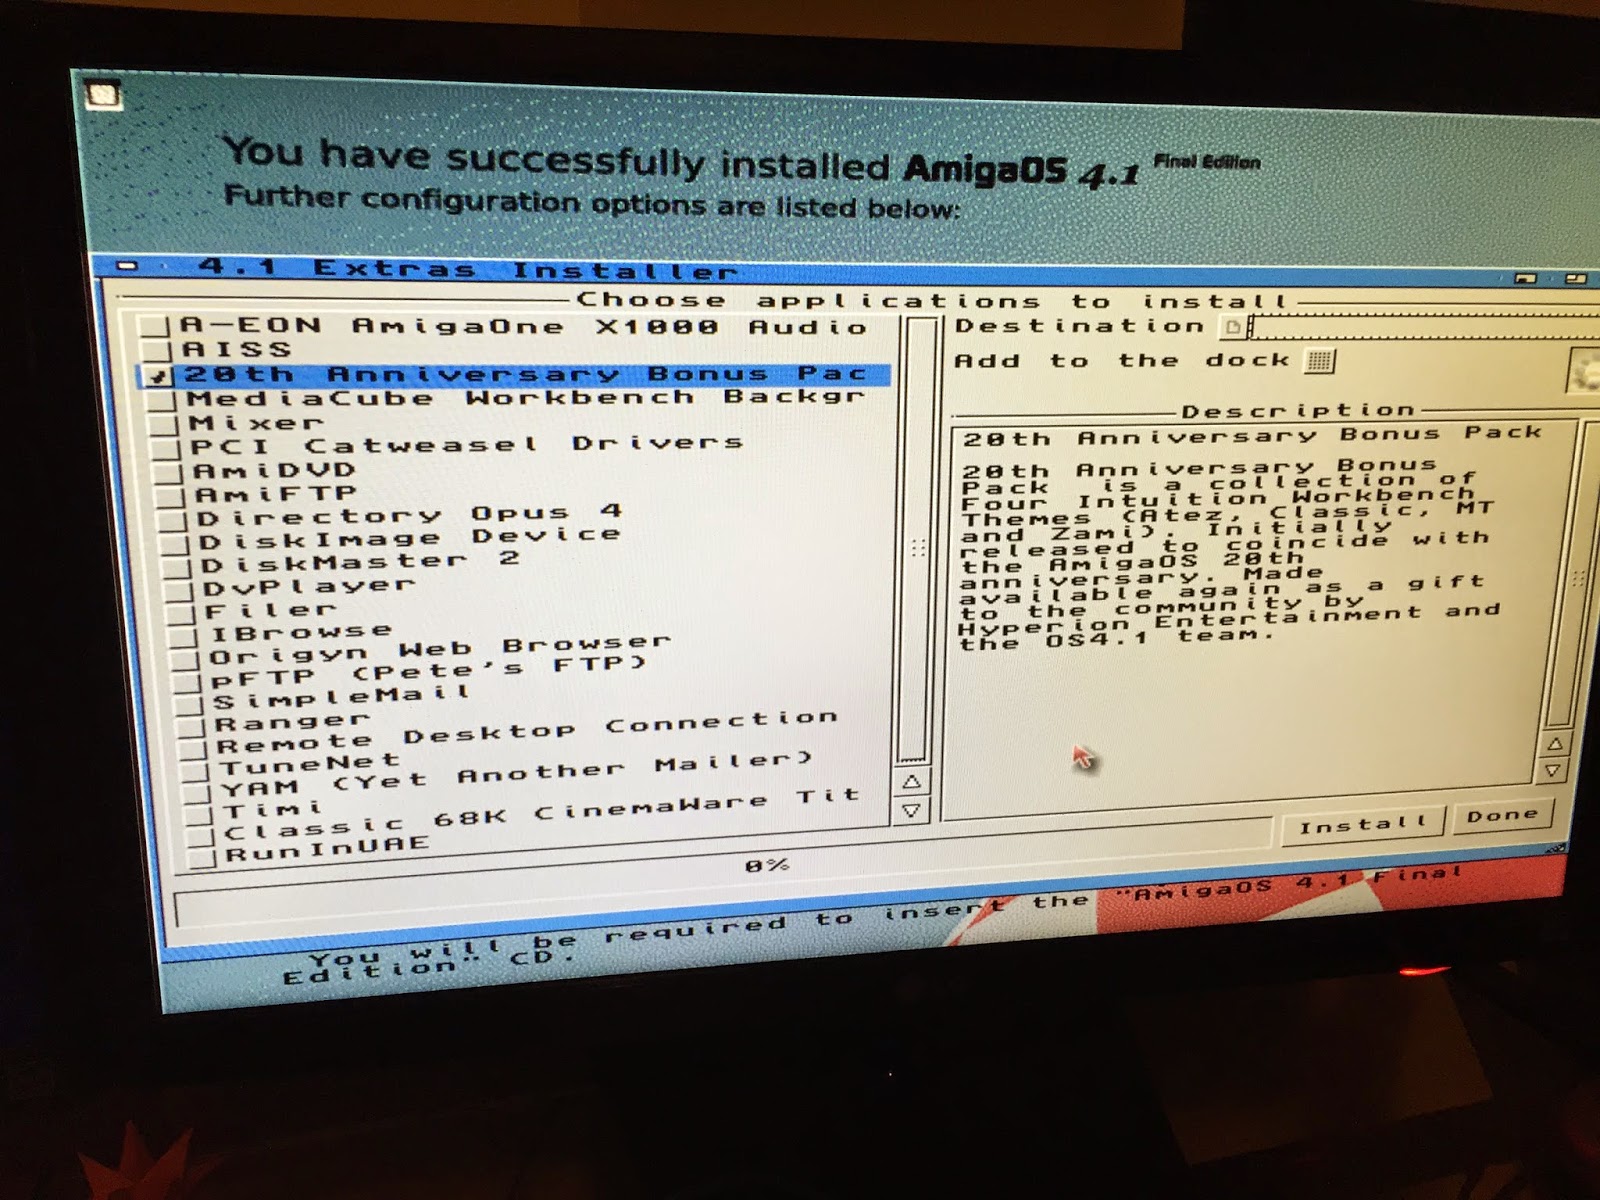
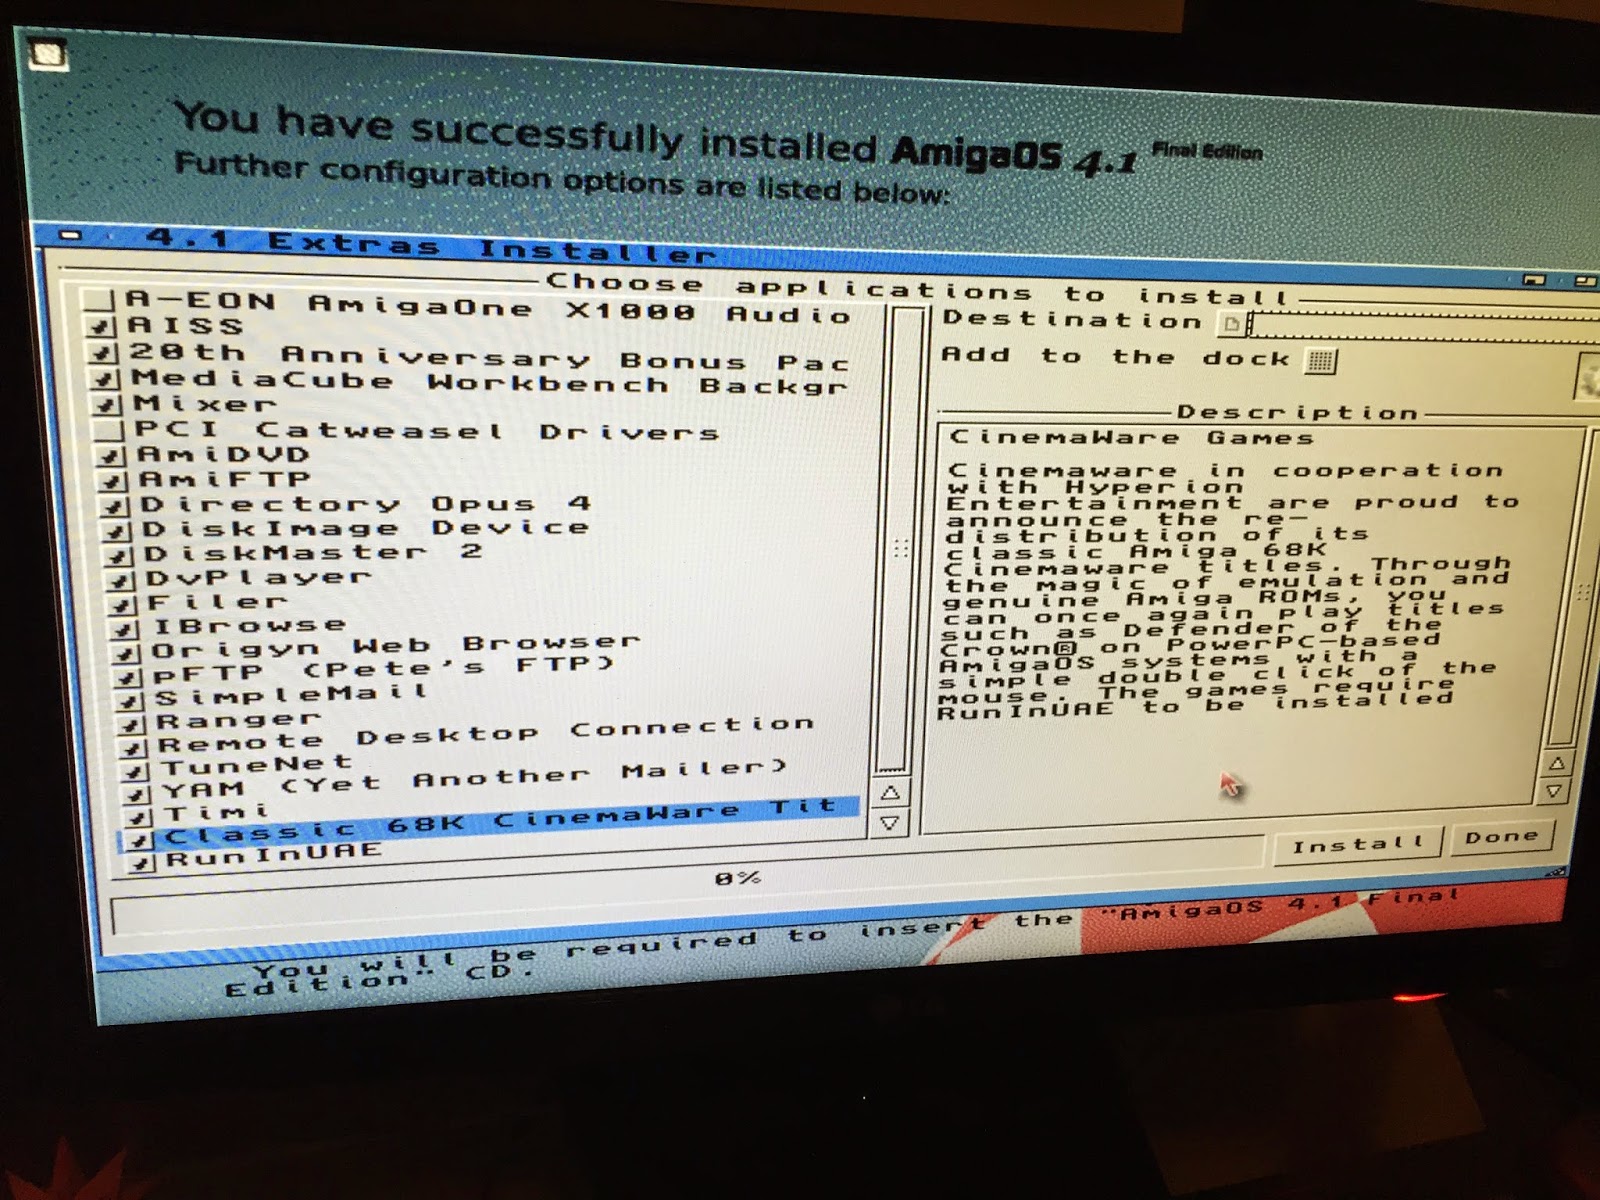
Helpfully when you click on each one, you get a description of what it is and does - you can
click on the checkbox next to each one you want to install:
I decided to install almost all of the extras:
When I click on
Install, the programs install and come up in green as they are installed:
Entries are added to the Amidock at this point and the screen gets a little cluttered. You can close the docks that appear as below, in order to view the ongoing installation easier:
It was at around this time that I found out why the screen mode didn't change - I got a nasty message saying that
"Volume has broken Cluster geometry! Can't mount it!":
At first I had no idea what this could be, but after some thought I realised that it was the
CF Card in my X1000 that was
causing the problem.
The CF Card in my X1000 (on the motherboard itself) is a 8GB card, formatted as 4GB FAT partition containing Linux kernel needed by the X1000 CFE in order to boot Ubuntu Remix on the X1000.
AmigaOS4.1 Final Edition
now supports reading this CF card - AmigaOS4.1.6
didn't. Clearly AmigaOS4.1 Final Edition
was having issues with the unformatted space on the CF Card. When I removed the card
the problem went away and no more error messages appeared.
One solution is to comment out the
cfide.device.kmod line in the
kicklayout file, which
prevents AmigaOS4.1.6 Final Edition from seeing the CF Card. This is the option to do if you get this problem and want to preserve your dual booting linux capacity on the X1000 using the CF Card as FAT.
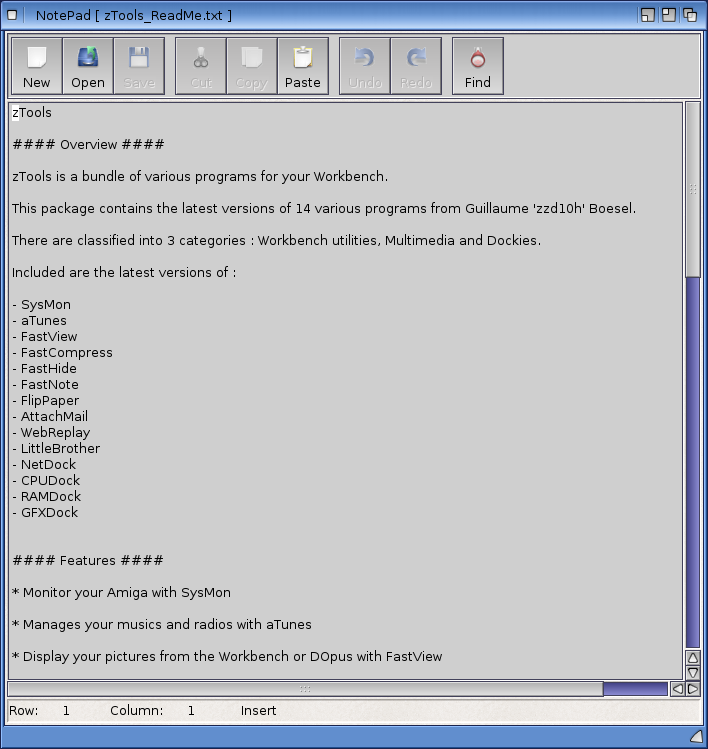
Here below is the Kicklayout file in Notepad (
System:Kickstart/Kicklayout) with the required line highlighted and shown commented out by placing a semi-colon in front.
While in this file you can also comment out the
bootsound.kmod line if you want, which is what plays the original Amiga 1000 boot sound when AmigaOS4.1 Final Edition boots every time.
Back on topic, Another resolution to the CF Card error issue is to use a 2/4GB CF card, which apparently works fine when formatted to it's full capacity. 4GB is the FAT limit, so it is not possible to format a 8GB CF card to it's full capacity unless I create multiple partitions.
Other people have had this problem too -
please remove the CF Card if you are having this error message, confirm the problem goes away and then decide what to do with your CF Card after that.I haven't used Ubuntu Remix for a long time and with 2015 now here, it is a good time to go AmigaOS4.1 Final Edition only on the X1000 moving forward.
I later decided to format the CF card as Amiga format (8GB) labelled
CF0 so I can use it in the X1000 still, now only for AmigaOS4.1 Final Edition.
Getting back to the installation of the extras, it is continuing:
RunInUAE prompts for additional options when it installs -
Simple or
Advanced Mode:
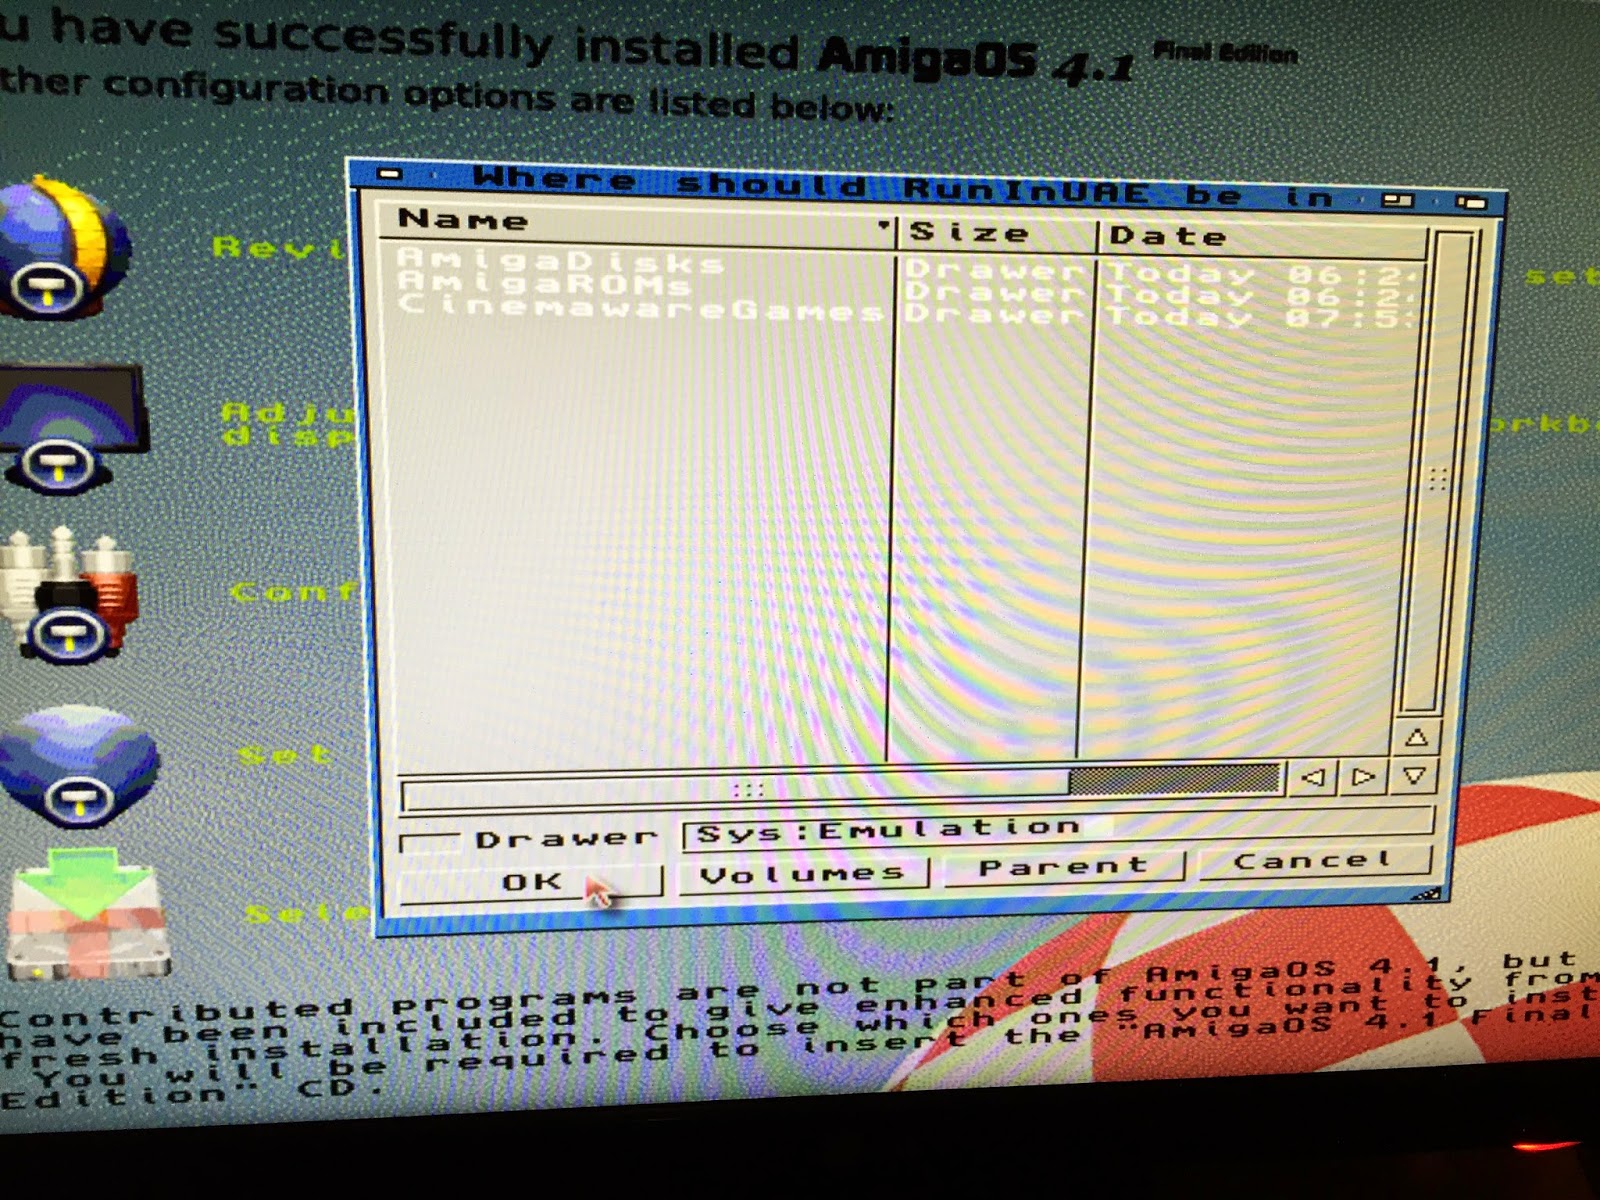
I picked the advanced mode - it asks where I want to install it:
It then asks where E-UAE should be installed:
After that it asks where the Workbench3.1 folder should be created - it reminds you that you need to
manually create the drawer as it is not done automatically for some reason.
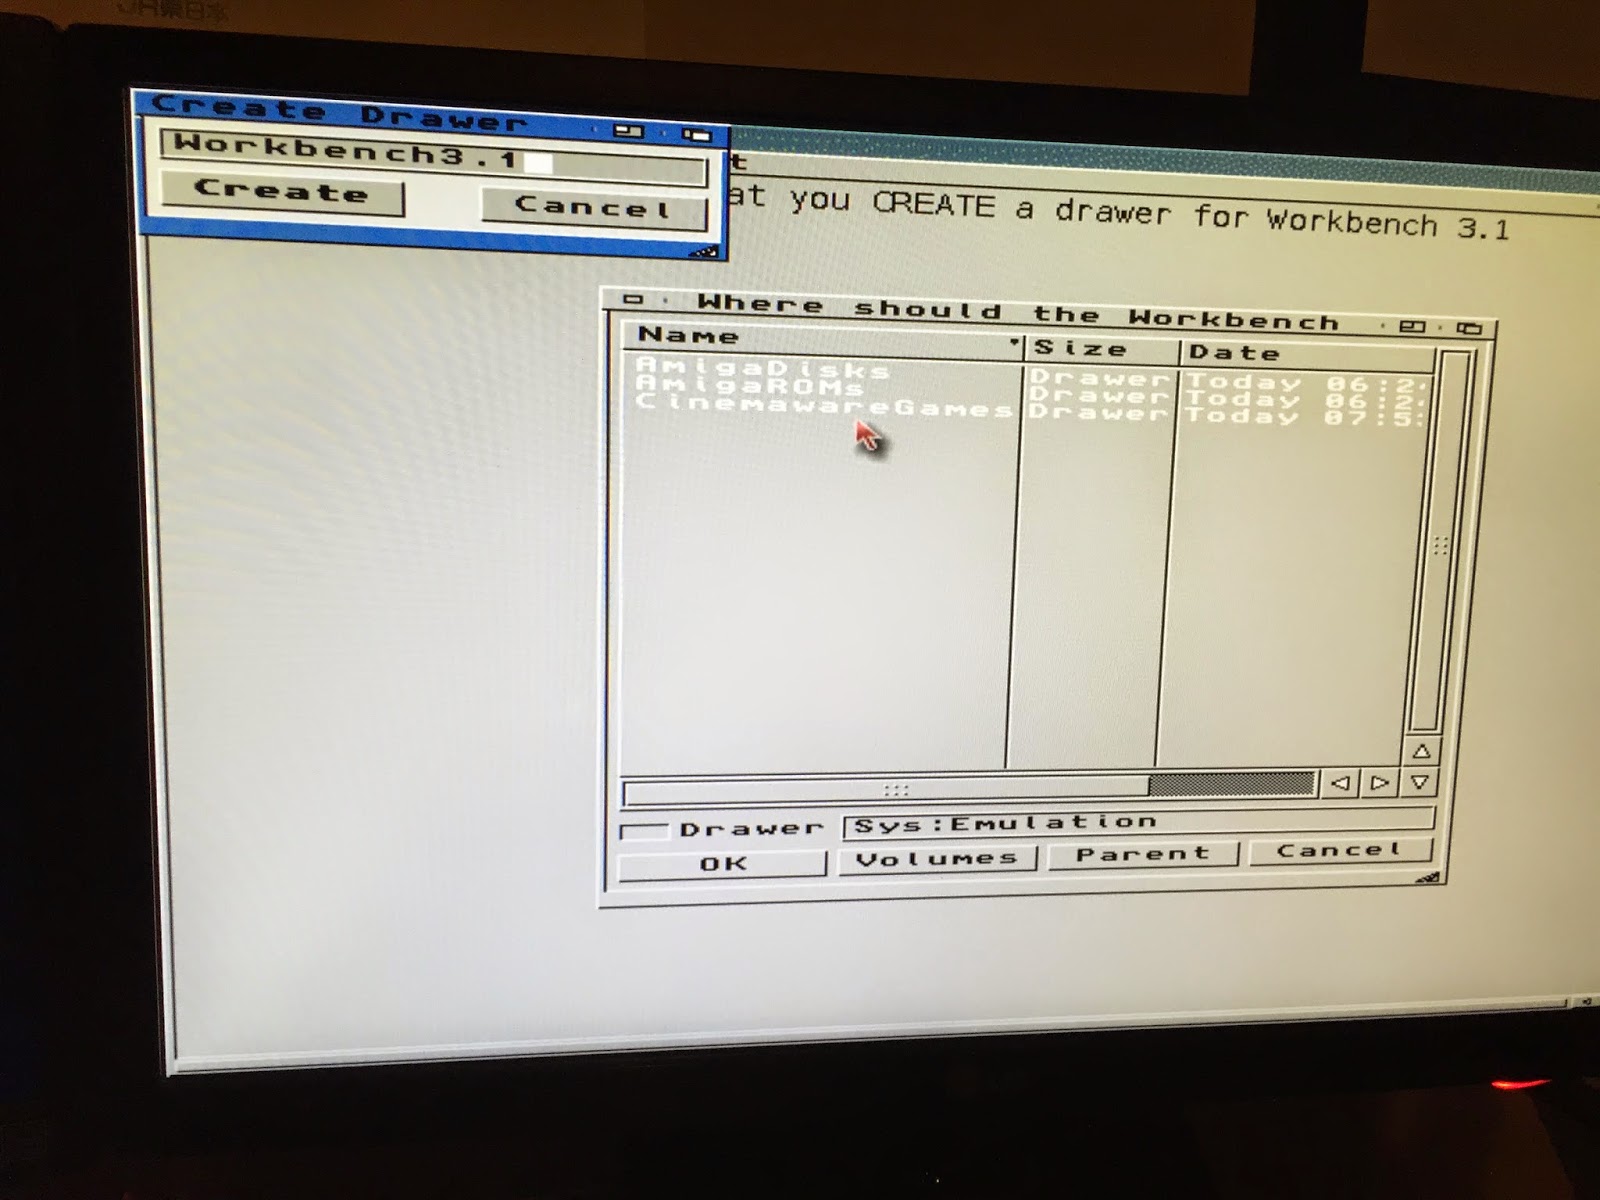
To do this,
right click in the requester window, highlight
Control and select
Create new Drawer. Enter the name and click on
Create:
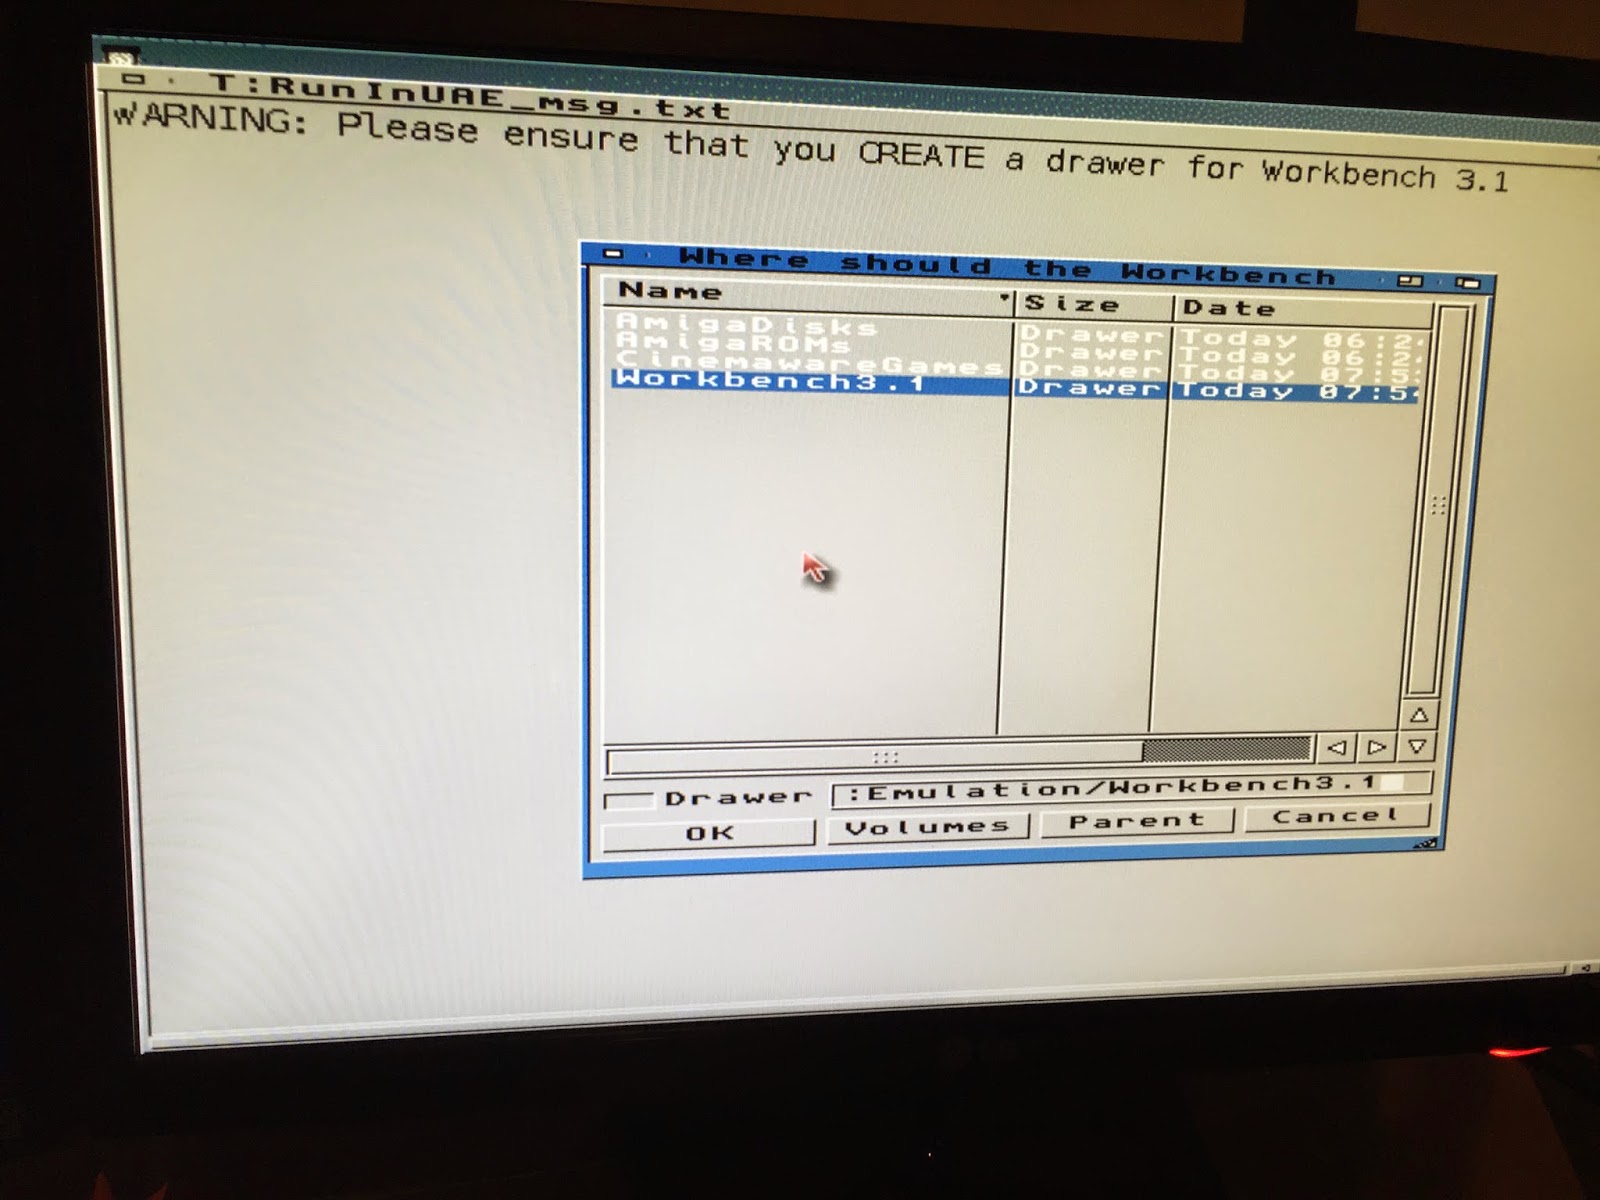
Then select the new drawer you created as the destination and click
OK:
It also prompts (not shown) for the location of your WHDLoad registered key so it can insert it into RunInUAE environment. I have registered WHDLoad so I was able to provide this file at this point - you can register WHDLoad at
www.whdload.de It then prompts you that installation of RunInUAE is about to start - click on
OK:
It finishes the install and then prompts that you need to
restart the X1000 to use RunInUAE:
I clicked
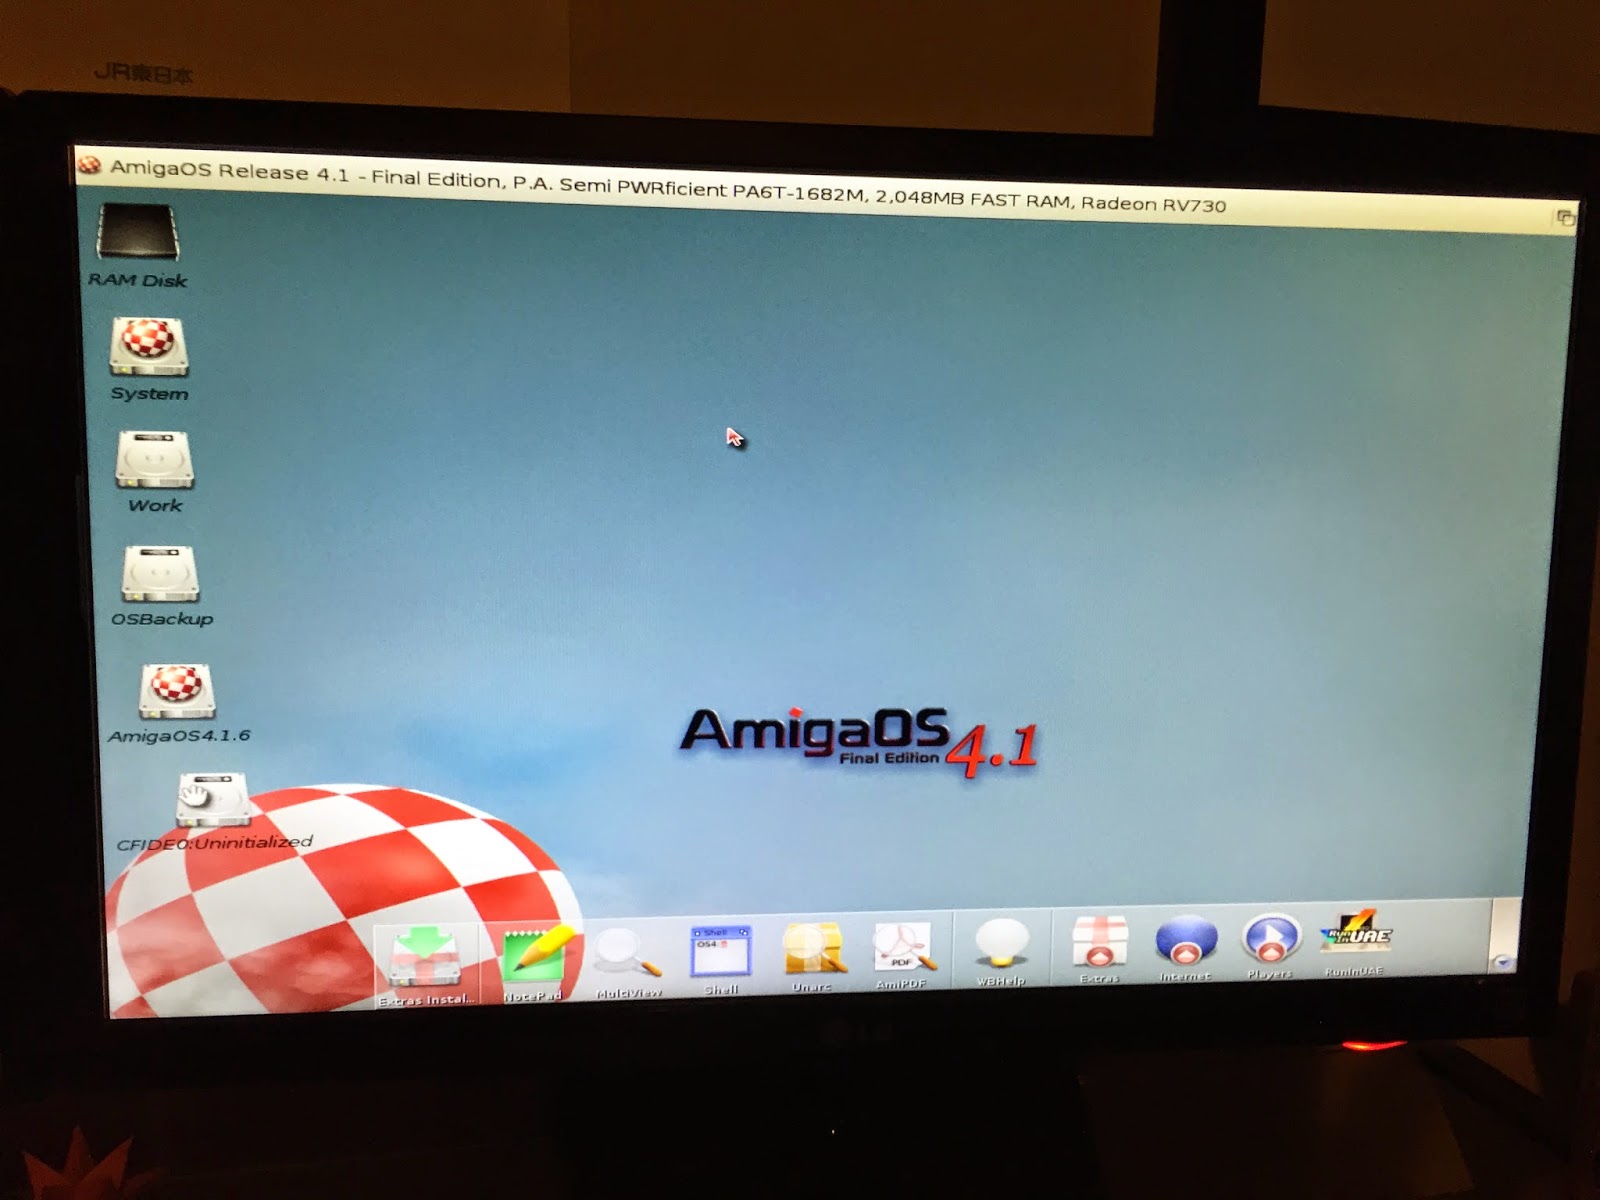
OK and restarted the X1000. I then get the AmigaOS4.1 Final Edition Workbench screen for the first time on my X1000:
At this point I got SGrab setup so I could start screen grabs from this point onwards:
You can see at this point I haven't formatted the CF Card, which is showing as
uninitialised. I
right clicked on it and selected
Format Disk to format it as an Amiga formatted disk (as mentioned earlier).
Looking around briefly at what is new, I checked the Prefs first - I can see the new Console prefs here:
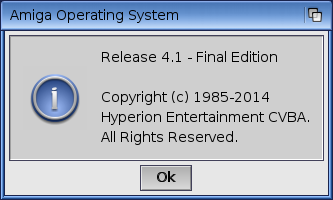
From the Workbench title bar menu, I can select About to see the version information window:
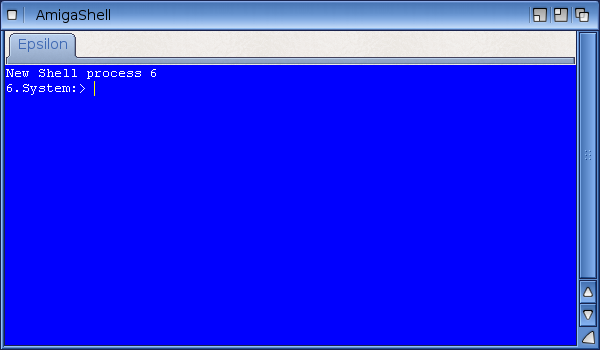
Running up a new shell, I can see the tabbed shell console for the first time:
I opened another shell and it opens in a new tab in the same Console window - neat:
I will play around with the console more later on of course as there is a lot more configuration for it!
Unregistered MUI4 is included - I have registered MUI so later on I will put my key in
s: to activate the full functionality of MUI4 - but wanted to point this out for people who are not aware that it needs registration at
www.sasg.com to get the full functionality:
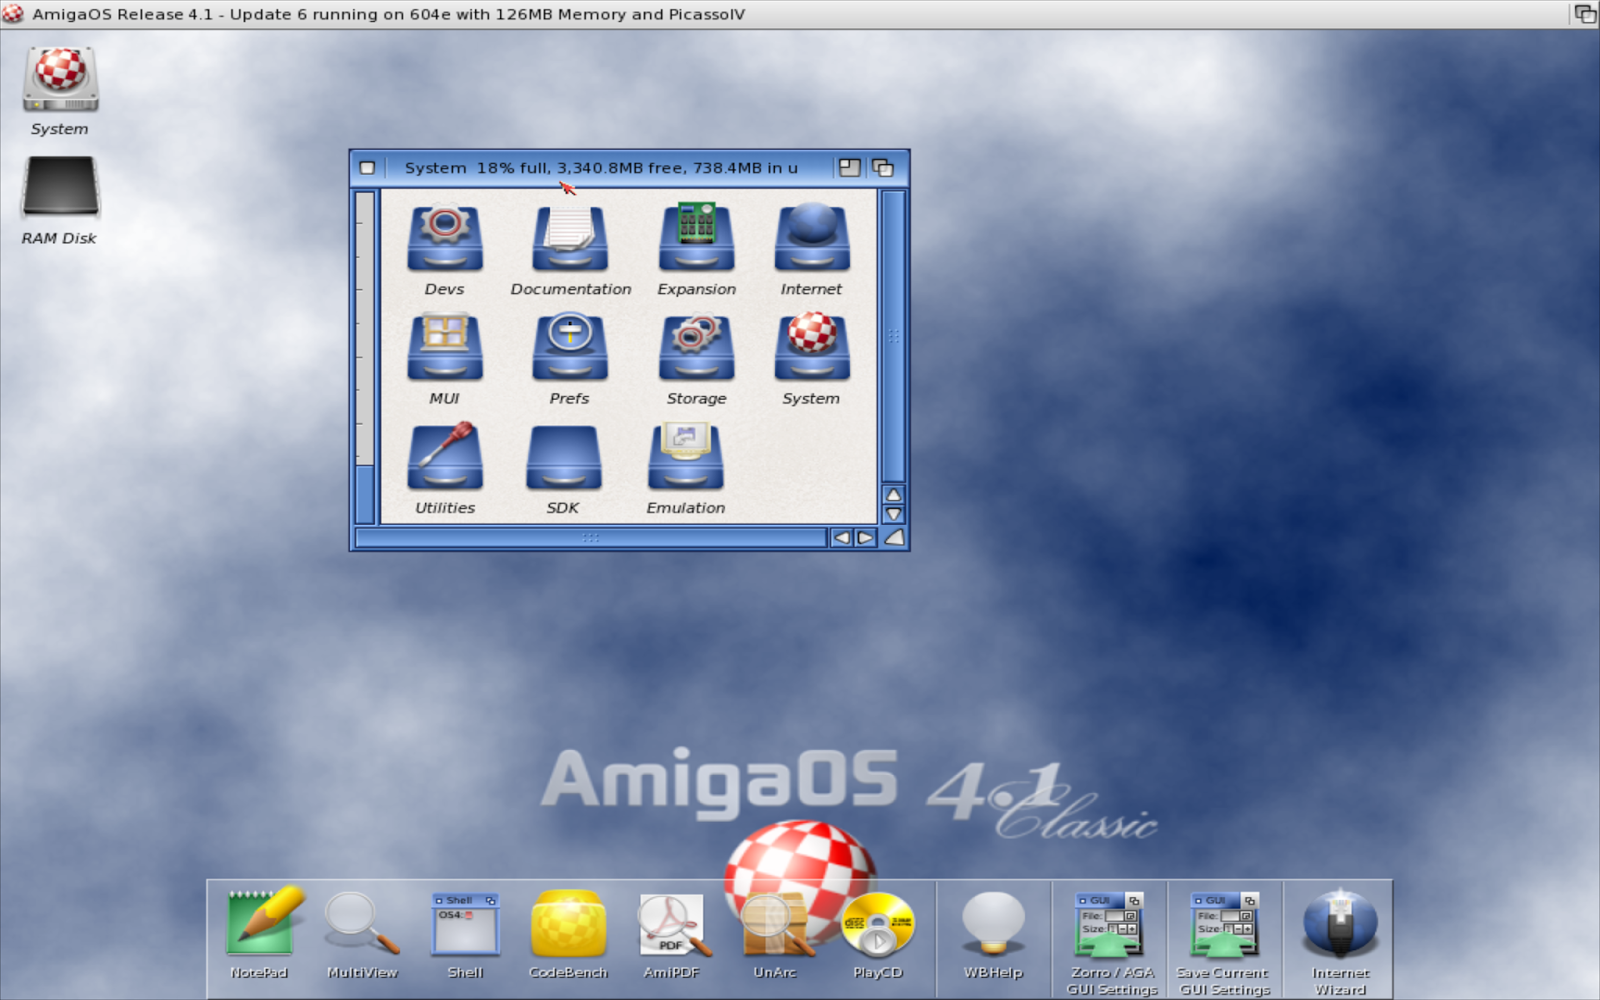
Just showing off some more of the AmigaOS4.1 Final Edition drawers and icons:
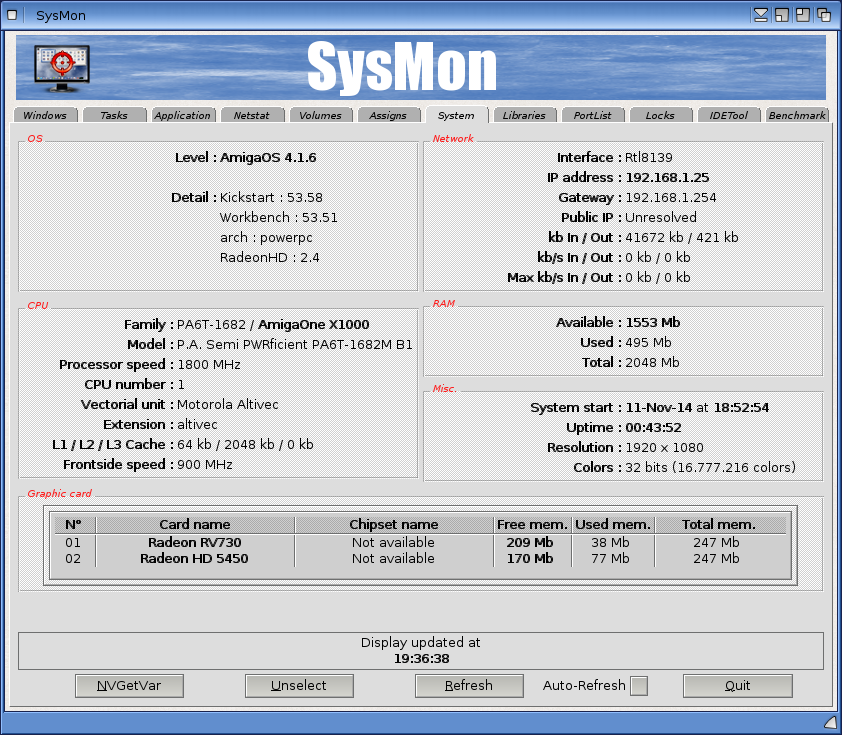
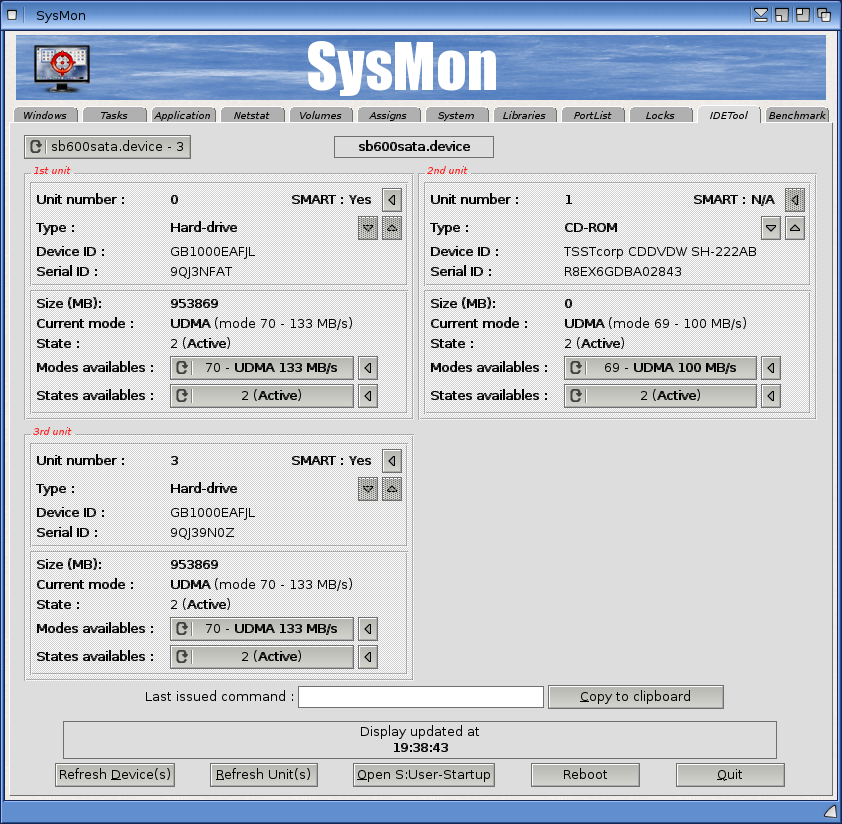
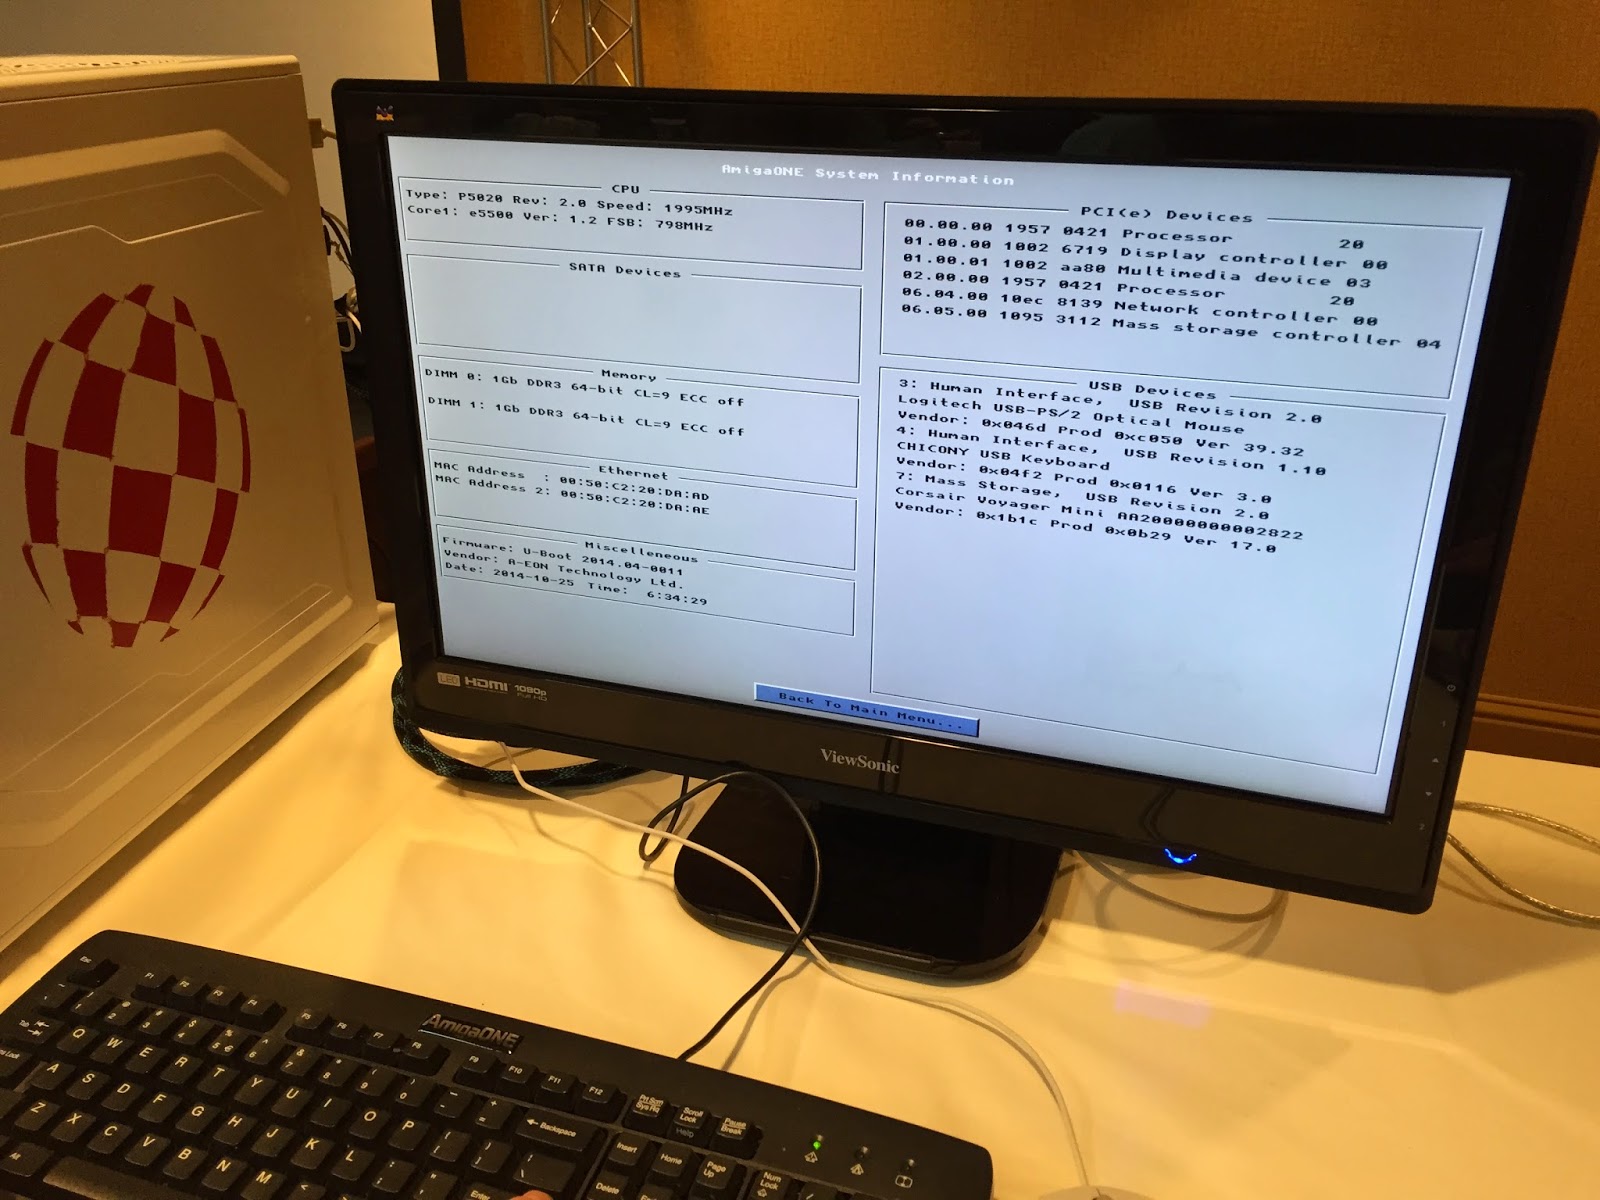
In the Utilities drawer I ran ShowConfig for some more version info about this X1000:
In AmigaOS4.1 Final Edition we now have image preview icons when viewing drawers with photos in them. To view these,
right click on a folder containing photos and select
Information. Select the
Icon tab:
You can see Previews field is set "
As parent" - the default is previews is
off for all drawers. You can change this to
On for this folder:
After clicking
Save and opening the drawer, from the Workbench title bar menu, highlight
Window > Show > Previews (or press
Amiga-T):
You then get the preview photos as icons in the drawers! This is standard functionality on Windows and Mac OS X, so it is great to finally have it included in AmigaOS - it also includes the photo size and colour depth information underneath the name of the photos in the drawer:
Excellent stuff!
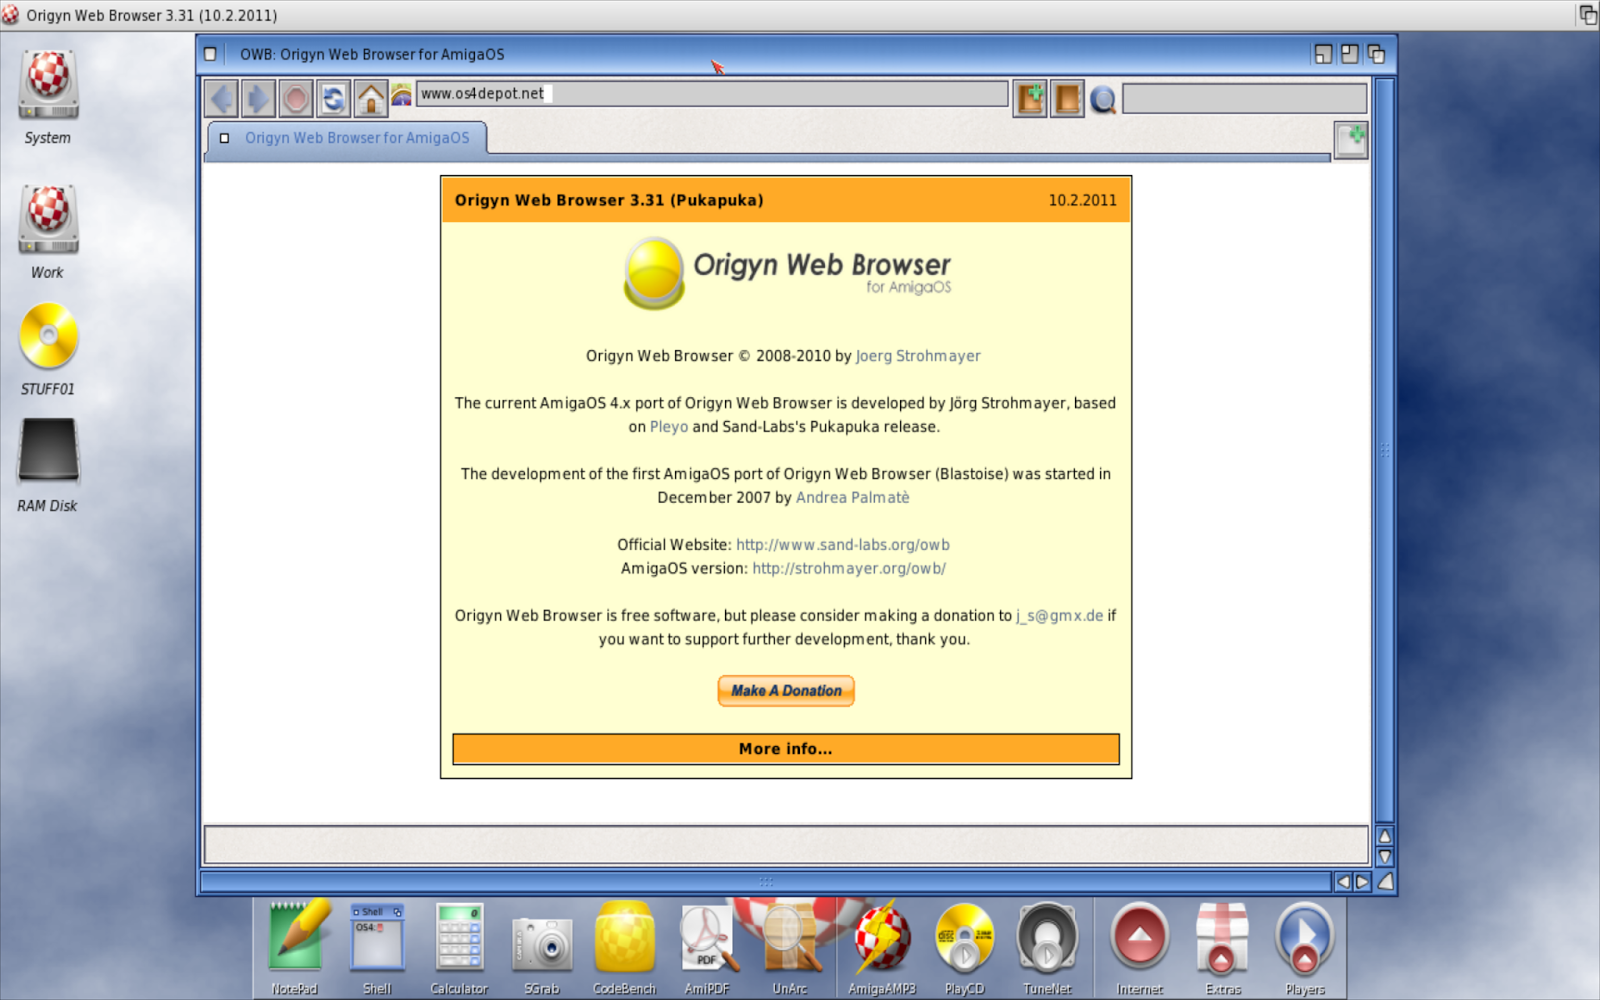
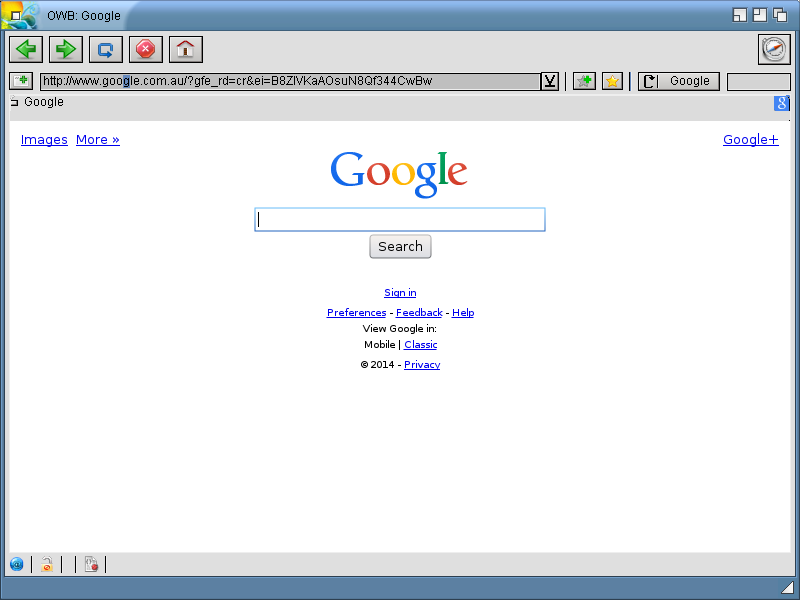
Next I went to www.amistore.net using OWB (included in the Extras for AmigaOS4.1 Final Edition) to download the AmiStore program. After it is installed I logged onto it as me so I could start installing the programs I bought for the X1000 previously, to reinstall them on AmigaOS4.1 Final Edition:
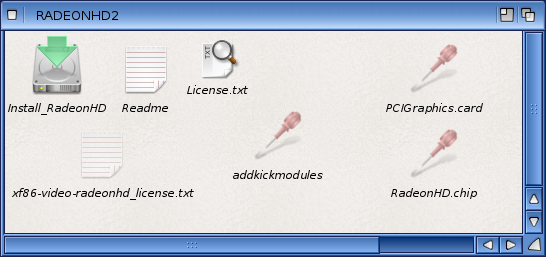
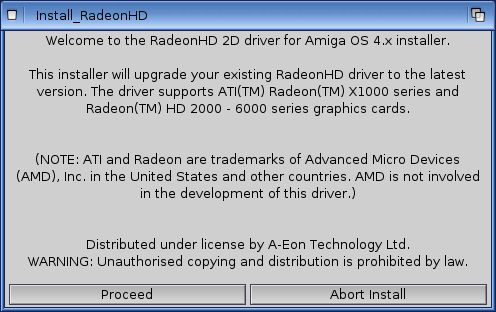
Of course the first order of business was upgrading the Radeon HD Lite driver to the full Radeon HD 12.4 driver - I downloaded it to my X1000 from AmiStore:
Once saved to RAM: by the download install wizard, the Installation of the driver is simple enough - run the
Install_RadeonHD icon in the extracted folder in RAM: and follow the prompts:
I then was able to select my preferred 1920x1080 32 bit colour screen mode again:
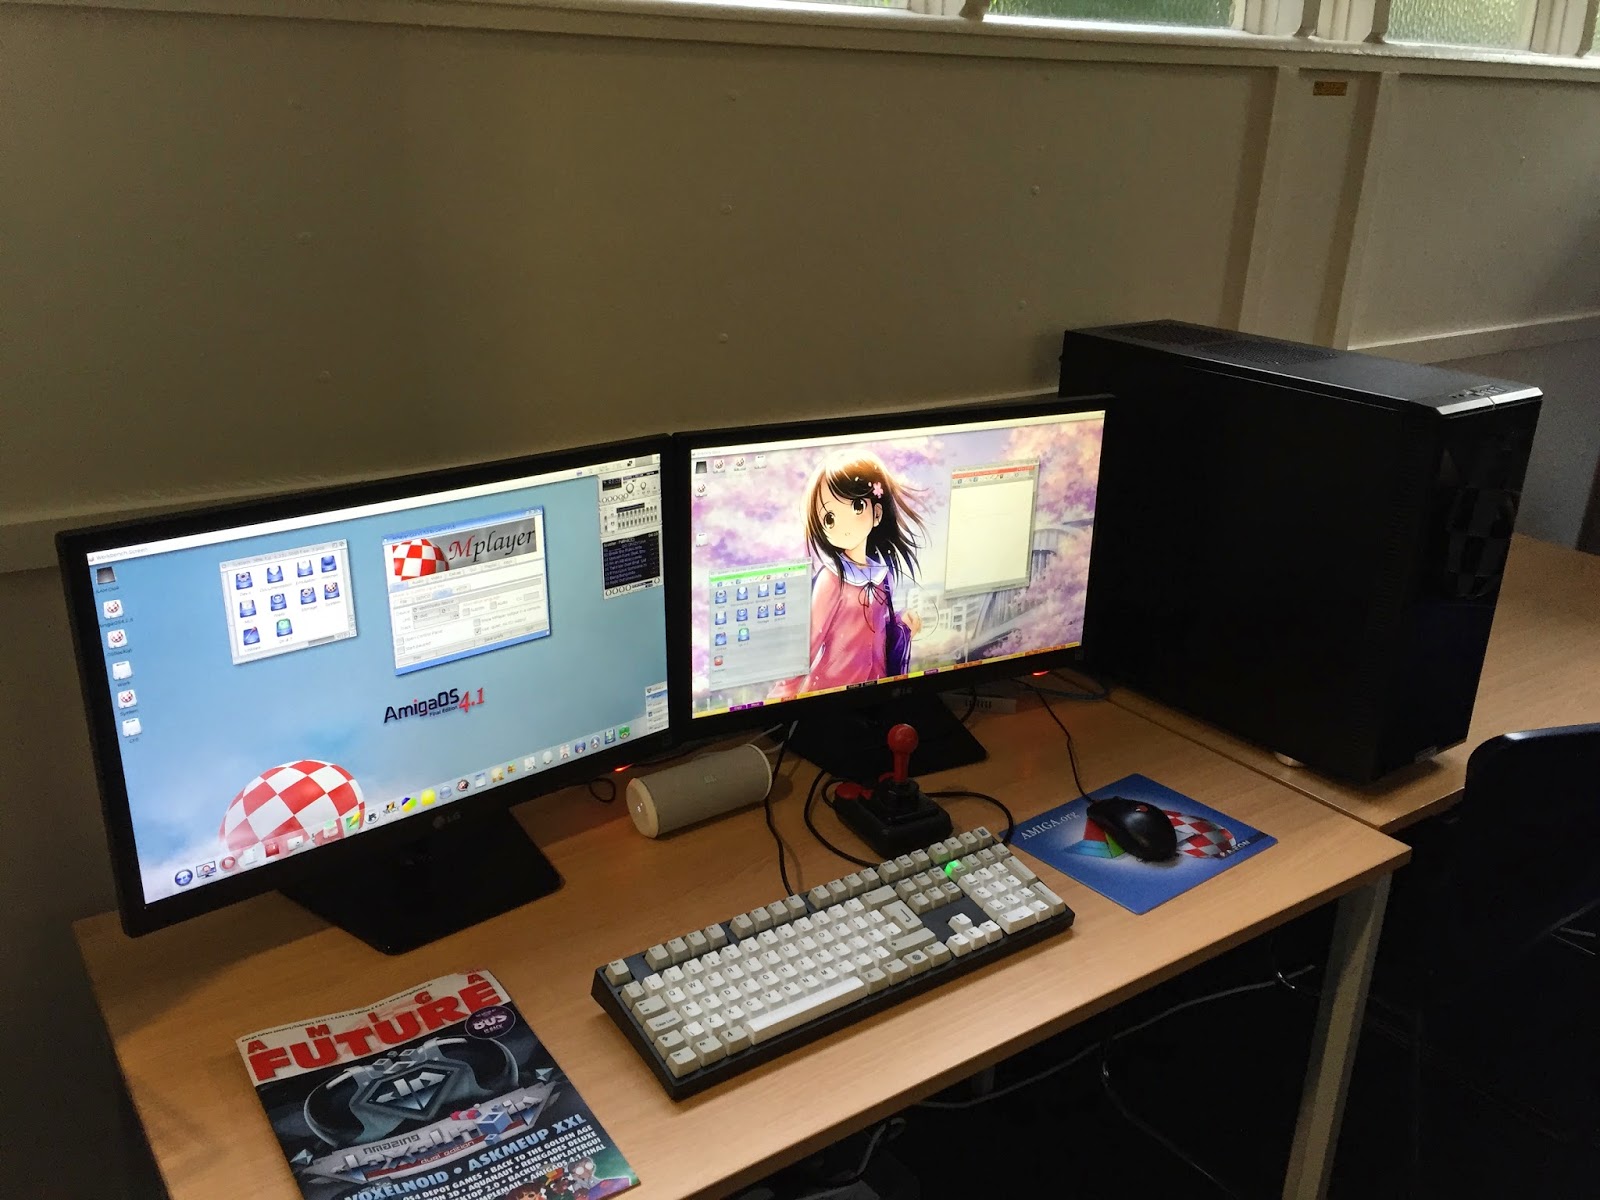
Now I have my HD screen again on the X1000:
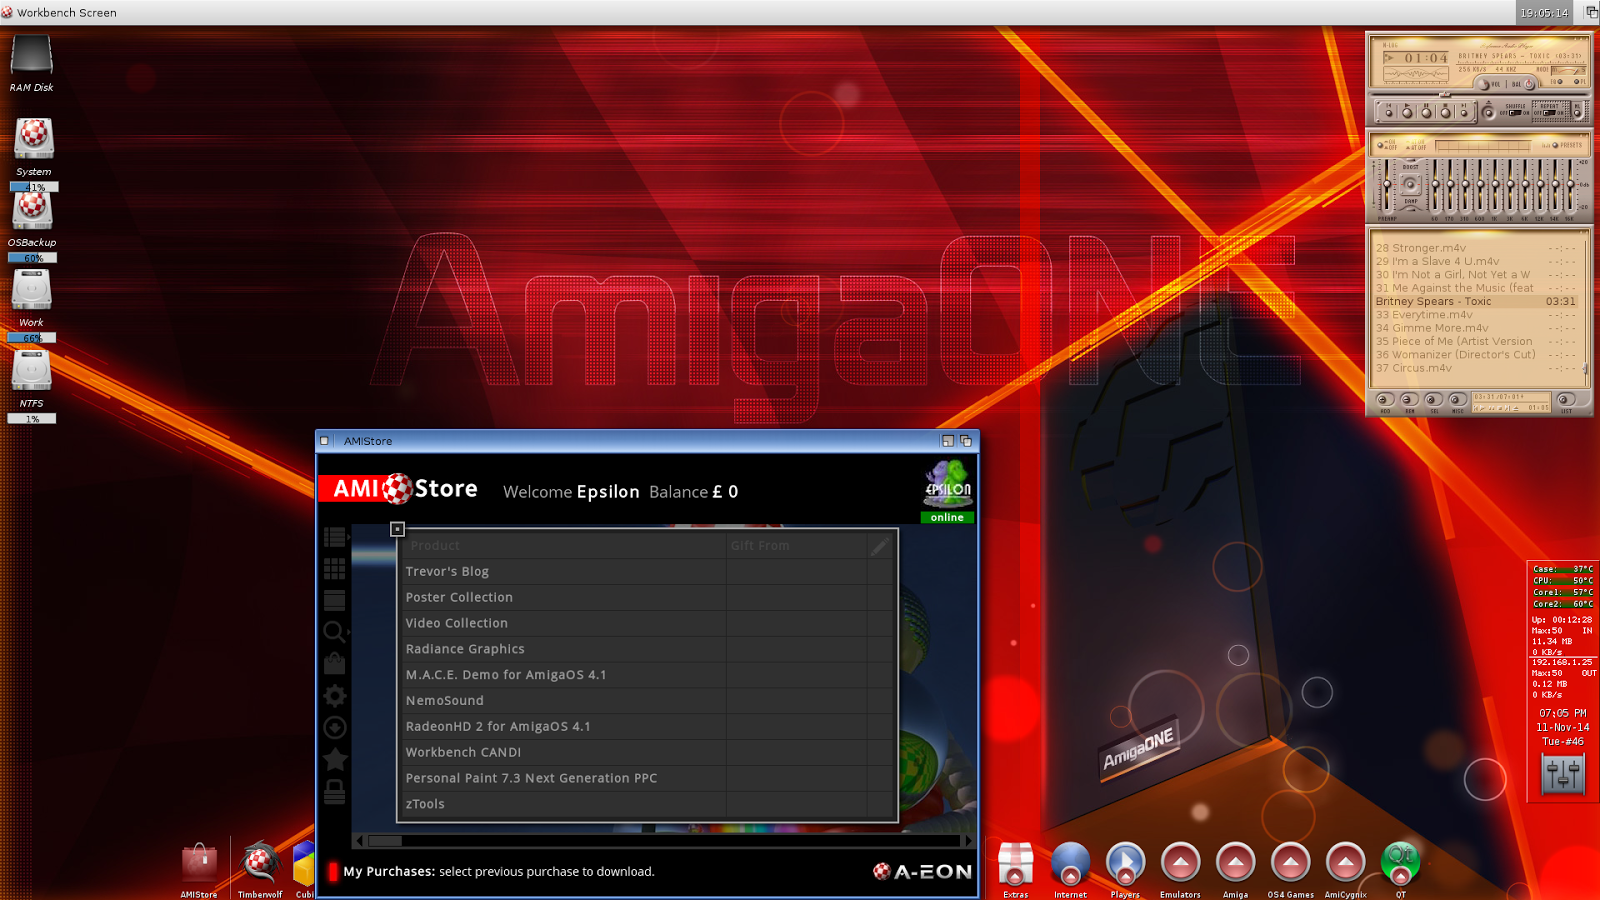
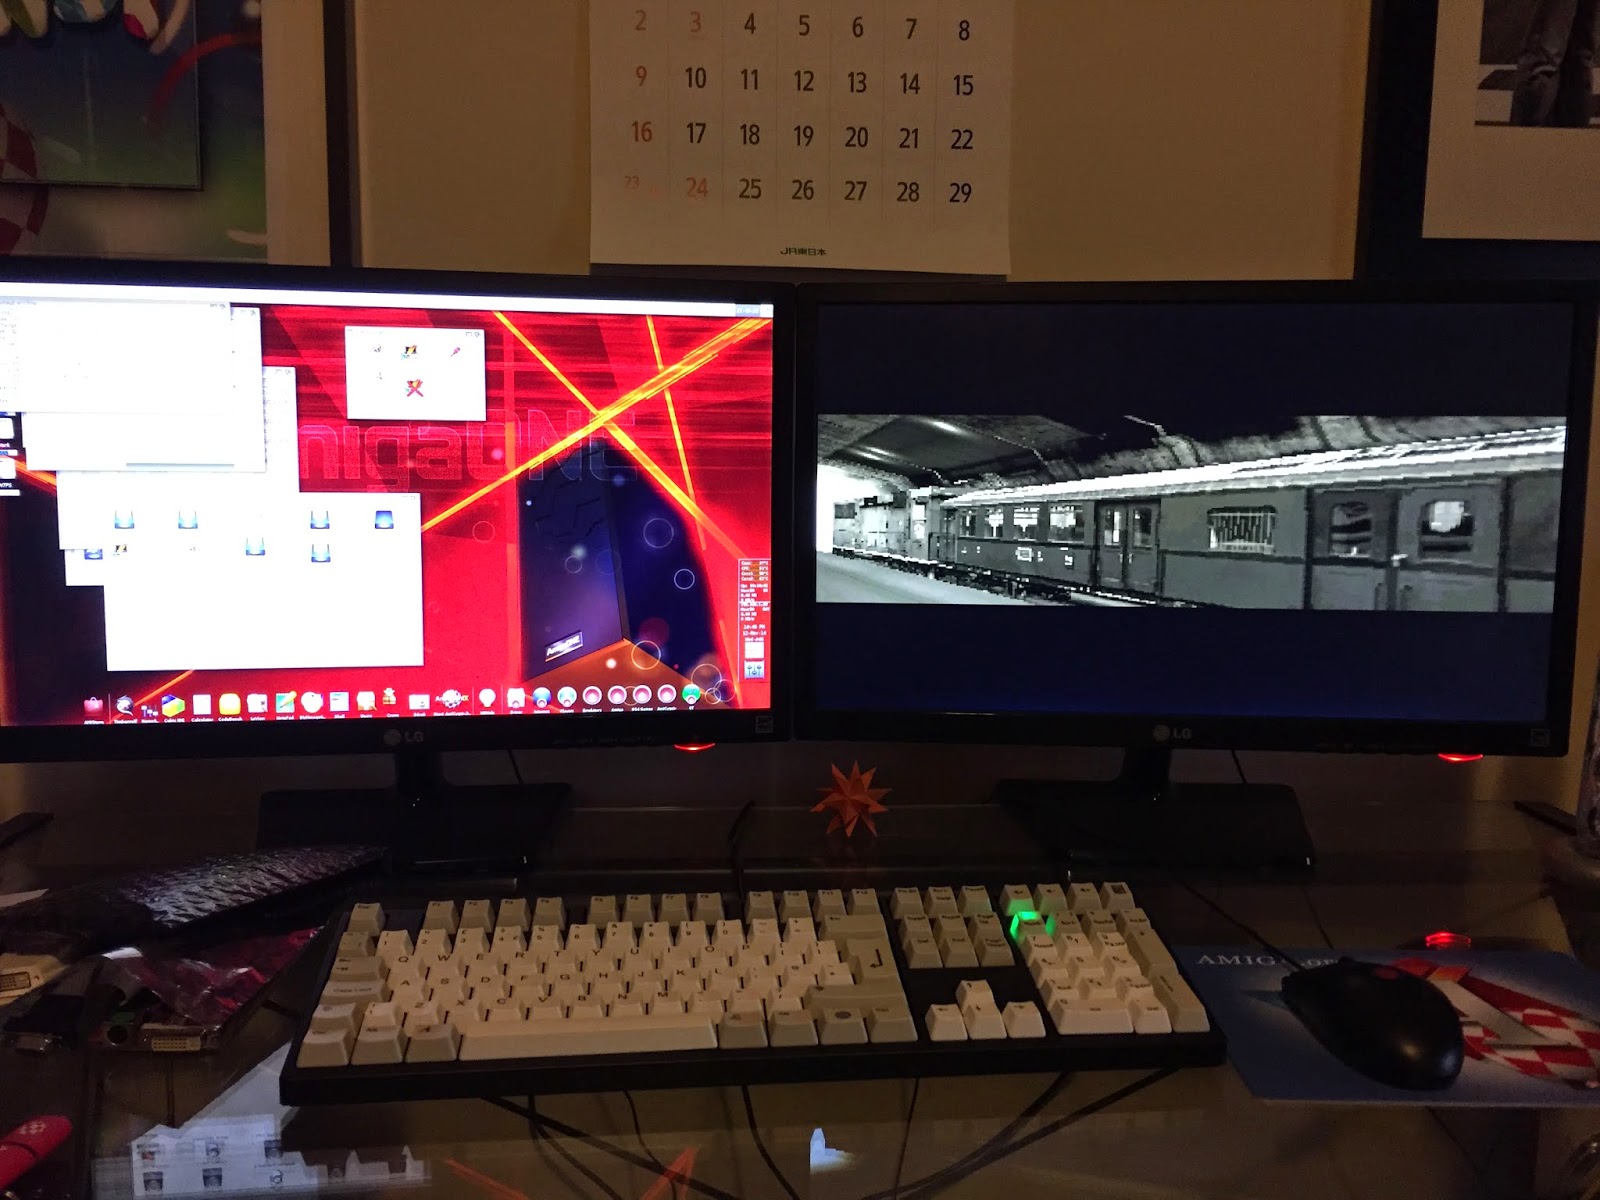
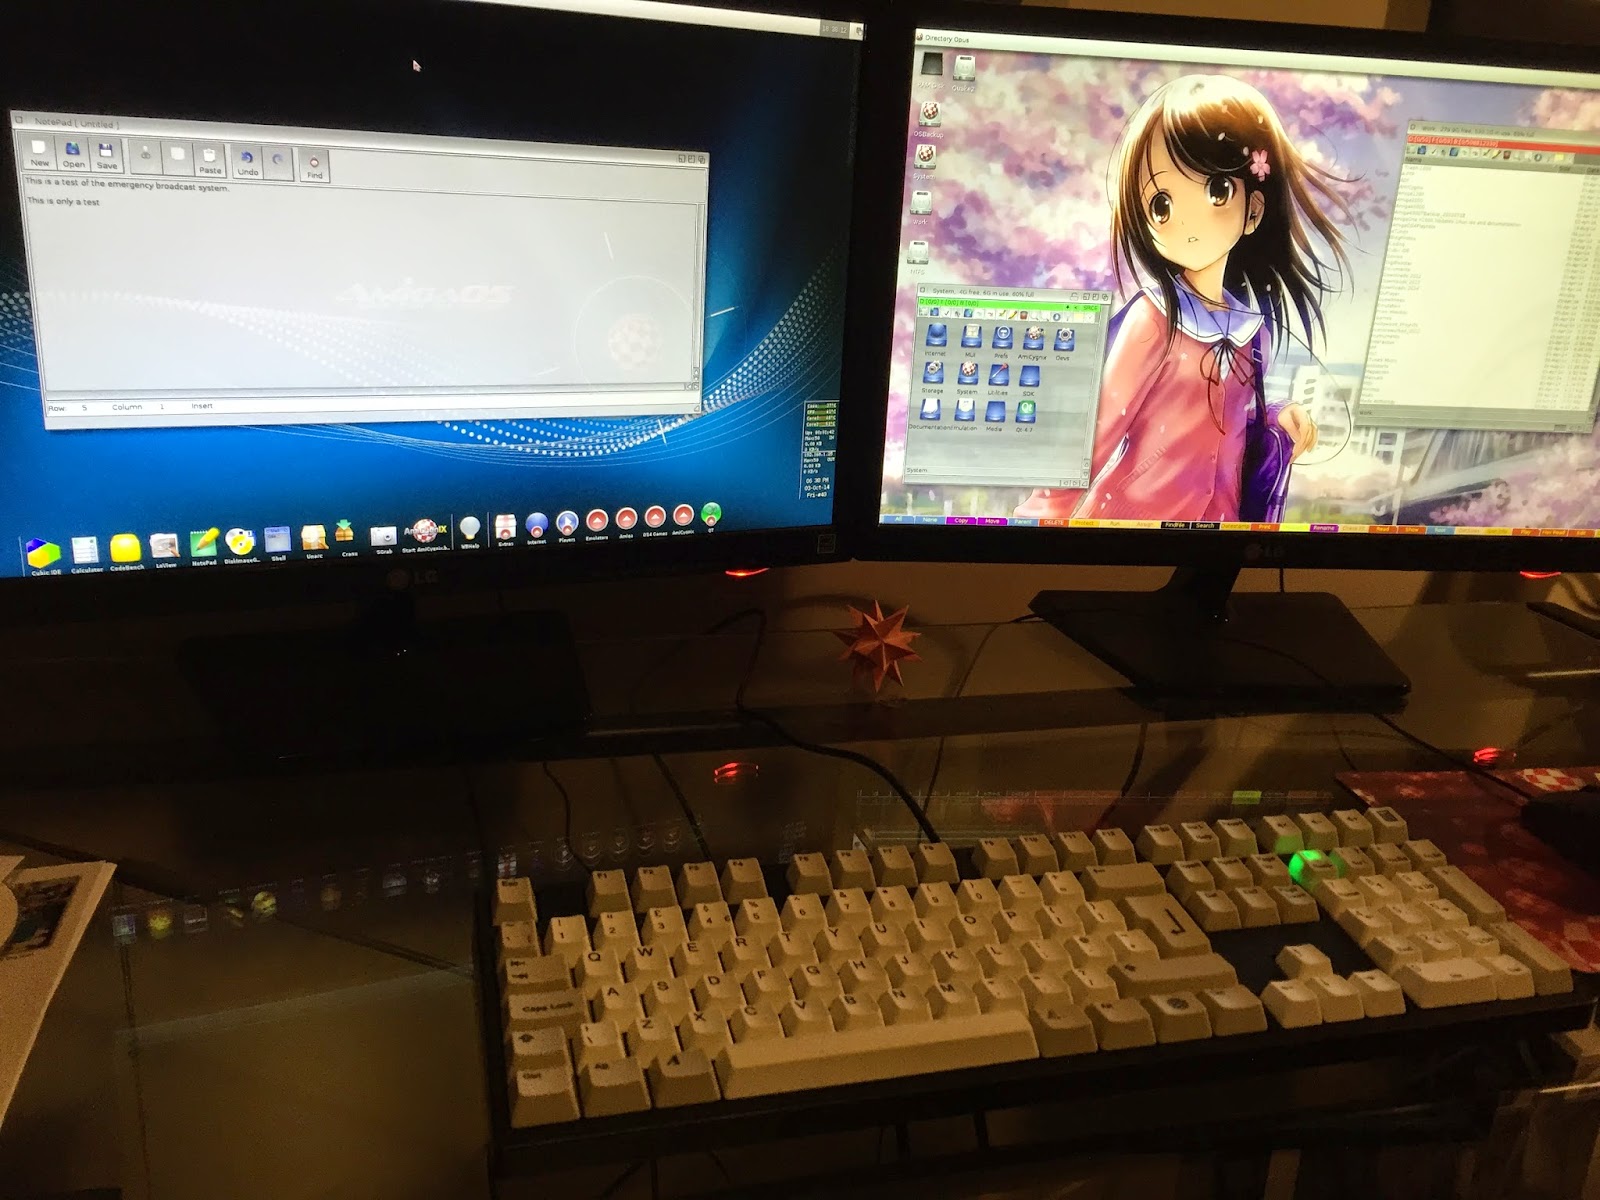
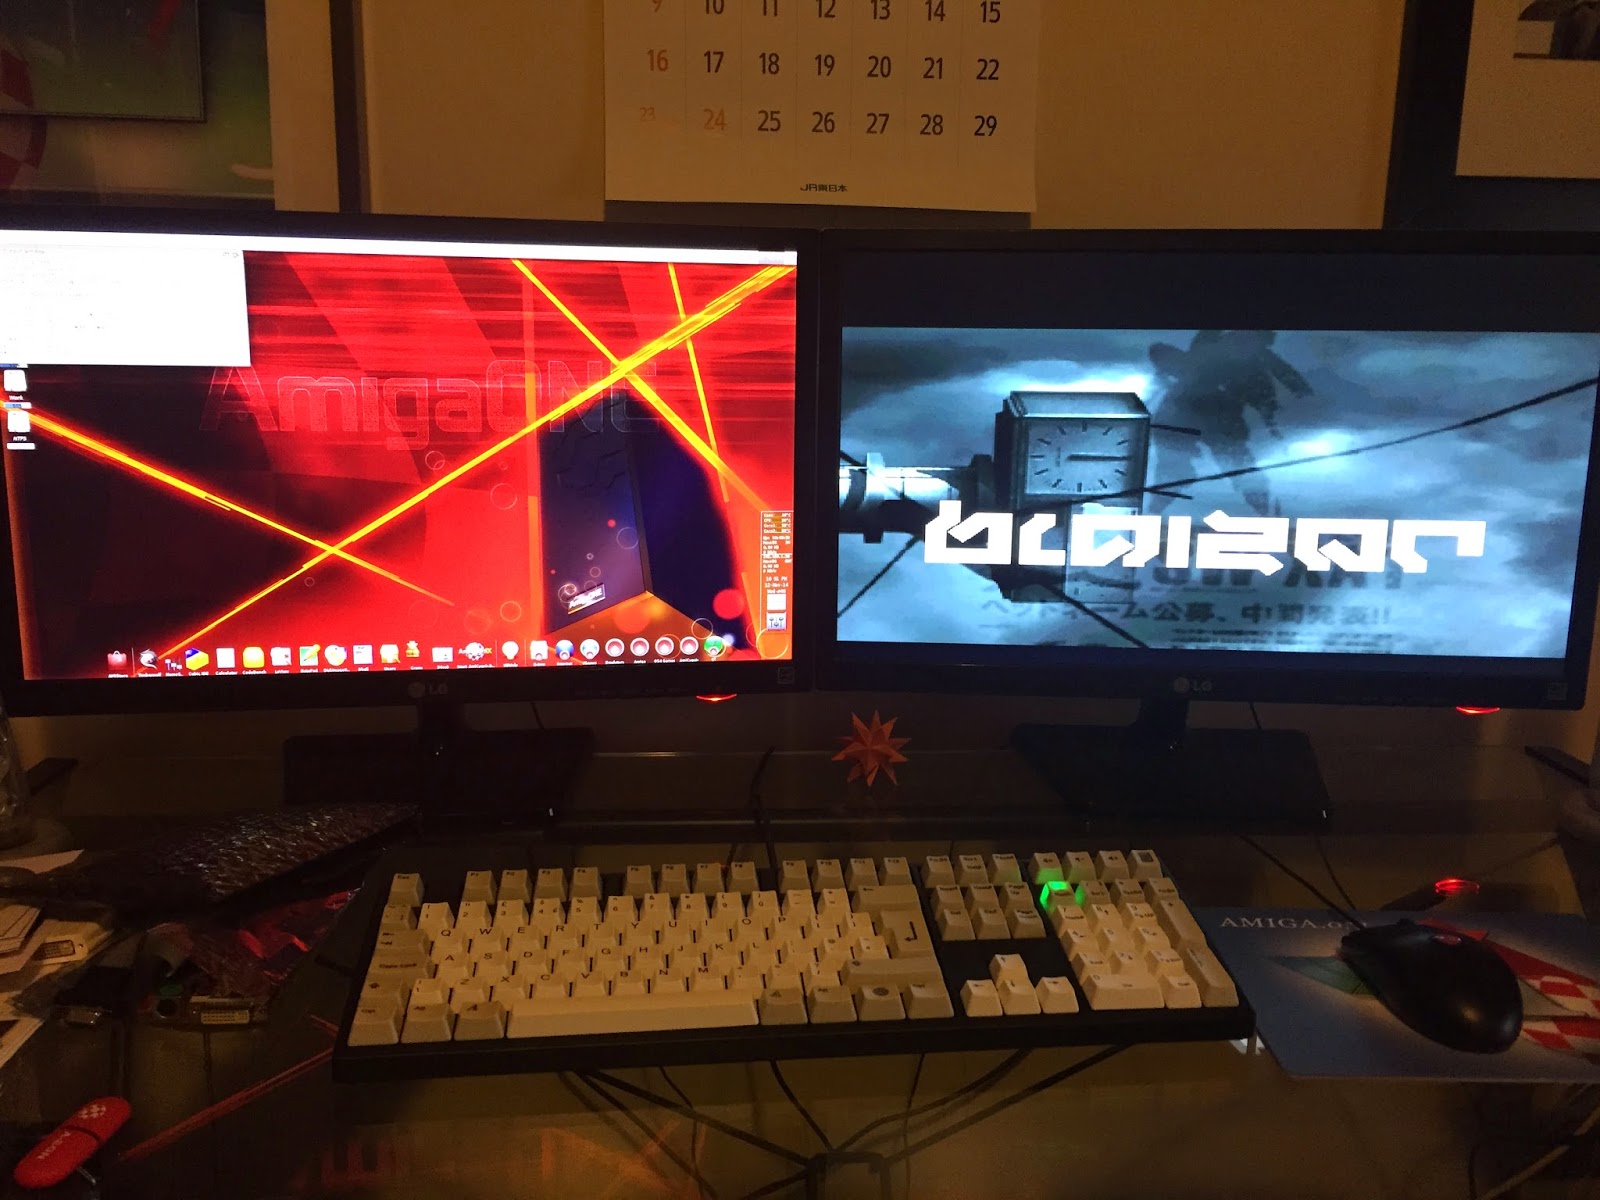
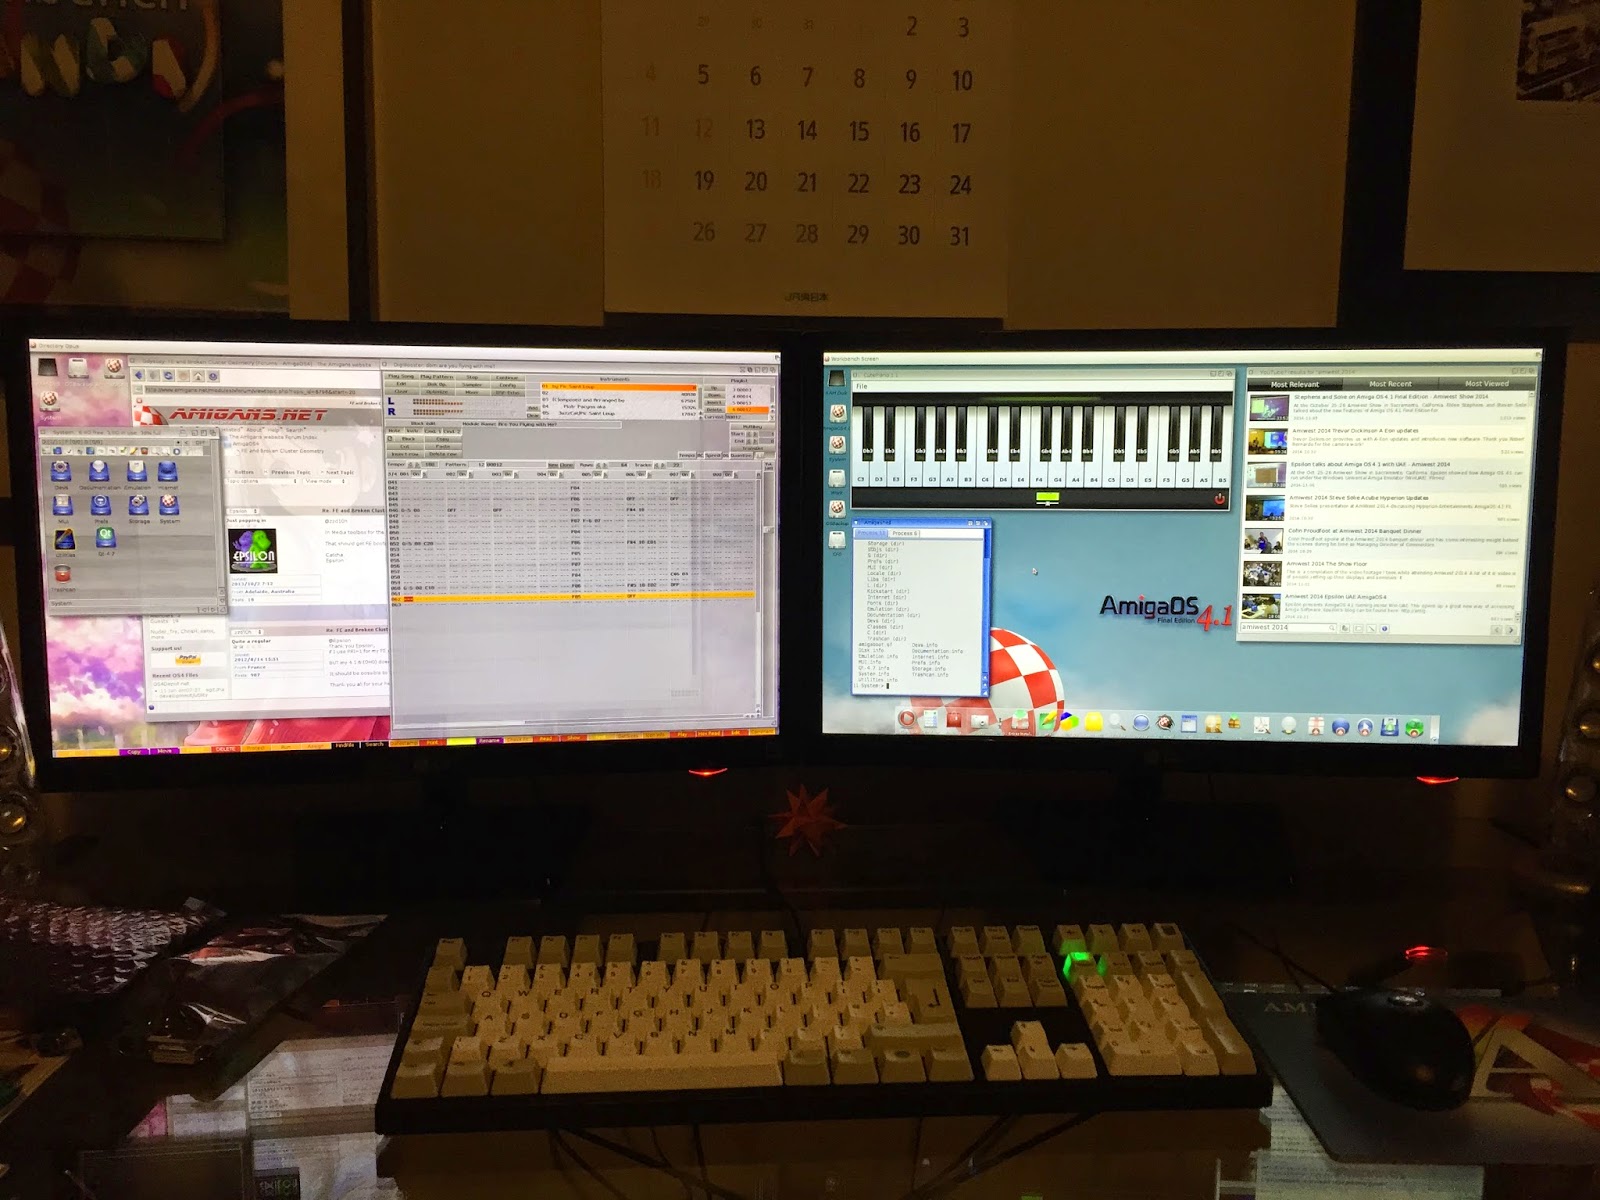
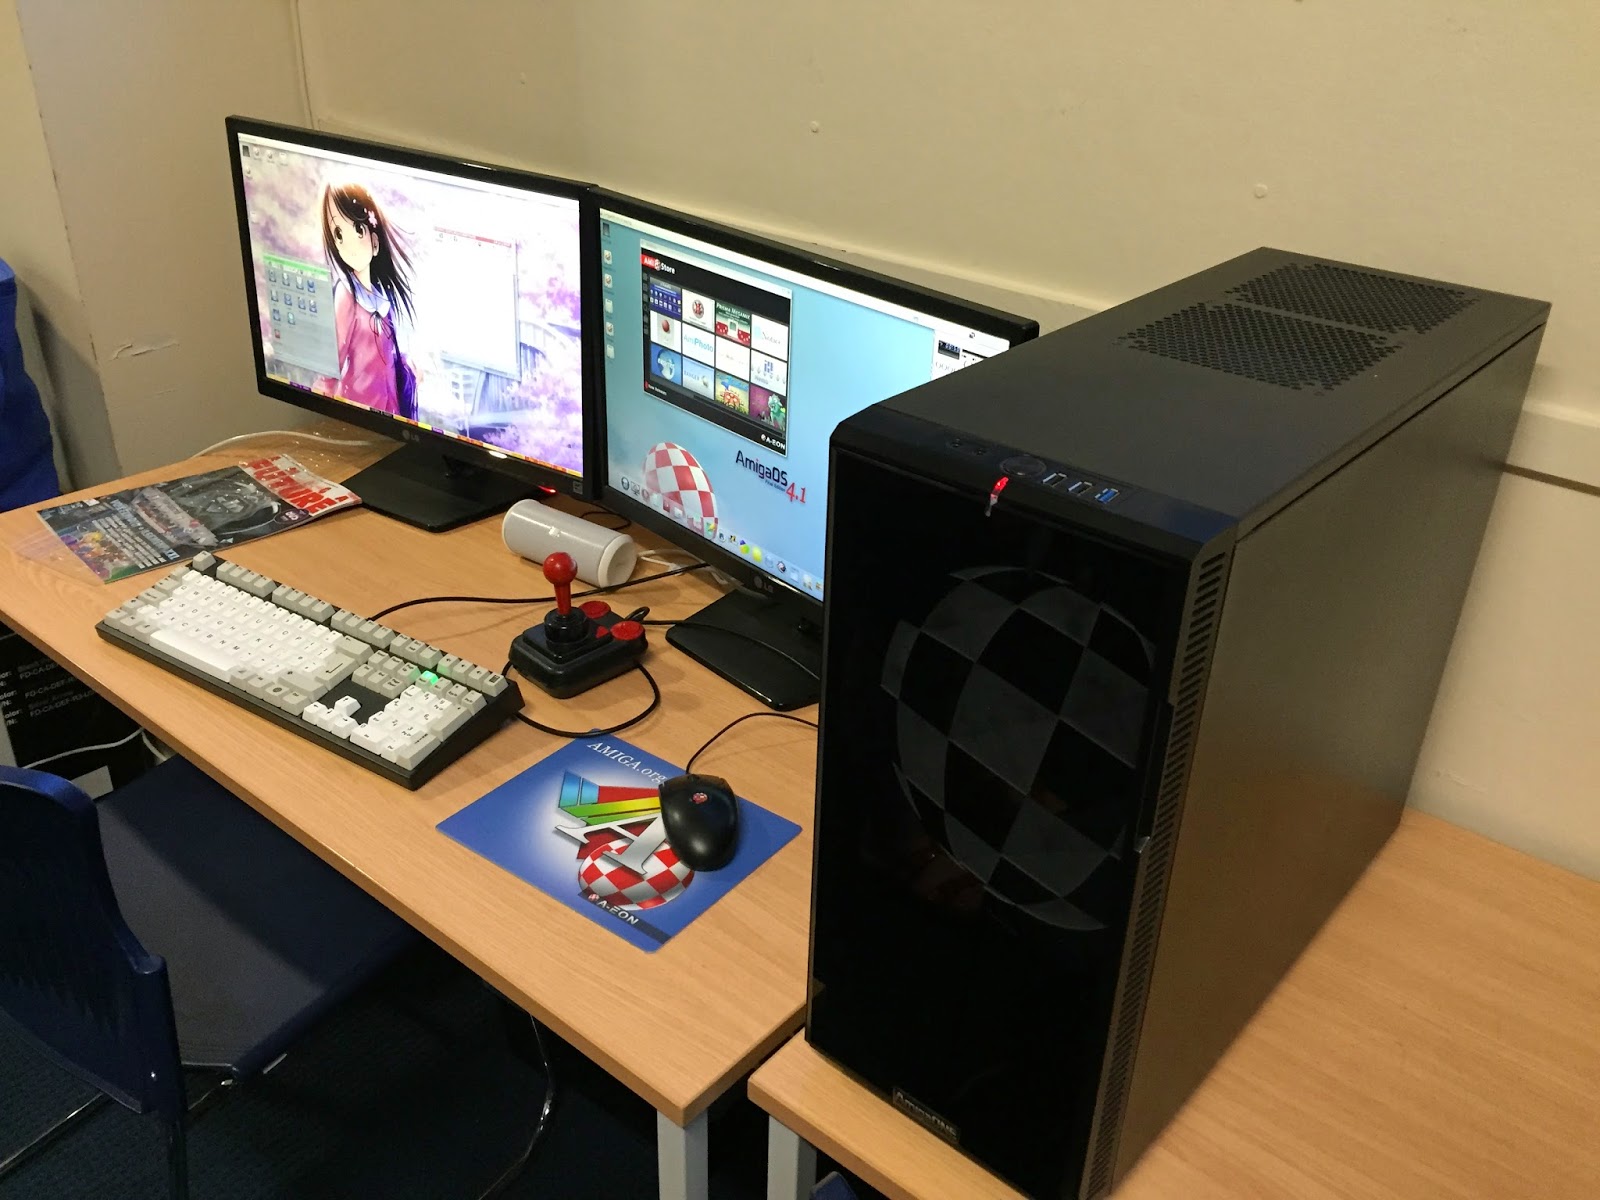
After some more work reinstalling my applications and settings onto my X1000 things are taking shape on the X1000 - I have also restored my dual display configuration (by copying the dev/monitors folder from my AmigaOS4.1.6 installation to the dev/monitors folder on the new install.
Here are some more screenshots as my work progresses...showing AmigaAmp3 with ExpensiveHifi Skin applied, SMTube (Qt Application) and Cute Piano (QT Application), and the new tabbed Shell (click to expand any photos for more detailed look):
Another shot of Final Edition running AmiPDF, Final Writer 97 (Classic Amiga application running native on AmigaOS4.1 Final Edition), and Cubic IDE with Hollywood Plugin (and example Hollywood program being edited):
On my other display (now configured as dual display) is the DOpus 5.9 screen as I had on AmigaOS4.1.6 before, running Odyssey web browser and Digibooster Pro 3 on that screen:
I have Odyssey, Timberwolf, AmiCygnix, QT, MPlayer (and GUI), DOpus 5.9, Codebench and more installed already, but more to go yet before my system has everything I was using under AmigaOS4.1.6! I am working hard to get everything installed on the X1000 ready for the Adelaide Amiga User Group get together on January 19th - can't wait!
The X1000 Dual display setup running AmigaOS4.1 Final Edition looks great already in my opinion!
Whew - covered a lot in this part. But we now have AmigaOS4.1 Final Edition installed on my X1000!
I am sure there will be more blog entries to come as I transfer and reinstall more of my applications onto the new installation and get to grips with AmigaOS4.1 Final Edition new features!